How to Make Wood Coasters
To make your own wooden coasters, you will need:
-1/4 inch thick plywood or MDF (medium density fiberboard)
-A jigsaw or circular saw
-Ruler or a straight edge
-Sandpaper
-Stain or paint
-Polyurethane
First, use a ruler or a straight edge to measure and mark out 4 inch squares on your plywood or MDF. Then, cut out the squares with a jigsaw or circular saw.
Once all of your pieces are cut out, sand down the edges to smooth them out. Next, stain or paint the coasters in any color you like. Finally, seal the coasters with polyurethane to protect them from water damage.
- Choose the wood you want to use for your coasters
- You can use any type of wood, but some woods are better suited for coasters than others
- For example, hardwoods like maple or oak are good choices because they’re strong and durable
- Cut the wood into pieces that are all the same size
- You can use a saw or have someone at a hardware store cut the pieces for you
- Sand the edges of each piece of wood so they’re smooth
- This will help prevent splinters and make the coasters more comfortable to use
- Apply a finish to the wood if desired
- This step is optional, but it can help protect the wood from stains and moisture damage
- 5 Place felt pads on the bottom of each coaster to prevent scratching furniture surfaces
How to make wood coasters (the right AND the wrong way)
What Type of Wood is Best for Coasters?
There are a few things to consider when choosing the best wood for coasters. The first is the absorbency of the wood. You want a wood that won’t absorb too much moisture, as this can cause warping or cracking over time.
Woods like cedar and redwood are good choices in this regard.
The second consideration is the hardness of the wood. You don’t want a wood that’s too soft, as it will dent easily and show wear quickly.
Hardwoods like maple and oak are good choices for coasters.
Finally, you’ll want to consider the grain of the wood. Some woods have very pronounced grains, while others have more subtle ones.
The grain can affect how easy it is to clean the coasters; if you choose a wood with a very porous grain, dirt and grime can be difficult to remove. Woods like cherry and walnut have relatively closed grains, making them easier to keep clean.
What Do You Use to Seal Wood Coasters?
To seal wood coasters, you can use a variety of products including polyurethane, lacquer, shellac, and varnish. Each product has its own advantages and disadvantages, so it’s important to choose the right one for your project. Polyurethane is a durable option that will protect your coasters from moisture and wear.
Lacquer is a good choice for a high-gloss finish. Shellac is a natural product that creates a beautiful amber color when applied to wood. Varnish is a good all-purpose sealer that will protect your coasters from moisture and sunlight.
What Do You Put on the Bottom of Wood Coasters?
There are a few things you can put on the bottom of wood coasters to prevent them from sticking to your furniture or scratching it. One option is to use cork pads. You can either buy these precut, or cut them yourself from a sheet of cork.
Another option is to use felt pads. These also come in precut circles, or you can cut them yourself from a piece of fabric. Finally, you can use self-adhesive bumpers.
These are usually made of rubber or silicone and have an adhesive backing that sticks to the coaster and prevents it from sliding around.
How Do You Make a Wooden Coaster Set?
Assuming you would like a step by step guide on how to make your own wooden coaster set:
What You’ll Need:
-4×8 sheet of 1/4″ hardboard or plywood
-Circular saw
-High-grit sandpaper (100+)
-Stain or paint (optional)
-Clear sealer (optional)
-Ruler or measuring tape
-Pencil or pen
Step One: Cut Pieces to Size
Using a circular saw, cut your hardboard or plywood down into six equal squares. These will be the coasters.
If you want your coasters to have rounded edges, you can use a router with a flush trim bit to round over the edges of each square.
Step Two: Sand the Edges and Faces
Use high grit sandpaper (100+) to smooth out all the edges and faces of each coaster.
This will help prevent splinters and give the wood a nice smooth finish.
Step Three: Stain or Paint the Coasters (Optional)
If desired, stain or paint the coasters in any color you like.
Make sure to use water based stains or paints if you plan on sealing the coasters with clear coat later on. Allow the stain or paint to dry completely before proceeding to step four.
Step Four: Apply Clear Sealer (Optional)
To help protect the wood and give it a nice shine, apply one or two coats of clear sealer such as polyurethane. Allow plenty of time for the sealer to dry between coats according to directions on can/bottle.
And that’s it! Your very own set of wooden coasters!

Credit: diyhuntress.com
How to Make Wood Coasters Waterproof
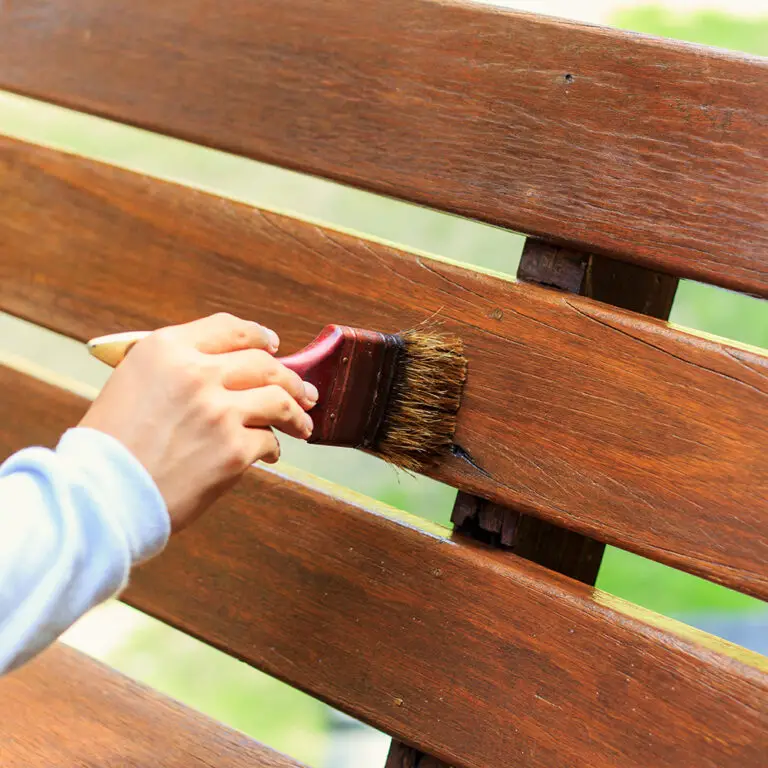
Create your own water-resistant wood coasters with this easy tutorial! You’ll need some waterproof sealant, a paintbrush, and a few other supplies to get started.
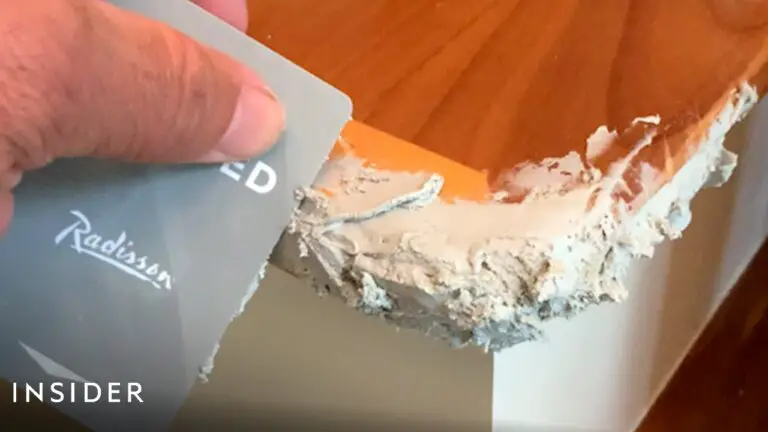
First, sand the edges of your wood coasters to smooth them out.
Then, apply a generous amount of waterproof sealant to the top and bottom surfaces of each coaster. Use a paintbrush to spread the sealant evenly over the surface.
Let the sealant dry for 24 hours before using your coasters.
Now you can enjoy your favorite drinks without worrying about damaging your furniture!
How to Make Wooden Coasters With Pictures
Making your own wooden coasters is a fun and easy project that can be done in an afternoon. Plus, it’s a great way to show off your favorite photos!
To make wooden coasters, you will need:
-4×4 inch square of plywood for each coaster
-Sandpaper
-Stain or paint (optional)
-Mod Podge or other decoupage glue
-Sponge brush
-4×6 inch photo prints (one for each coaster)
-Coaster caddy (optional)
First, start by sanding the edges of your plywood squares. This will help prevent splinters later on.
If you’d like, you can also stain or paint the wood at this point.
Next, use Mod Podge or another decoupage glue to adhere your photo prints to the wood. Be sure to smooth out any bubbles as you go.
Allow the glue to dry completely.
Once the glue is dry, apply another layer of Mod Podge over the top of the photos. This will seal and protect them.
Allow this layer to dry completely as well.
Your coasters are now complete! If desired, place them in a coaster caddy so they’re ready to use next time company comes over.
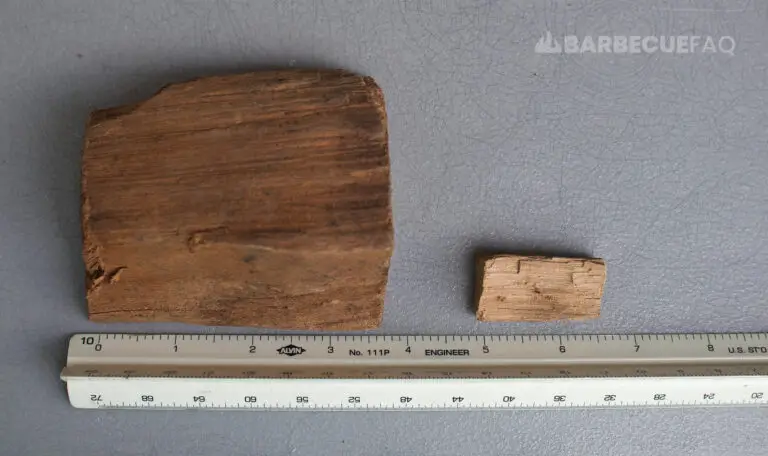
Wood Coaster Thickness
When it comes to wood coasters, thickness is everything. A coaster that’s too thick will be bulky and take up too much space on your coffee table, while a coaster that’s too thin will offer little protection for your surfaces.
The ideal thickness for a wood coaster is about 1/4 inch.
This thickness provides enough protection for surfaces without being overly cumbersome. If you’re looking for a more durable coaster, you can opt for something slightly thicker, like 3/8 inch. But anything thicker than that is probably overkill.
When choosing a wood coaster, make sure to select one that’s the right thickness for your needs. Too thick or too thin and you’ll just be wasting space – and money!
Conclusion
This post provides a tutorial on how to make wood coasters from start to finish. It covers everything from choosing the right wood and measuring the pieces, to cutting, sanding, staining, and sealing the coasters. The author includes plenty of helpful tips and photos along the way.
These coasters would make a great DIY project for anyone looking for a fun and easy way to spruce up their home décor.