How to Install Wood Beams on Ceiling
Wood beams can add an architectural element to your home. They are also functional, providing support for your ceiling. You can install wood beams on your ceiling yourself with some basic carpentry skills.
Here is how:
1. Decide where you want to place the wood beam across your ceiling. Use a measuring tape to mark the placement of the beam on the ceiling joists.
Make sure the beam will be level and evenly supported by the joists.
2. Cut the wood beam to size using a saw. The ends of the beam should be cut at a 45-degree angle so they fit together flush when joined together in the middle of the span between two joists.
3. Place two wooden dowels into each end of the beam at the 45-degree angles you just cut. These dowels will help support and stabilize the beam while you attach it to the ceiling joists.
4. Drill pilot holes through each dowel and into each supporting ceiling joist using a power drill and long drill bit (at least 3/8 inch).
5 .
- Measure the ceiling to determine how many beams you will need and the appropriate length for each beam
- Cut the beams to size using a saw
- Place the beams on the ceiling, starting at one end of the room and working your way across
- Use clamps to secure them in place if necessary
- Drill pilot holes through the beams and into the ceiling joists
- Screw the beams into place using long screws or nails
DIY Box Beams | Easy Faux Beams
How Much Does It Cost to Install Wood Beams on a Ceiling?
Wood beams are an excellent way to add both character and visual interest to a ceiling. But before you start planning your dream design, it’s important to know how much installing wood beams will cost. Here’s what you need to know.
On average, installing wood beams on a ceiling costs between $1,500 and $4,500. The exact price will depend on the size and complexity of the project. For example, adding a single beam to an existing ceiling is typically less expensive than installing an entirely new system of beams.
Installing wood beams is not a DIY project. It requires experience and expertise to ensure that the beams are properly supported and installed correctly. As such, hiring a professional is always recommended.
Expect to pay between $50 and $100 per hour for labor costs.
The cost of materials will also play a role in the overall price of the project. Wood beams are available in a variety of materials, including pine, oak, cedar, and more exotic options like mahogany or teak.
The type of wood you choose will affect both the look of your beam installation and the price tag. In general, harder woods like oak are more expensive than softer woods like pine.
How Do You Install Decorative Wood Beams?
Wood beams make a beautiful addition to any home, and they’re relatively easy to install yourself. Here’s how:
1. Choose the right wood beams.
Depending on the look you’re going for, you may want real wood beams or faux wood beams. Real wood beams are more expensive but will add more value to your home. Faux wood beams are less expensive but still give your home an updated look.
2. Measure the area where you want to install the beam(s). This will help you determine how many beams you need and what size they should be.
3. Cut the beams to size, if necessary.
If you’re using real wood beams, you may need to have them cut to size at a lumberyard or hardware store before installation.
4. Install brackets or other supports for the beam(s), following the manufacturer’s instructions. This step is important!
Without proper support, your wood beam could sag or even fall over time.
5 . Affix the beam(s) to the brackets or supports using screws or nails, again following the manufacturer’s instructions .
Be sure to predrill holes for nails or use self-tapping screws so that you don’t split the wood . Make sure the beam is level before moving on . Use a spirit level if necessary .
6 . Add any decorative touches like paint , stain , carvings , etc . Once yourbeam is installed , it ’ s time topersonalize it ! You can leave it natural , paint it white for a chic farmhouse look ,or even carve initials into it for a rustic touch .
How to Build a Wooden Beam for a Ceiling?
Building a wooden beam for a ceiling is not as difficult as it may seem. With the proper tools and materials, you can easily construct a beautiful and sturdy beam that will add character to any room.
1. Choose the right wood.
For beams, hardwoods are best since they are less likely to warp or split over time. Oak is a popular choice for beams since it is both strong and durable. If you want a more rustic look, reclaimed lumber is also an option.
2. Cut the lumber to size. Beams are typically 6-8 inches wide and 8-10 feet long. If you are using reclaimed lumber, make sure to clean it thoroughly before cutting it to size.
3 .Assemble the beam using either screws or nails. If you are using screws, drill pilot holes first to prevent splitting the wood.
Nails can be used if you pre-drill holes for them as well. Use construction adhesive along with your chosen fasteners for extra stability
4 .
Install the beam by attaching it to either roof trusses or joists using hangers made specifically for this purpose (available at most hardware stores). Make sure the beam is level before securing it in place
5 That’s it!
How Do You Attach Wood Beams to Drywall?
One popular way to attach wood beams to drywall is by using metal straps. You can find these at most hardware stores. Another option is to use screws and washers.
The size of the screw will depend on the thickness of the beam.
Credit: www.youtube.com
Cost to Install Wood Beams on Ceiling
How much does it cost to install wood beams on a ceiling? This is a difficult question to answer because it depends on a number of factors. The size and type of beam, the height of the ceiling, the complexity of the installation, and the labor costs in your area all play a role in determining the final price.
That being said, you can expect to pay anywhere from $500 to $1,500 for a basic wood beam installation. If you have a higher ceiling or if your beams are particularly large or complex, you could be looking at a bill closer to $2,000 or even $3,000. Of course, these are just estimates – always get multiple quotes from qualified contractors before making any decisions.
Real Wood Beams on Ceiling
If you’re looking to add a touch of rustic charm to your home, then real wood beams are the way to go. Not only do they look great, but they can also help to support your ceiling and keep it from sagging over time. Here’s everything you need to know about using real wood beams in your ceiling.
The first thing you need to do is decide where you want the beam or beams to go. This will largely be determined by the support structure of your ceiling and what will give the most aesthetic appeal. Once you have a general idea of where the beam(s) will go, it’s time to get measurements.
You’ll need to know the length, width, and depth of the beam so that you can find one that fits perfectly.
Now it’s time for installation! If you’re not comfortable doing this yourself, then hire a professional contractor who has experience working with wood beams.
They will be able to get the job done quickly and efficiently so that your ceiling looks amazing when they’re finished.
Once the beam is installed, take a step back and admire your handiwork! Real wood beams are a beautiful addition to any home and can really add character to a room.
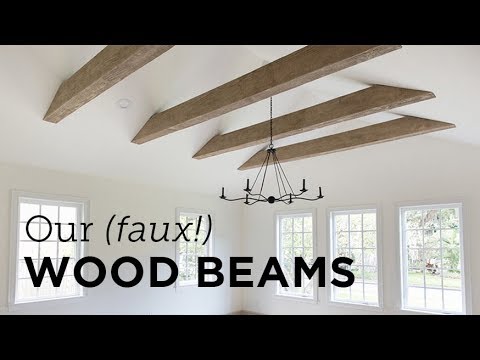
Faux Wood Beams for Ceiling
If you are looking to add some character to your home, consider adding faux wood beams to your ceiling. Faux wood beams are a great way to add architectural interest to any room and can be used in both traditional and contemporary spaces. There are many different styles of faux wood beams available, so you can find the perfect look for your home.
Faux wood beams are made from high-quality polyurethane that is designed to look like real wood. They are lightweight and easy to install, making them a great option for do-it-yourselfers. Faux wood beams come in a variety of sizes, so you can create the look of exposed beam ceilings without the hassle or expense of actually installing real wooden beams.
When choosing faux wood beams for your ceiling, it is important to select a style that complements the existing architecture of your home. For example, if you have a rustic farmhouse style home, selecting rough hewn beams will help create an authentic look. If you have a more modern space, sleek and polished faux wood beams would be a better choice.
No matter what style you select, adding faux wood beams to your ceiling is sure to add charm and personality to your home.
Conclusion
Wood beams are a great way to add character and charm to any room in your home. But before you can enjoy the beauty of wood beams, you need to install them properly. Here are some tips on how to install wood beams on your ceiling:
1. Choose the right location for your beams. The best place for beams is along the longest wall in the room. This will make the room appear more spacious and open.
2. Mark out the placement of your beams with a pencil or chalk line. Use a level to make sure that your lines are straight.
3. Cut the beams to size using a saw.
Make sure that the cuts are clean and precise.
4. Nail the beam into place using large nails or screws. Be sure to predrill holes first to avoid splitting the wood.5 Hang tapestry wire from each end of the beam, if desired, for added support.