How to Paint Laser Cut Wood
Laser cut wood is a popular material for crafting and DIY projects. It can be painted easily with regular craft paint or spray paint. When painting laser cut wood, it is important to use a primer or sealer before painting.
This will help to prevent the paint from chipping or peeling off of the wood. Once the primer or sealer has been applied, you can then begin to paint your laser cut wood project.
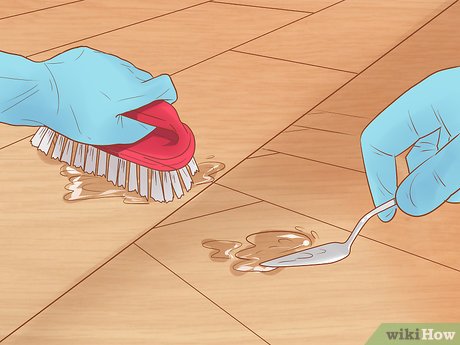
- Begin by sanding down the wood with a medium to high grit sandpaper
- This will help to create a smooth surface for painting
- Next, apply a base coat of paint to the wood
- A light color such as white or cream works well for this
- Allow the base coat to dry completely before proceeding to the next step
- Once the base coat is dry, you can begin adding your desired layers of color
- For best results, use several thin coats of paint rather than one thick coat
- Allow each layer of paint to dry completely before adding the next one
- When you are finished adding your layers of color, allow the paint to dry completely before applying a clear sealant or varnish over top
- This will help protect your painted design and make it last longer
How to Paint Fill Wood that has been Laser Engraved
Can You Paint Laser Engraved Wood?
Yes, you can paint laser engraved wood. The process is actually quite simple. First, sand the surface of the wood to create a smooth base for the paint.
Next, apply a primer designed for use on wood surfaces. Once the primer is dry, apply your desired paint color in thin coats, allowing each coat to dry completely before applying the next. Finally, seal the painted surface with a clear polyurethane to protect it from wear and tear.
What Kind of Paint Do You Use on Wood Engraving?
Wood engravings are usually done with a tool called a burin, which is a type of cutting tool. The wood is first prepared by sanding it smooth and then the design is transferred onto the wood. Once the design is transferred, the artist uses a burin to carve out the design.
The type of paint that is used on wood engravings depends on the artist’s preference. Some artists prefer to use oil-based paints, while others prefer water-based paints. There are also some artists who like to use acrylics.
What Paint is Safe to Laser Cut?
If you’re looking to laser cut something and you’re not sure what kind of paint is safe, don’t worry! We’ve got you covered. Here are the three most common types of paint and whether or not they’re safe to use with a laser cutter:
Water-based paints are generally safe to use with laser cutters. However, because they contain water, they can cause the material you’re cutting to warp. If possible, test out your design on a scrap piece of material before cutting it out for real.
Oil-based paints should not be used with laser cutters. The oil in the paint can cause the material you’re cutting to catch fire. In addition, oil-based paints produce harmful fumes when heated, so it’s best to avoid them altogether.
Acrylic paints are also generally safe to use with laser cutters. However, like water-based paints, they can cause the material you’re cutting to warp. Again, it’s always best to test your design on a scrap piece of material before cutting it out for real.
How Do You Paint Laser Engraving?
If you’re looking to add a personal touch to your laser-engraved projects, painting the engraving can be a great way to do it! Here’s a quick guide on how to paint laser engraving:
1. Start by sanding down the surface of the engraving.
This will help the paint adhere better and create a smoother finish.
2. Next, apply a base coat of paint. We recommend using an acrylic paint for best results.
3. Once the base coat is dry, apply your topcoat of paint. Again, acrylic paints work well for this purpose.
4. Allow the paint to fully dry before using or handling your project.

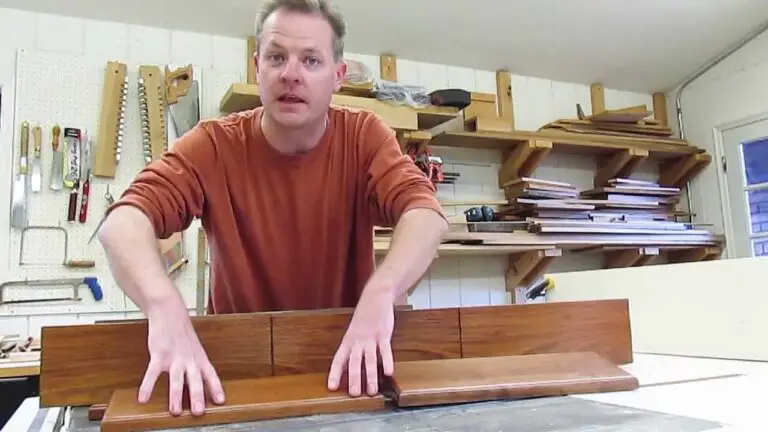
Credit: www.instructables.com
How to Paint Laser Cut Wood Ornaments
If you’re looking for a unique and personal way to decorate your home this holiday season, why not try painting your own laser cut wood ornaments? It’s a fun project that anyone can do, and with a little creativity you can create some truly beautiful decorations. Here’s how:
1. Begin by sanding your ornament smooth. This will help the paint adhere better and give you a nice even finish.
2. Next, decide on the colors you want to use.
You can either go with traditional holiday colors like red and green, or get creative and use any colors you like. Paint each section of the ornament using a small brush, taking care to avoid any drips or smears.
3. Once the paint is dry, add some finishing touches like glitter, sequins, or beads.
Use hot glue or another strong adhesive to attach these items to the ornament so they’ll stay put.
4. Finally, hang your finished ornament on the tree and enjoy!
Painting Laser Cut Wood Models
Laser cutting is a great way to add detail and interest to your wood models. Here are some tips on how to get the most out of your laser cutter when painting laser cut wood models:
1. Use a low power setting.
This will help prevent the paint from burning or melting the wood.
2. Test the paint on scrap wood before you start painting your model. This will help you determine the right amount of paint to use and how it will look on the finished model.
3. When painting, start with light coats and build up to darker colors. This will help avoid any streaks or unevenness in the final product.
4. Make sure to protect your work surface while painting, as laser cutters can create a lot of heat and fumes.
How to Paint Laser Cut Wood Earrings
If you’re looking for a fun and easy DIY project, why not try painting your own laser cut wood earrings? It’s a great way to add a personal touch to your jewelry collection, and it’s also a great way to show off your creative side. Here’s how to do it:
1. Start by sanding down the edges of your laser cut wood earrings. This will help them absorb the paint better and give you a nice smooth finish.
2. Next, choose the paint colors you want to use.
You can either go with a solid color or get creative and mix and match different colors. Once you’ve decided on your colors, apply a thin layer of paint to each earring using a brush or cotton swab.
3. Let the paint dry completely before wearing your earrings.
And that’s it! You now have unique and one-of-a-kind painted laser cut wood earrings that are sure to turn heads wherever you go!
Conclusion
This blog post provides a step-by-step guide on how to paint laser cut wood. The author begins by sanding down the wood to create a smooth surface. Next, they apply a primer coat and let it dry completely.
Once the primer is dry, they start painting the wood with their chosen color. They recommend using multiple thin coats of paint to avoid drips and streaks. Finally, they seal the painted wood with a clear sealer to protect it from wear and tear.