How to Condition Wood before Staining
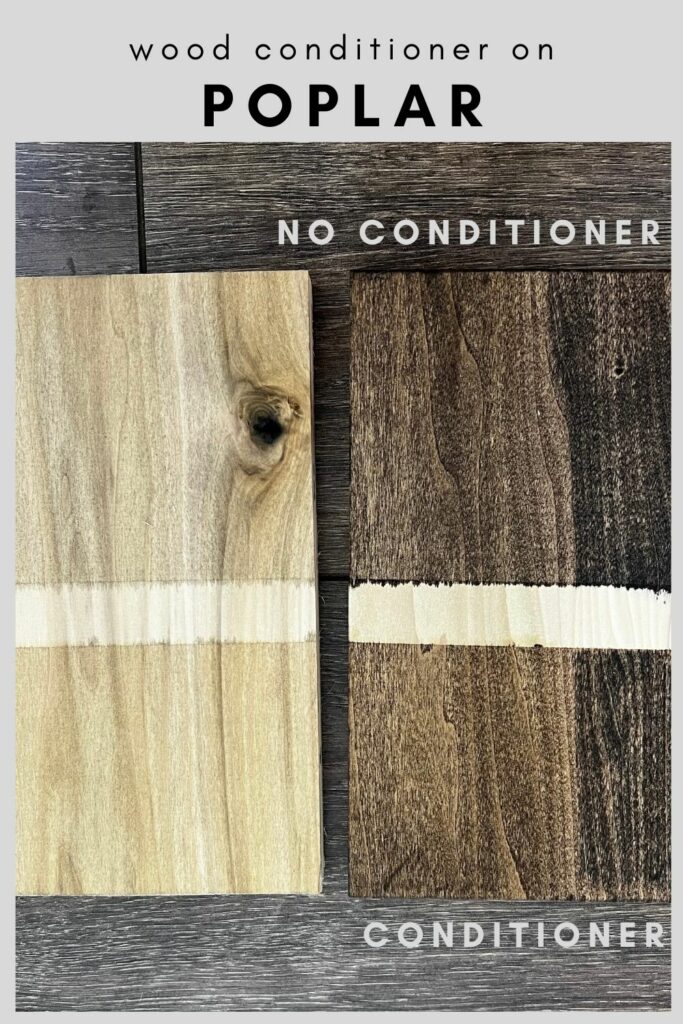
The best way to condition wood before staining is to use a pre-stain conditioner. This will help the stain to evenly penetrate the wood and prevent blotching. Apply the pre-stain conditioner with a clean cloth and let it sit for about 15 minutes before wiping off any excess.
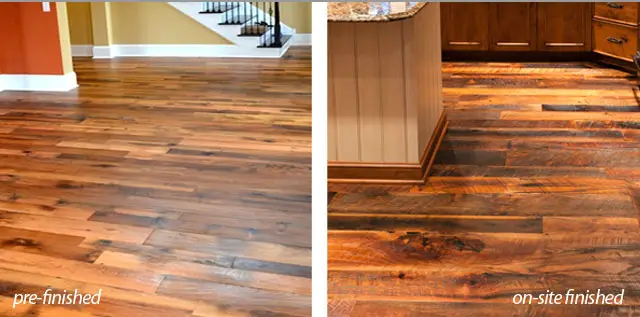
Once the pre-stain conditioner has been applied, you can proceed with staining the wood.
- Sand the wood surface with a fine-grit sandpaper to create an even, smooth texture
- Wipe down the wood with a clean cloth to remove any dust or debris
- Apply a pre-stain conditioner to the wood using a clean cloth, following the manufacturer’s instructions
- Allow the pre-stain conditioner to soak into the wood for the recommended amount of time before proceeding to staining
- Stain the wood according to your desired look, following the manufacturer’s instructions for application and drying times
Credit: www.charlestoncrafted.com
Do You Let Wood Conditioner Dry before Staining?
Wood conditioner is a product that is typically used to help prepare wood for staining. It can be applied before or after the stain, but many people prefer to apply it before so that the stain will be more evenly absorbed. If you do choose to apply wood conditioner before staining, be sure to let it dry completely before proceeding with the stain.
Otherwise, the conditioner could end up affecting the final color of your project.
How Do You Apply Conditioner to Wood?
When it comes to conditioning wood, there are a few different ways that you can go about it. You can either use a natural oil or wax, or you can opt for a synthetic polymer. Each has its own set of benefits and drawbacks, so it’s important to choose the right one for your needs.
If you’re looking for something that will penetrate deep into the wood grain and provide long-lasting protection, then an oil or wax is the way to go. However, these products can be tricky to apply evenly, and they may require more frequent reapplication than a synthetic polymer.
If you want something that’s easy to apply and provides good surface protection, then a synthetic polymer is the way to go.
These products typically last longer than oil or wax finishes, but they don’t penetrate as deeply into the wood grain.
Do you really need wood conditioner when staining?
Diy Pre Stain Wood Conditioner
When it comes to finishing a woodworking project, pre-stain wood conditioner is a key step in ensuring success. This simple product helps to even out the absorbency of the wood, so that the stain will be applied evenly and without blotches. It’s easy to make your own DIY pre-stain wood conditioner with just a few ingredients that you likely already have on hand.
To make your own DIY pre-stain wood conditioner, start by mixing one part white vinegar with two parts raw linseed oil. You can do this in a jar or container with a lid so that you can shake it up well before each use. When you’re ready to apply the conditioner, simply wipe it on with a clean cloth and let it sit for about 15 minutes before wiping off any excess.
You should apply pre-stain wood conditioner to your project piece(s) prior to staining them.
Pre-stain wood conditioner is an important step in achieving an even stain color on your projects. Try making your own DIY version at home with just a few simple ingredients!
Vinegar As Wood Conditioner
Vinegar is a natural product that can be used to condition wood. It is acidic, which helps to restore the pH balance of the wood. Vinegar also contains tannins, which help to protect the wood from moisture and other damage.
Wood Conditioner Substitute
If you’re a woodworker, you know that one of the most important steps in finishing a project is to condition the wood. This helps to prep the grain for accepting stain or paint, and also helps to prevent splintering and cracking. Conditioning also makes the wood more pliable, which is important when working with delicate projects.
There are many different products on the market that can be used for conditioning wood, but they can be expensive. If you’re looking for a cheaper alternative, there are several things that you can use as substitutes for wood conditioner.
One option is to mix equal parts vinegar and water, and apply this mixture to your wood with a cloth.
Let it sit for about 15 minutes before wiping it off with a clean cloth. You can also try using diluted lemon juice or diluted tea tree oil in place of the vinegar solution.
Another option is to make a paste out of beeswax and linseed oil.
Apply this paste to your wood with a cloth, let it sit for 15 minutes, then wipe it off with a clean cloth. You can find beeswax at most craft stores, or online.
If you don’t have any of these things on hand, you can also try using olive oil or coconut oil as a substitute forconditioner.
Homemade Wood Conditioner
Wood conditioner is a vital part of the woodworking process. It helps to ensure that your projects will turn out looking their best, and it can also help to prolong the life of your tools and equipment. There are a number of different ways to make wood conditioner, but one of the easiest is to simply mix equal parts of boiled linseed oil and mineral spirits.
Once you have your mixture, apply it generously to a clean cloth and then rub it into the wood in the direction of the grain. Be sure to get into all of the nooks and crannies, as this will help to protect against moisture damage down the line. After you’ve applied the conditioner, let it sit for at least an hour before wiping off any excess with a second clean cloth.
If you take care of your woodworking tools and equipment, they’ll be there for you when you need them. A little bit of effort up front can save you time and money in the long run!
Conclusion
Wood staining is a process of adding color to wood in order to protect it from the elements and enhance its natural beauty. In order to get the best results, it is important to condition the wood before staining. This can be done by sanding the surface of the wood and then wiping it down with a clean cloth.
Once the wood is prepared, you can choose the stain that you would like to use and apply it according to the manufacturer’s instructions.