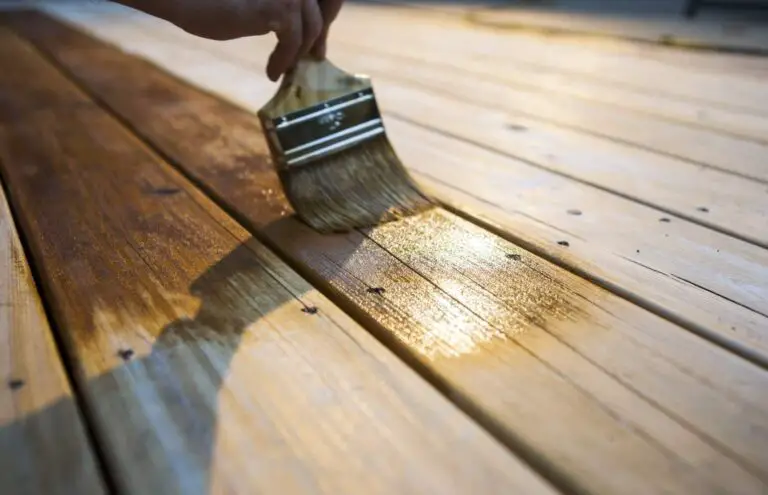
How to Build Wood Closet Shelves
Building wood closet shelves is a simple task that can be completed in just a few hours. The first step is to determine the size and location of the shelves. Once the measurements have been taken, mark the shelf locations on the wall.
Next, cut the lumber to size and install it at the marked locations. Be sure to use brackets or other supports to secure the shelves in place. Finally, add any desired finishing touches, such as paint or trim.
- Decide where you want your shelves to go and measure the space
- Cut your shelving material to size using a saw
- Assemble the shelves by nailing or screwing them together
- Install the shelves in your closet space using screws or brackets
- Add shelf liner if desired for a finished look and extra protection for your clothes
Building Closet Shelves Plywood
If you’re planning on building your own closet shelves, one material you may want to consider using is plywood. Plywood is a type of manufactured wood that’s made by layering thin sheets of wood veneer. It’s strong and durable, making it a good choice for closet shelving.
When choosing plywood for your shelves, it’s important to select the right thickness. For most home applications, 3/4-inch thick plywood is a good choice. It’s sturdy enough to support heavy items, but not so thick that it’s difficult to work with.
If you’re unsure which thickness to choose, ask a salesperson at your local home improvement store for advice.
Once you’ve selected the right plywood for your project, cut it to size using a saw. Make sure the cuts are straight and accurate, as even small inaccuracies can throw off the final look of your shelves.
Once the pieces are cut to size, sand them down smooth with sandpaper before assembly.
Building closet shelves out of plywood is a great way to add extra storage space to your home without breaking the bank. By following these simple tips, you can create strong and attractive shelves that will last for years to come.
How to Build Closet Shelves With Mdf
If you’re looking for a way to add some extra storage space to your home, one option is to build closet shelves with MDF. While this material is not as strong as plywood, it’s much cheaper and easier to work with. Plus, it will still provide plenty of support for whatever you need to store on the shelves.
Here’s a step-by-step guide on how to build closet shelves with MDF:
1. Cut the MDF boards to size. You’ll need two pieces that are the same width as the opening of your closet, and then cut them to the depth that you want your shelves to be.
2. Attach the boards together using screws or nails. Make sure that they’re flush against each other so that there’s no gap in between.
3. Measure and mark where you want your shelf brackets to go.
Drill pilot holes at these marks, then screw in the brackets.
4. Place the shelving unit inside your closet and start filling it up!
Diy Closet Shelves And Drawers
If you’re looking for a way to organize your closet and make it more functional, consider adding some DIY closet shelves and drawers. This is a relatively easy project that can be completed in a weekend, and it will make a huge difference in the way your closet looks and works.
Start by measuring the space inside your closet.
You’ll need to know how wide and deep the shelves need to be, as well as how much clearance there is between the top of the shelf and the ceiling. Once you have these measurements, head to your local home improvement store or lumberyard to purchase the materials you’ll need.
Next, cut the shelving material to size using a power saw or hand saw.
If you’re not comfortable working with power tools, ask someone at the store to do this for you. Then, assemble the shelves according to the instructions that came with your particular shelf system. Most systems will require that you drill pilot holes and use screws or nails to secure the shelves in place.
Finally, add any desired drawer hardware such as handles or knobs, then fill each drawer with items like clothes, shoes, accessories, etc. That’s it! Your new DIY closet shelves and drawers are ready to use!
Diy Adjustable Closet Shelves
When it comes to closet organization, there are a lot of options out there. But if you’re looking for something that’s customizable and easy to adjust, then DIY adjustable closet shelves are the way to go.
There are a few things you’ll need to get started: wood boards, shelf brackets, screws, and L-brackets.
First, cut your wood boards to size and attach the shelf brackets using screws. Then, use the L-brackets to secure the shelves in place.
Now it’s time to start organizing!
You can use these shelves for storing clothes, shoes, bags, or anything else you need to keep tidy. And since they’re adjustable, you can easily change up the configuration as your needs change over time.
So if you’re looking for a versatile storage solution that’s easy to customize, DIY adjustable closet shelves are a great option.
Give them a try today!
How to Attach Closet Shelves to Wall
If you’re looking for extra storage space in your closet, adding shelves is a great way to create it. But if you’re not sure how to attach closet shelves to the wall, don’t worry – it’s actually a pretty easy process. Here’s what you need to do:
1. Start by measuring the area where you want to add shelves. Make sure to measure both the width and the height so that you know how much space you have to work with.
2. Once you know the dimensions of your shelf space, head to your local hardware store and purchase some shelving brackets.
These will be used to hold up the shelves once they’re attached to the wall.
3. Next, cut some pieces of wood or MDF (medium-density fiberboard) to size using a saw. These will be your actual shelves.
If you’re using wood, make sure to sand down any rough edges before proceeding.
4. Now it’s time to attach the brackets to the wall. Use a drill and screw them into place making sure that they’re level before moving on.
If necessary, use a stud finder tool irst so that you know where best ixation points are located within your walls prior their installation.. Attaching screws directly into studs will provide added support for heavier loads.
. Be careful not strip out any surrounding drywall while doing this! 5 bracket installation is complete, it’s time install your new closet shelves by setting them atop brackets already secured against chosen wall surface then lightly pressing down until each shelf feels snug in its position.
. For cabinets or other applications where more weight bearing strength is needed consider gluing as well attaching via screws..6 And there ixed! Give yourself little bit extra satisfaction by organizing items currently taking up valuable floor space onto these newly created higher surfaces..7 Finish off project good coat clear varnish or paint color choice ensure durability longevity..Closet shelf DIY project complete!
Credit: www.youtube.com
How Do You Make Wooden Closet Shelves?
If you’re looking to add some extra storage space to your home, wooden closet shelves are a great option. They’re relatively easy to make, and you can customize them to fit your specific needs. Here’s a step-by-step guide to making your own wooden closet shelves.
1. Measure the space where you want to install the shelves. You’ll need to know the width, depth, and height of the area so that you can cut the boards to size.
2. Cut the boards that will form the shelf supports out of 2×4 lumber.
These should be cut to match the measurements of the space where the shelves will go.
3. Nail or screw the boards together so that they form a rectangular frame. If using screws, predrill holes first so that the wood doesn’t split.
4. Cut plywood sheets or pieces of hardboard to fit inside the frame you just created. These will form your actual shelves.
5 .
Attach these panels to the frame using screws or nails placed every few inches along each board’s edge . Be sure to countersink any nails so that they don’t stick up above the shelf surface . Trim off any excess material with a saw .
6 . Paint or stain your new shelves , then add brackets (if desired) for additional support . Hang them up and load ’em up with whatever you need extra storage space for !
What Kind of Wood Should I Use to Build Closet Shelves?
When it comes to wood for closet shelves, there are a few things to keep in mind. The first is the weight of the items you’ll be storing on the shelves. If you’re planning on storing heavier items, then you’ll want to use a stronger and thicker wood.
For lighter items, a thinner and lighter wood will do just fine.
Another thing to consider is the finish of the wood. If you want your closet shelves to have a natural look, then using unfinished wood is a good option.
However, if you want your shelves to have a more polished look, then stained or painted wood would be better suited. Just make sure that whatever finish you choose is durable and can withstand the wear and tear of everyday use.
Finally, think about what style of shelving you want for your closet.
Do you want traditional shelf brackets? Or do you prefer something more modern like wire shelving? Whichever route you go, just make sure that the shelving system you choose is easy to install and sturdy enough to hold all of your belongings.
Now that you know some things to consider when choosing wood for closet shelves, take some time to browse through your options and pick out the perfect material for your space!
How Do You Build Closet Shelves?
If you’re looking to add some shelves to your closet, there are a few things you’ll need to take into account. First, decide what kind of shelving material you want to use. There are many different options available, from wood to wire and everything in between.
Once you’ve selected your material, it’s time to measure the space in your closet where you’d like the shelves to go.
Once you have all of your materials and measurements ready, it’s time to start building! If you’re using wood for your shelves, start by cutting the boards to size and nailing or screwing them together.
For wire shelving, assemble the frame according to the manufacturer’s instructions. Once the frame is complete, begin adding your shelf brackets and then attaching the shelves themselves.
Building closet shelves is a relatively easy project that anyone can do with just a little bit of planning and effort.
By taking care in selecting materials and measuring properly, you can create sturdy and attractive shelving that will help keep your closet organized for years to come.
Is It Cheaper to Build Your Own Shelves?
When it comes to storage, many people face the eternal question: build or buy? When it comes to shelves, the answer isn’t always so clear cut. In some cases, it may be cheaper to build your own shelves.
However, there are also a number of compelling reasons to buy them instead. Here’s a closer look at the pros and cons of each option:
Building Your Own Shelves
There are two main benefits of building your own shelves: customization and cost savings. When you build your own shelves, you can tailor them exactly to your needs in terms of size, shape and finish. This means that you won’t have to make any compromises when it comes to finding storage that fits your space perfectly.
Additionally, if you have specific aesthetic preferences, building your own shelves allows you to create storage that looks exactly the way you want it to.
Another potential advantage of building your own shelves is that it could save you money. If you already have some basic carpentry tools and materials on hand, the only additional costs associated with this project would be for the shelving itself (which can be quite inexpensive).
Even if you need to purchase all new supplies, however, building your own shelves is still likely to be cheaper than buying ready-made ones; especially if you opt for simple designs. Of course, how much money you ultimately save will depend on a number of factors including how complex your design is and whether or not you already have the necessary tools and materials on hand. Nevertheless, if saving money is a priority for you then building your own shelves is definitely worth considering.
The main downside of this option is that it requires time and effort – two things that many people don’t have a lot of these days! Unless you’re an experienced woodworker or handyman (or woman), constructing shelving can also be tricky; resulting in frustration more than anything else. If time and convenience are important considerations for you then buying ready-made shelving might be a better option after all.
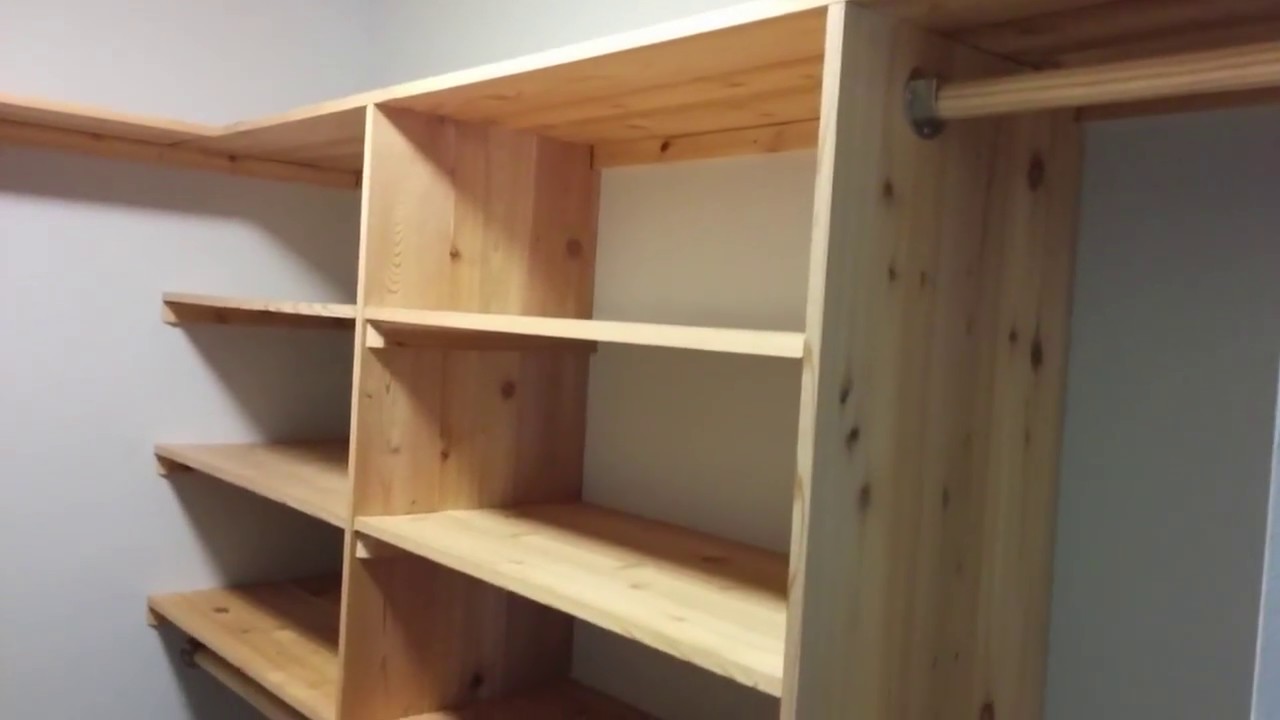
Closet Organizer Build | Woodworking How To
Conclusion
Building wood closet shelves is a simple way to add extra storage space to your home. You can build them yourself using some basic tools and materials, or you can buy pre-made shelves from a store.
If you’re building your own shelves, start by measuring the space where you want to put them.
Cut some boards to size and then use screws or nails to attach them together. Make sure they’re level before adding any shelving paper or lining.
Pre-made wood closet shelves are usually made of plywood and come in a variety of sizes.
They’re easy to install and can be cut to fit any space. Just measure the area where you want the shelves and then use a saw to cut them down to size. Attach them to the wall using brackets or screws and then add your shelving paper or liner.