How to Attach Leather to Wood
There are a few different ways to attach leather to wood, and the best method will depend on the specific project you’re working on. If you’re looking for a permanent attachment, you can use glue or nails. For a more temporary option, you can try tacking the leather down with staples or brads.
Whichever method you choose, make sure that the leather is clean and dry before attaching it to the wood.
- Gather your materials
- You will need a piece of leather, a piece of wood, adhesive, and clamps
- Clean both the leather and the wood with a damp cloth to remove any dirt or debris
- Apply adhesive to one side of the leather
- Be sure to apply it evenly over the entire surface
- Place the leather onto the wood, adhesive side down
- Use clamps to secure the two pieces together
- Allow the adhesive to dry completely before removing the clamps and using your new attached piece of leather!
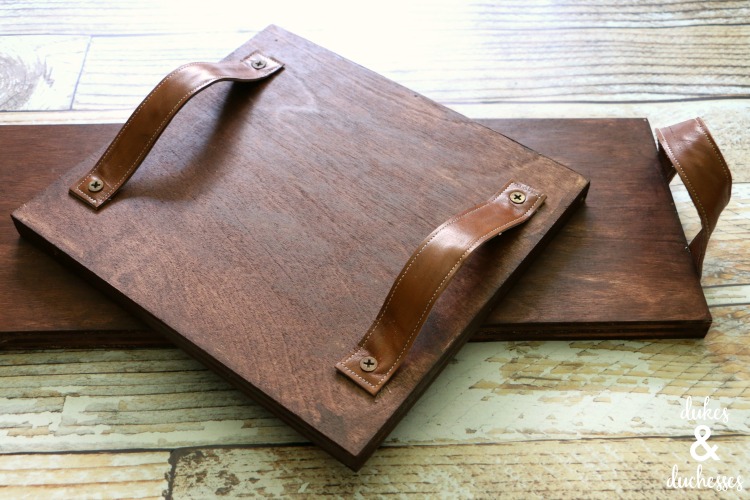
How to Attach Leather Strap to Wood
It’s easy to add a leather strap to wood, and it can add a nice touch to any project. Here’s how to do it:
1. Start by drilling a hole in the wood where you want the strap to be attached.
The size of the hole will depend on the size of the screw or bolt you’re using to attach the strap.
2. Next, cut a piece of leather strap to the desired length. Make sure that the ends of the strap are even.
3. To attach the strap, first thread one end through the hole in the wood. Then, take that same end and thread it through the loop at the other end of the strap. Finally, pull both ends tight and secure with a screw or bolt.
4. That’s it! Your leather strap is now attached to your wood project.
How to Attach Cowhide to Wood
If you’re looking to add a touch of rustic flair to your home, attaching cowhide to wood is a great way to do it! Here’s how:
1. Start by sanding down the wood surface that you’ll be attaching the cowhide to.
This will help the hide adhere better and also create a smoother surface for painting or staining (if desired).
2. Once the wood is sanded, measure and cut your cowhide to size. If you’re working with a large piece of hide, it’s best to have it professionally tanned so that it doesn’t rot or disintegrate over time.
3. To attach the hide, use either heavy-duty staples or upholstery tacks. Start at one end of the hide and work your way around, securing it every few inches until it’s completely attached. Be sure to hammer the staples/tacks in flush so they don’t stick out and snag on anything!
4. That’s it! You can now enjoy your new rustic addition to your home décor!
How to Attach Faux Leather to Wood
If you want to add a touch of luxury to a wood project, consider using faux leather. Faux leather is a type of upholstery fabric that looks and feels like real leather, but without the high price tag. It’s also easy to work with, making it a great choice for DIY projects.
Here’s how to attach faux leather to wood:
1. Start by sanding the wood surface to create a smooth base for the adhesive. Wipe away any dust with a damp cloth.
2. Cut your piece of faux leather to size, allowing for an extra inch or two on all sides. This will give you some wiggle room when attaching it to the wood.
3. Apply adhesive to the back of the faux leather and center it on the wood surface.
Press down firmly to ensure good contact between the two surfaces.
4 . Use clamps or heavy books to weigh down the edges of the fabric while the adhesive dries completely (this usually takes 24-48 hours).
Once dry, trim away any excess fabric from around the edges.
Gorilla Glue Leather to Wood
Gorilla Glue is an extremely popular adhesive for a variety of DIY and professional applications. It’s specifically designed to bond well with wood, metal, stone, ceramic, foam, glass, and more. So it’s no surprise that people often ask if Gorilla Glue can be used to attach leather to wood.
The answer is yes! Gorilla Glue provides a strong and lasting bond between leather and wood. However, there are a few things you need to keep in mind when using this adhesive.
First of all, you should always test the glue on a small area before proceeding with your project. This will help you gauge the strength of the bond and make sure that it’s what you’re looking for.
Another important consideration is that Gorilla Glue expands as it dries.
This means that you need to be very careful about how much glue you use. Too much glue can cause the leather to buckle or warp. So start by applying a small amount of glue and then build up from there as needed.
Finally, remember that Gorilla Glue takes about 24 hours to fully dry. So plan accordingly and allow plenty of time for the adhesive to set before putting your project into use.
How to Attach Suede to Wood
Assuming you would like a blog post discussing the process of attaching suede to wood:
Suede is a popular material used in many upholstery and fashion applications. It has a unique texture and appearance that can add interest and style to any project.
When attaching suede to wood, there are a few things to keep in mind in order to get the best results.
The first step is to clean both the wood and the suede. This will help ensure that the adhesive will bond properly.
Next, cut the suede to size, allowing for an extra inch or so around the edges of the wood. Once you have your pieces cut out, it’s time to apply the adhesive. There are a variety of adhesives that can be used for this project, but we recommend something like E-6000 which is specifically designed for bonding fabric to wood.
Apply a generous amount of adhesive to both surfaces and then press them together firmly. Allow the piece to dry overnight before continuing on with your project.
Now that your piece is attached, you can finish it off by trimming away any excess suede from around the edges.
You can also use a leather punch or rotary tool fitted with a sanding bit to create smooth, finished edges if desired. And that’s it! With just a few simple steps you now know how easy it is attach suede to wood – giving your project a touch of luxury without breaking the bank!
Credit: dukesandduchesses.com
Does Wood Glue Stick to Leather?
No, wood glue does not stick to leather.
What Adhesive is Best for Leather?
There are a few adhesives that work well with leather, but one of the best is 3M Super 77 Multipurpose Adhesive. This adhesive can be used on a variety of surfaces, including leather, and it forms a strong bond that will last. Another good option for leather is Bostik Best Adhesive.
This adhesive also forms a strong bond and is versatile enough to be used on many different materials, including leather.
Does Gorilla Glue Bond Leather to Wood?
It’s a common question we get asked – can Gorilla Glue be used on leather? The answer is yes! Gorilla Glue is an incredibly strong adhesive that can be used on a variety of materials, including leather and wood.
When bonding leather to wood, it’s important to ensure that both surfaces are clean and free of any dirt or debris. Once the surfaces are prepped, you’ll want to apply a thin layer of Gorilla Glue to both the leather and the wood. Then, simply press the two surfaces together and hold for 30-60 seconds.
For best results, allow the glue to dry for 24 hours before putting any weight on the bond.
So there you have it – yes, Gorilla Glue can be used to bond leather to wood!
How Do You Attach Fake Leather to Wood?
If you’re looking to add a bit of leather to your woodworking project, there are a few different ways you can go about it. Here are a few options for attaching fake leather to wood:
Tape: You can use double-sided tape to attach the leather to the wood.
This is a quick and easy option, but it may not be as secure as some of the other methods.
Glue: Using glue is probably the most common way to attach leather to wood. You can use any type of glue that will work with both materials.
Just make sure that you let the glue dry completely before continuing with your project.
Staples: Staples are another good option for attaching fake leather to wood. They’ll hold the leather in place well and they’re easy to remove if you need to make any adjustments.
Just be careful not to staple too close to the edge of the leather or it could tear.
Nails: Nailing the fake leather onto the wood is another possibility. This method is more permanent than some of the others, but it’s also more difficult to remove if you need to make changes later on.
Leather & Wood… Strengthening Bonds
Conclusion
This blog post provides a detailed tutorial on how to attach leather to wood. It begins by outlining the tools and materials you will need, including leather, wood glue, clamps, and a utility knife. It then walks you through each step of the process, from cutting the leather to size to applying the glue and clamping it in place.
The post includes helpful photos so you can see each step of the process. Finally, it offers some tips on how to care for your newly attached leather.