Detail Master Wood Burning Tips
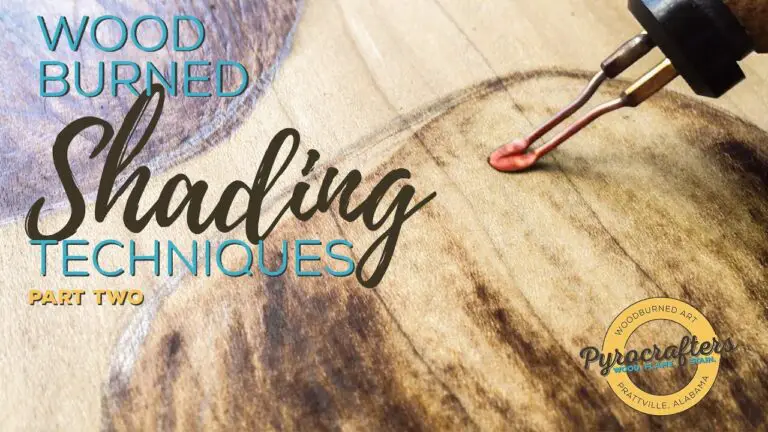
Wood burning is an age-old craft that can add beauty and character to any piece of wood. Whether you’re looking to add a personal touch to your home décor or create a one-of-a-kind gift, wood burning is a fun and relatively easy way to do it. Here are some tips to help you get started.
Before you begin, it’s important to select the right type of wood for your project. Softwoods like pine and cedar are good choices for beginners, while harder woods like oak and maple will require more experience. Once you’ve chosen your wood, use a pencil or other sharp object to sketch out your design.
If you’re not sure what you want, there are plenty of books and online resources with wood burning patterns to choose from.
Are you looking for some great tips on how to master wood burning? If so, then you’ve come to the right place! Here are a few tips that will help you get the most out of your wood burning experience:
1. Start by choosing the right wood. Not all woods are created equal when it comes to wood burning. Some woods burn better than others, so it’s important to choose wisely.
Hardwoods like oak and maple are good choices, as they tend to burns evenly and produce less smoke.
2. Prep your wood properly. Before you start burning, make sure to prep your wood properly.
This means sanding it down smooth and removing any debris or dirt that could potentially cause problems while you’re working.
3. Use the right tools. When it comes to wood burning, having the right tools can make all the difference in the world.
Invest in a good quality pyrography pen and some high-quality carving knives so that you can get started on the right foot (or hand!).
4 . Take your time .
Rushing through your work will only lead to mistakes being made, so take your time and focus on doing a good job . This is especially important if you’re new to wood burning – slow and steady really does win the race here !
Detail Master Wood Burner Pens
Wood burning has been around for centuries, and it’s a great way to add a personal touch to your woodworking projects. But if you’re new to the world of wood burning, the thought of using a pen to burn designs into wood can be daunting. That’s where Detail Master comes in.
Detail Master is a leading manufacturer of wood burning pens, and their products are designed to make wood burning easy and fun. Their pens come in a variety of sizes and styles, so you can find one that’s perfect for your needs. And because they’re made with high-quality materials, Detail Master pens will last for years with proper care.
If you’re ready to try your hand at wood burning, Detail Master is the way to go. With their quality products and helpful tips, you’ll be creating beautiful burned designs in no time!
Detail Master Excalibre Model 8600
The Detail Master Excalibre Model 8600 is a high-tech, professional-grade detailing tool that is designed to make the detailing process easier and more efficient. The 8600 is equipped with a powerful suction motor that can generate up to 3500 RPM of suction power, making it ideal for removing dirt, dust, and debris from your vehicle’s surface. The unit also features a detachable hose that makes it easy to reach tight spaces and hard-to-reach areas.
Leisure Time Products Detail Master
Assuming you would like a blog post discussing the Leisure Time Products Detail Master:
The Leisure Time Products Detail Master is an all-in-one tool that makes it easy to keep your pool and spa clean and well-maintained. This versatile product can be used as a brush, vacuum, leaf skimmer, and more, making it a must-have for any pool or spa owner.
The Detail Master features soft bristles that won’t scratch your pool’s surface, and its lightweight design makes it easy to maneuver around your pool. With so many uses, the Leisure Time Products Detail Master is an essential tool for keeping your pool looking its best.
Detail Master 4
Detail Master 4 is a versatile and affordable detailing tool that can be used for a variety of purposes. It features four different attachments – a brush, a sponge, a polishing pad, and a buffing pad – that can be used to clean, polish, and buff your car’s exterior. The Detail Master 4 also comes with two different speed settings, so you can tailor the tool to your needs.
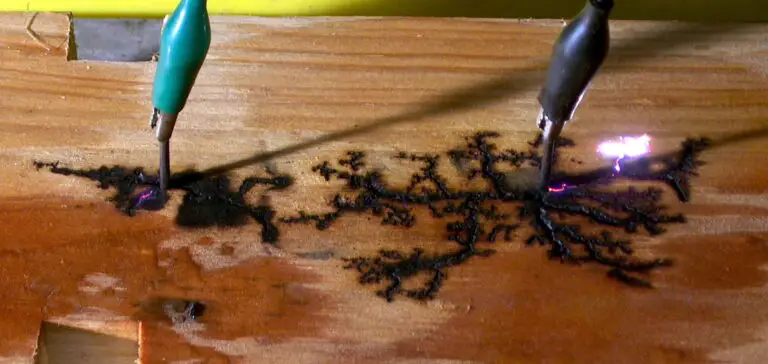
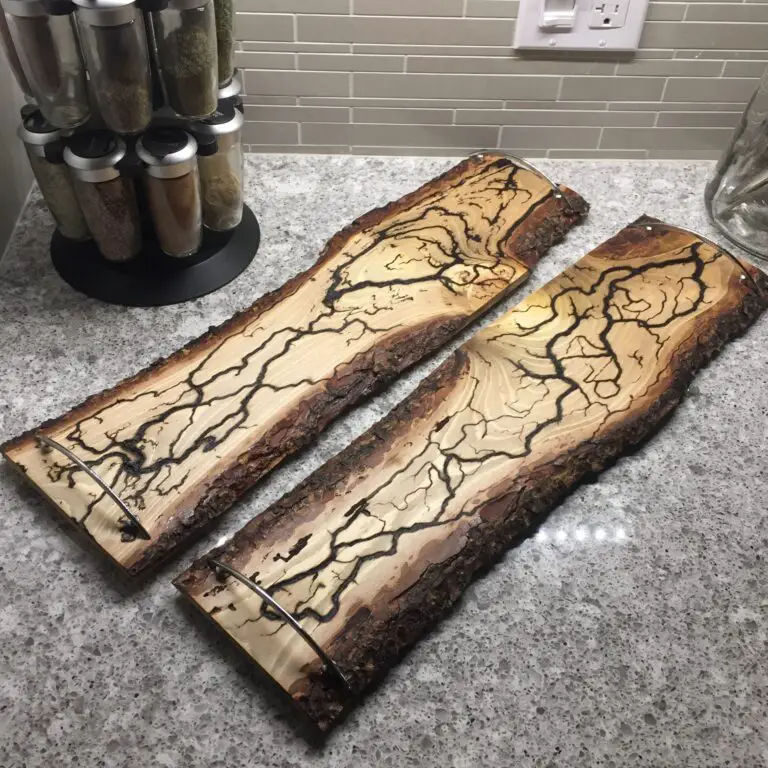
Wood Burner Tool
If you’re looking for a wood burner tool, you’ve come to the right place. In this blog post, we’ll provide detailed information about wood burners and what they can do for you. We’ll also give you a few tips on how to choose the right wood burner tool for your needs.
A wood burner is a great way to add some extra flavor to your food. Whether you’re grilling or smoking, a wood burner can help give your food that unique flavor that you’re looking for. But how do you choose the right wood burner tool for your needs?
Here are a few things to keep in mind:
– The type of wood: There are many different types of woods that can be used in a wood burner, so it’s important to know which one is best for the type of flavor you’re trying to achieve. Different woods will produce different flavors, so it’s worth doing some research beforehand.
– The size of the unit: Wood burners come in all shapes and sizes. It’s important to choose one that’s big enough to accommodate the amount of food you plan on cooking. Otherwise, you might not get the full effect of the flavor from the wood burning process.
– The price: Wood burners can range in price depending on features and quality. If you’re on a budget, there are still great options available that will get the job done without breaking the bank.
Now that you know more about choosing a wood burner tool, it’s time to start shopping around!
There are plenty of great options out there, so take your time and find one that fits your needs perfectly.

Credit: www.burnsavvy.com
How Do You Do Detailed Wood Burning?
Wood burning is a form of pyrography, which is the art of decorating wood or other materials with burn marks. It can be used to create both functional and decorative objects.
To get started with wood burning, you will need a few supplies:
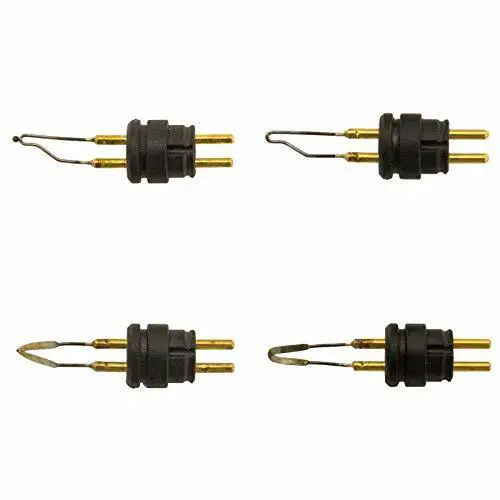
-A wood burning tool. This can be a pen-style burner or a soldering iron-style burner.
-A set of tips for your burner.
Different tips create different effects and allow you to vary your line widths.
-Wood burning stencils (optional). These can help you create detailed designs.
-Safety gear, including gloves, goggles and a respirator mask rated for fumes.
Now that you have your supplies, follow these steps to start wood burning:
1) Choose the right piece of wood.
Softwoods like pine are easy to burn, but hardwoods like oak take longer to heat up and may require multiple passes over the same area to produce dark burns. Experiment on scrap pieces of wood before working on your final project piece.
2) Sketch out your design on the wood using pencil or pen.
If using a stencil, place it on the wood and secure it in place with painter’s tape before tracing around the edges with pencil or pen.
3) Select your tip and attach it to your burner according to the manufacturer’s instructions. Turn on your burner and wait for it to heat up fully before proceeding—this could take 10 minutes or more depending on the model you’re using.
4) To startBurning, lightly touch the tip of your hot toolto the surface of thewood whereyou wanttheburn markto beginandapplyevenpressure asyoumovethetoolalongthelinesofyourdesign untilyoureachtheend point(s). Asyouwork,keepanevendistancebetweenyourtoolandthesurfaceofthewood so thatyoucreatea consistentline width throughoutyour design;ifyoutoolistooclose toyour workpiece,youmayremovetoo muchwood materialorproducesmokeandexcessresidueon/in theroughnessof lines;ifyouholdittoomuch abovethe surfaceofthe workpiece being carefulyouavoidaccidentallyburning yourselfonthetoolorthesurfaceoftheworkpiece!5) Aftercompletingyour designonone sideofthewoodenworkpiece(orsurface), turnitoverandrepeatsteps4–5untilall desiredareassidehavebeenburnt evenlywithconsistent pressureappliedduring eachpassovertheroughedarea(i fusingdifferenttools/tips oneafteranother toproducedifferentwidthsoflinesin certain areasofdesign).
6) Whenfinished Burningcominglecolorsbylightlytouchinghot toolstogetherinthedesignated areasorbypassingonetip quicklyoverAnotheralready cooled downbutstillwarmtip – thiswill resultina niceblendingof colors!
What is the Best Tip for Wood Burning?
If you’re new to wood burning, the best tip is to start slow and practice on scrap wood before moving onto your final project. When you’re ready to begin, use a pencil or other pointed object to trace your design onto the wood. Then, use a wood burning tool to slowly burn along the lines of your design.
Be sure to keep the tool moving so you don’t burn too deeply into the wood.
As you become more comfortable with wood burning, you can experiment with different techniques to create different effects. For instance, you can try holding the tool at different angles or using different types of strokes.
You can also experiment with other tools, such as pyrography pens or soldering irons, to create unique results.
How Do I Get a Smooth Line Pyrography?
If you want to achieve smooth lines in your pyrography, there are a few things you can do. First of all, it is important to choose the right pen tip. A pen tip with a small point will give you more control over your line than a larger one.
It is also important to use the right pressure when burning. Too much pressure will result in a thicker line, while too little pressure will make it difficult to get a consistent line. Finally, practice makes perfect!
The more you burn, the better you will become at achieving smooth lines.
How Hot Should Wood Burning Tool Be?
Wood burning tools can be used at a variety of different temperatures, depending on the effect you want to achieve. For example, lower temperatures are better for delicate work, while higher temperatures will produce darker lines and deeper burns.
Generally speaking, most wood burning tools will have an adjustable temperature control that allows you to set the tool to your desired heat level.
However, it’s important to note that even the best temperature control can’t give you an exact reading – it’s always best to err on the side of caution and start with a lower setting before working your way up.
So how hot should your wood burning tool be? It really depends on what you’re trying to accomplish.
But as a general rule of thumb, we recommend starting at a lower temperature and then slowly increasing the heat until you achieve the desired effect.
Tips for Using Wood Burning Pens for Pyrography
Conclusion
If you’re looking to get into the world of wood burning, or even if you’re just a casual enthusiast, then this blog post is for you. In it, we’ll go over some of the basics of wood burning, as well as some more advanced tips and tricks. We’ll also touch on some of the safety concerns that come with wood burning, so that you can stay safe while enjoying this fun hobby.