How to Electrically Burn Wood
Wood burning is a popular technique for adding decoration to wood. It’s also a great way to add personalization to gifts and home decor items. But what if you want to add an electrical element to your wood burning?
This guide will show you how to electrically burn wood.
- Gather your supplies
- You will need a piece of wood, a power drill, a metal file, sandpaper, and a soldering iron
- Drill a hole into the center of the piece of wood
- The size of the hole will depend on the size of the soldering iron tip you are using
- File the edges of the hole you just drilled so that they are smooth and even
- Sand down the entire piece of wood to create an even surface
- Turn on your soldering iron and allow it to heat up to its maximum temperature
- Then, touch the tip of the iron to the center of the hole you created in step 2
- Hold it there for 30-60 seconds or until you see smoke and charring begin to occur on the wood
Fractal wood burned charcuterie board READ DESCRIPTION
How to Electrify Wood With Battery Charger
If you’re looking to add a little extra flair to your woodworking projects, why not try electrifying the wood? It’s a simple process that can be done with a battery charger and some careful planning. Here’s how to do it:
1. Choose the right type of wood. Softer woods like cedar or pine are ideal for this project since they’ll be easier to carve and won’t splinter as easily. Harder woods like oak or maple can work too, but you’ll need to be more careful when carving and take your time so you don’t damage the wood.
2. Sketch out your design on the wood. This is where planning comes in handy – you’ll need to know exactly where you want your electrical elements to go before you start carving. Make sure your design is symmetrical and evenly spaced so everything looks clean and professional when it’s finished.
3. Start carving! Carefully carve out your design using a sharp knife or chisel. If you’re working with harder woods, it’s best to use power tools like an electric drill or router so you don’t damage the wood (or yourself).
4. Drill holes for your wires. Once your carving is complete, use a drill bit that’s slightly smaller than the diameter of your wire to make holes along each edge of your design. These will serve as pathways for the electricity to flow through once everything is connected.
5 . Connect everything up! Run your wires through the drilled holes and connect them to their corresponding terminals on the battery charger using alligator clips (or whatever other type of connector you’re using).
Make sure everything is secure and there are no loose connections – if there are, electricity could arc between them and cause a fire hazard.
Read: How to Burn Wood With Electricity
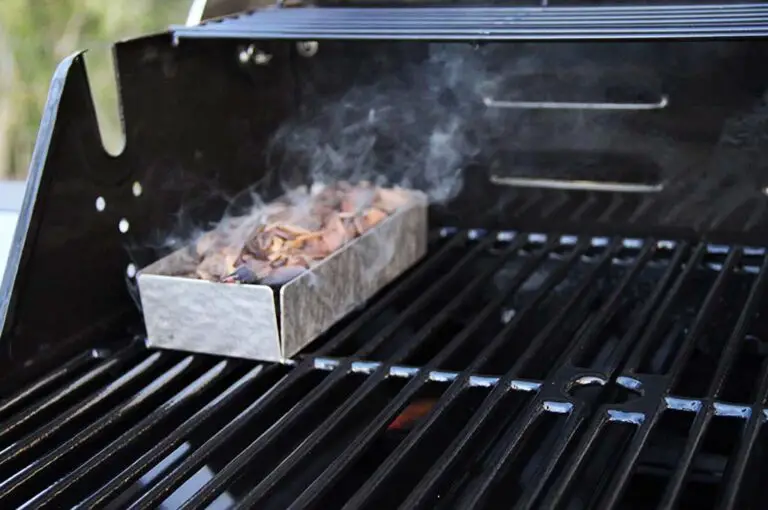
How to Burn Wood
Assuming you would like a blog post about the process of burning wood:
Most people are familiar with the act of burning wood, but may not know the specifics of how to do it properly. Whether you’re looking to start a campfire or keep your home warm during the winter, here are some tips on how to burn wood.
First, you’ll need to gather some supplies. In addition to wood, you’ll need a fire starter (such as lighter fluid or newspaper) and something to ignite it with (a match or lighter). Once you have your materials, find a spot for your fire.
If you’re outdoors, clear an area of any leaves or debris that could catch fire. If you’re indoors, use a fireplace or stove designed for burning wood.
Next, build your fire.
Start by placing your largest logs at the bottom of the stack and smaller pieces on top. Use crisscrossed twigs or kindling as filler material between the logs. Once your stack is built, apply your fire starter evenly across the top layer of wood.
Finally, light the match and touch it to the kindling at several points until the entire pile is ablaze.
Once your fire is going strong, there are a few things to keep in mind in order to maintain it. First, never leave unattended – always make sure someone is nearby in case it gets out of control.
Second, stoke the flames regularly by adding more fuel as needed; if the flames start to die down, they can be revived by blowing gently on them (but don’t overdo it or you’ll risk putting out the whole fire). Finally, when you’re ready to call it quits for the night (or day), let the flames die down completely before dousing them with water – otherwise they could reignite when left unattended!
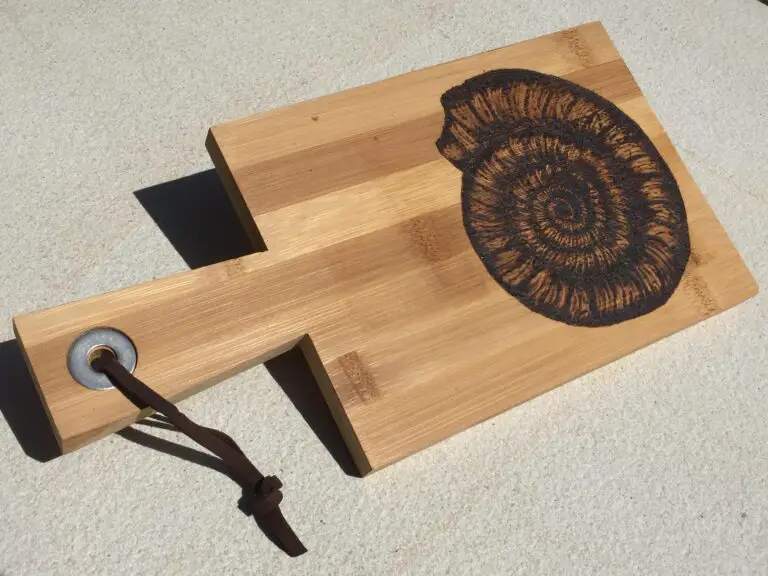
Fractal Wood Burning
Fractal wood burning is a type of pyrography that involves using a heated tool to create patterns in wood. The patterns can be simple or complex, and often resemble geometric shapes. Fractal wood burning is a relatively new form of art, and has only become popular in recent years.
There are many different ways to create fractal patterns in wood. One common method is to use a stencil. First, the desired pattern is drawn onto the stencil.
Next, the stencil is placed on the wood, and the outline of the pattern is burned into the wood using a heated tool. Once the outline is complete, the inside of the pattern can be filled in with additional burns to create darker areas and add depth to the design.
Another way to create fractal patterns is freehand burning.
This method requires more skill than using a stencil, but it allows for more creativity and flexibility in design. To freehand burn a fractal pattern, first sketch out your design on paper. Then, transfer your sketch onto the wood using a pencil or other tracing method.
Once your design is transferred onto the wood, you can begin burning it into place using a heated tool. Start with the outline of your design and then fill it in with additional burns as desired.
Fractal wood burning can be used to create beautiful works of art that are unique and eye-catching.
Read also: How to Burn Green Wood Bonfire
Lichtenberg Wood Burning
Lichtenberg wood burning is a unique form of pyrography that involves using high voltage to create patterns in wood. The process is named after Georg Christoph Lichtenberg, who first discovered the effect while experimenting with electricity.
The basics of Lichtenberg wood burning are relatively simple.
A piece of wood is placed on an insulating surface and connected to one terminal of a high voltage power supply. The other terminal is connected to a metal electrode, which is then used to draw patterns on the wood. As the electrode touches the wood, electrons flow from the power supply into the wood, causing it to heat up and burn.
The resulting patterns are often intricate and beautiful, making Lichtenberg wood burning a popular form of art. The process can be used to create everything from wall art to functional objects like cutting boards and jewelry boxes.
If you’re interested in trying Lichtenberg wood burning yourself, there are a few things you’ll need to get started.
First, you’ll need a high voltage power supply – these can be found online or at some electronics stores. Second, you’ll need an insulated work surface – a sheet of glass or ceramic tile works well for this. Finally, you’ll need a metal electrode – copper wire or a thin steel rod both work well for this purpose.
Once you have all of your supplies, simply set up your work surface and connect one end of your electrode to the positive terminal of your power supply. Then touch the negative terminal of your power supply to the Wood Burning Pencil Woodcarving Tool Kit Pyrography Machine Gourd Crafts Art project will be done by hand-held soldering iron tip (included) 。 Adjustable temperature control – Heat up fast (0~37 seconds).
Temperature range: 200~450℃ 。 Input Voltage: 110V; Output Power: 20W; Frequency: 50/60Hz; Plug Type: US Standard Plug 。 Package Included: 1 x High Quality Pyrography Machine + 5 x Replacement Iron Tips + 1 User Manual in English & German 。
Note: This machine only suitable for Adults use under Adult supervision! Please keep away from children!

Credit: www.waynesthisandthat.com
How Do You Burn Wood Like Lightning?
If you’re looking to light your fire with the speed of lightning, there are a few things you can do to make sure your wood is burning bright. The first step is to make sure your wood is properly seasoned. Seasoned wood is dry and has been exposed to the elements for at least six months.
This will help it catch fire quickly and burn evenly.
Next, you’ll want to create a tepee out of small pieces of kindling and set it in the center of your fireplace or outdoor pit. Then, place larger pieces of wood around the tepee, making sure they’re touching so the fire can spread easily.
Once your wood is in place, light the tepee from the top down using a match or lighter.
As the flames start to lick up the sides of the tepee, they’ll begin catching on to the larger pieces of wood and before long you’ll have a blazing inferno that’s ready for roasting marshmallows or keeping warm all night long.
Read to know: How Do You Burn Uncured Wood?
What Do You Need for Lichtenberg Wood Burning?
Lichtenberg wood burning is a unique and interesting way to add decoration to wood. The process uses high voltage electricity to create designs in the wood. This can be done with a simple household AC outlet and some basic supplies.
Here is what you need for Lichtenberg wood burning:
-A piece of wood. Any type of wood can be used, but hardwoods work best.
Softwoods will char more easily and may not produce as clear of a design.
-High voltage DC power supply. A welder or plasma cutter power supply works well, but you can also use a Variac with a rectifier bridge to step up the voltage.
-Alligator clips or other means of connecting the power supply leads to the wood.
-Safety gear including gloves, eye protection, and long sleeves/pants.
Can Fractal Burning Be Done Safely?
Yes, fractal burning can be done safely. Fractal burning is a type of image burning that creates images with repeating patterns. These patterns can be created by using a software program or by hand.
When done correctly, fractal burning can create beautiful and intricate designs.
There are a few safety concerns to keep in mind when doing fractal burns. First, make sure that the area you are working in is well ventilated.
The fumes from the burning process can be harmful if inhaled. Second, wear gloves and long sleeves to protect your skin from the heat of the burner. Finally, always use caution when working with fire.
Never leave the burner unattended and make sure to have a fire extinguisher handy in case of an emergency.
With proper precautions, fractal burning can be a safe and fun way to create unique pieces of art.
Important: How Do I Vent My Wood Burning Stove?
How Many Volts Does It Take to Burn Wood?
When it comes to burning wood, the amount of volts required can vary depending on a few factors. For instance, dryer and harder woods will require more volts to ignite than softer woods that are high in moisture content. In general, however, it takes around 4,000 volts to burn wood.
Conclusion
Wood burning is a popular technique for adding decoration to woodworking projects. It’s also a great way to add personalization to items like picture frames, jewelry boxes, and more. While it may seem daunting, electrically burning wood is actually quite simple with the right tools and materials.
Here’s a quick guide on how to electrically burn wood.
First, gather your supplies. You’ll need an electric wood burner, woodburning pen, piece of sandpaper, and a design template (if desired).
If you’re working with a larger project, you may also need a clamp to hold your workpiece in place.
Next, prepare your work area by covering it with newspaper or another protective layer. Then, sand down the area you’ll be burning to create a smooth surface for your design.
Now it’s time to start burning! Begin by tracing your design onto the wood using your woodburning pen. If you’re not using a template, freehand drawing is also an option.
Keep the tip of your pen at a 45-degree angle as you move along the lines of your design; this will ensure even burns across the entire image. Once you’ve finished tracing, go over the lines again with slightly heavier pressure to darken them. Finally, use light pressure to fill in any remaining white space within your design.
And that’s it! Let your burned design cool completely before handling or applying any finishes like paint or varnish. With practice, you’ll be able to create beautiful burned designs on all sorts of woodworking projects!