Wood Slice Ornaments Ideas
Wood slice ornaments are a great way to add a personal touch to your Christmas tree. You can find wood slices at your local craft store, or you can make them yourself by cutting thin slices of wood from a log. Once you have your wood slices, you can decorate them however you like!
Paint them with holiday designs, write festive messages on them, or simply leave them natural for a rustic look. Hang your wood slice ornaments on your tree with ribbon or twine, and enjoy your unique creation!
Wood slice ornaments are a great way to add a rustic touch to your holiday decor. Here are some ideas to get you started:
-Paint your wood slices with festive holiday colors and patterns.
-Use a wood burning tool to create unique designs on your ornaments.
-Wrap some twine around the top of the ornament and add a small jingle bell for extra decoration.
-Glue on some fake snowflakes or holly leaves for a wintery feel.
Whatever design you choose, these homemade wood slice ornaments are sure to add charm to your tree!
DIY Wood Slice Ornaments – Personalized with Vinyl Decals!
Wood Slice Ornaments Cracking
If you’re a fan of rustic, homemade Christmas decorations, then you’ll love these wood slice ornaments! Made from simple tree slices, they add a touch of nature to your holiday decor. But there’s one downside to these charming ornaments – they’re prone to cracking.
There are a few reasons why wood slice ornaments might crack. First, if the slices are too thin, they’ll be more fragile and susceptible to breaking. Second, if the wood isn’t properly dried before being carved or painted, it can also lead to cracking.
And finally, if the ornament is exposed to too much heat or cold (like being left out in the sun or placed in a freezing car), that can cause the wood to split.
To avoid having your wood slice ornament crack, start with a thicker slice of wood (about 1 inch thick). Make sure it’s been properly dried before carving or painting it.
And finally, take care when storing and displaying your ornament – keep it out of direct sunlight and extreme temperatures. With a little bit of care, your wood slice ornament will last for many Christmases to come!
Wood Slice Ornaments Bulk
Looking for a unique and rustic addition to your Christmas decor? Wood slice ornaments bulk are the perfect solution! These natural ornaments add a touch of nature to your home and are sure to impress your guests.
Best of all, they’re easy to make yourself with just a few supplies.
Here’s what you’ll need:
-A log or tree branch (the thicker the better)
-A saw (a hand saw will work fine)
-Sandpaper
Etsy Wood Slice Ornaments
Etsy Wood Slice Ornaments are the perfect way to add a rustic touch to your holiday decor. These natural wood slices are hand-painted with festive holiday images and come ready to hang on your tree. Each ornament is unique, making them a great addition to any collection.
Whether you’re looking for a unique gift or simply want to spruce up your own tree, Etsy Wood Slice Ornaments are a must-have this holiday season.
Wood Slice Ornaments Grinch
This year, add a personal touch to your holiday decor with wood slice ornaments! These ornaments are easy to make and can be customized to fit your style. To make them, you’ll need some thin slices of wood (you can find these at a craft store), a drill, some paint, and some twine or ribbon.
Once you have all of your materials, simply paint your design onto the wood slices and let them dry. Then, use the drill to make a small hole in the top of each slice. Thread the twine or ribbon through the holes and knot it in place.
Hang your new Ornaments on the tree and enjoy!
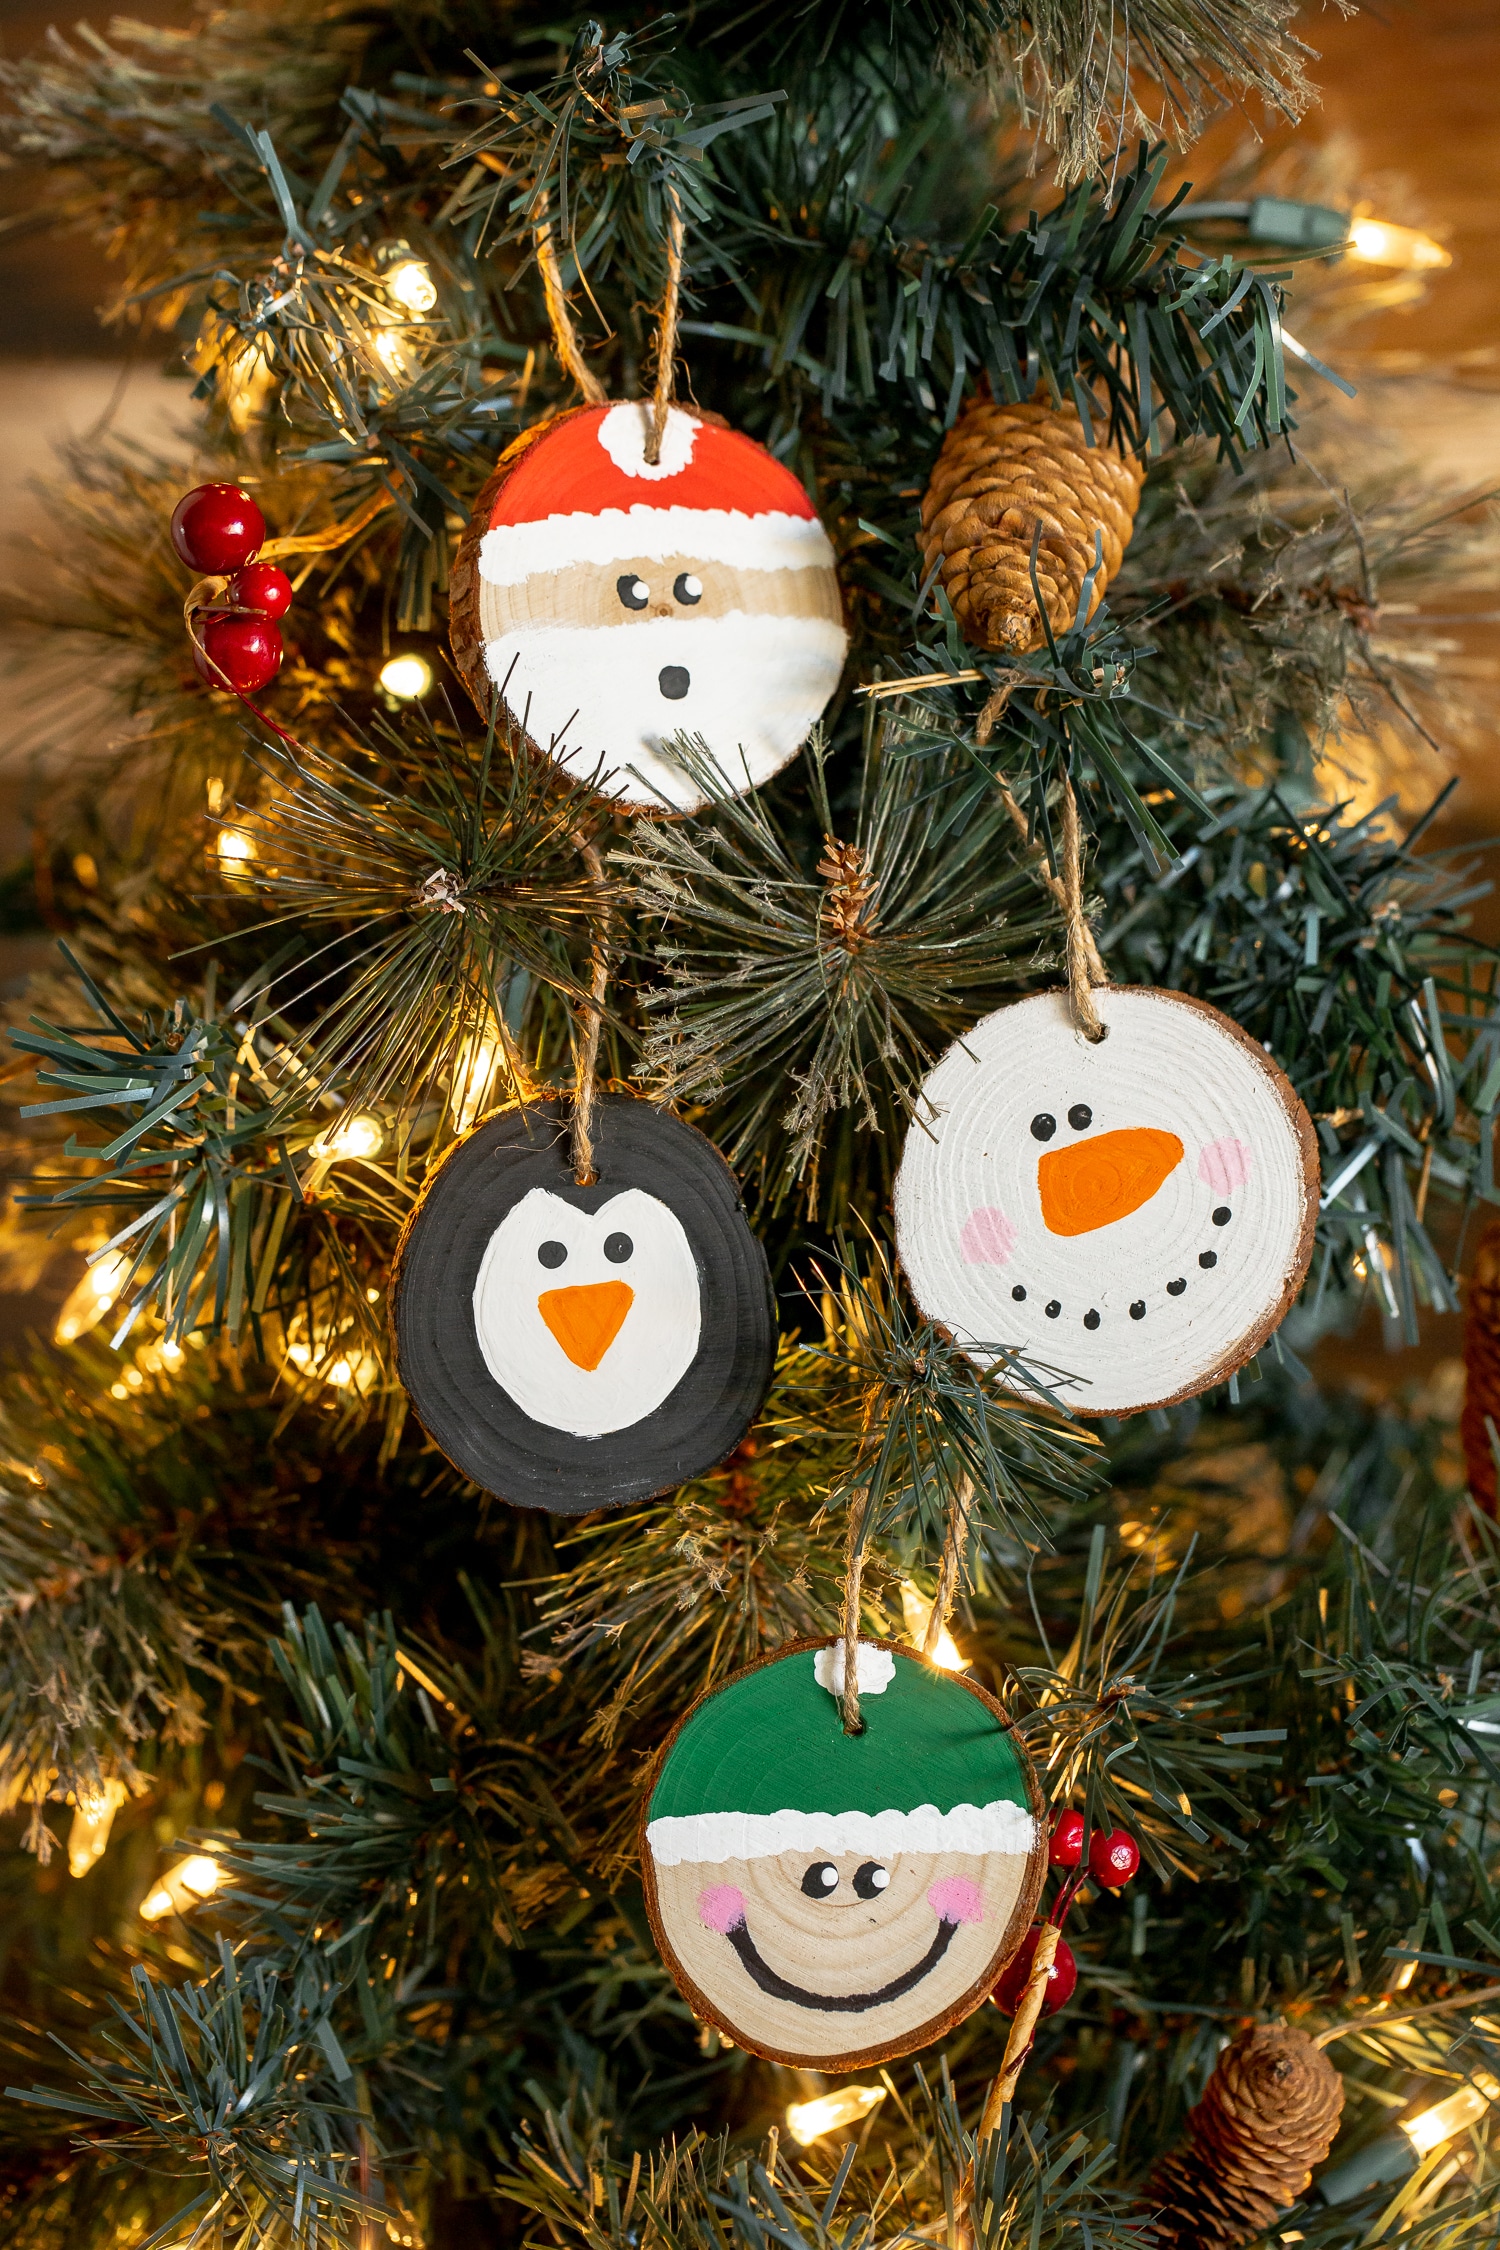
Credit: www.madetobeamomma.com
How Do You Decorate Wood Slice Ornaments?
Wood slice ornaments are a fun and easy way to add a personal touch to your holiday decor. Here are some tips on how to decorate them:
1. Start with a clean wood slice.
Sand any rough edges and wipe away any dust or debris.
2. Choose your design. You can go for a rustic look by simply painting or staining the wood slice, or get creative with stencils, stamps, or even carving.
3. Once you’ve decided on your design, it’s time to get crafting! If you’re painting, make sure to use acrylic paints designed for wood surfaces. For best results, apply several thin coats of paint rather than one thick coat.
Let the paint dry completely between each coat.
4. If you’re using stencils or stamps, first apply an even layer of craft glue over the entire surface of the wood slice (this will help keep the stencil in place). Then position your stencil(s) and/or stamp(s), and secure them with painter’s tape if necessary.
Apply ink, paint, or whatever medium you’re using evenly over the exposed areas of the design; be careful not to smudge any lines as you work. Remove the stencil(s) and/or stamp(s) carefully, then let everything dry completely before proceeding to the next step.
5., If you’re carving into the wood slice, start by sketching out your design with a pencil (this will be easier to erase later if needed).
Then use a sharp knife or other carving tool to etch out your design; take care not to carve too deeply into the wood so that you don’t split it apart entirely! When you’re finished carving, sand down any rough edges and wipe away any excess sawdust before moving on to the next step..
6,. Once your design is complete, it’s time to add a hanger so that your ornament can be displayed proudly! Simply loop a length of twine through a drill hole at the top of the ornament, knotting it securely in place.. And that’s it – enjoy your handiwork!
Do You Seal Wood Slice Ornaments?
When it comes to wood slice ornaments, there are a few things you need to take into consideration before you start sealing them. First, what kind of wood are your slices made from? If your slices are made from softwoods like pine, fir or cedar, then you’ll want to seal them in order to protect them from moisture and rot.
Hardwoods like oak and maple don’t necessarily need to be sealed, but it’s still a good idea to do so. This will help extend the life of your ornament and keep it looking its best.
Once you’ve decided whether or not to seal your wood slice ornament, the next step is to choose a sealant.
There are a variety of options available on the market, so do some research and find one that suits your needs. You’ll also want to make sure that the sealant you choose is compatible with the paint or finish that you plan on using (if any). Once you have everything ready, simply apply the sealant according to the manufacturer’s instructions – typically this will involve brushing or spraying it on evenly and allowing it to dry completely before proceeding.
How Do You Put Pictures on a Wood Slice Ornament?
Assuming you would like a tutorial on how to put pictures on wood slice ornaments:
You will need:
-Wood slices (you can find these at your local craft store)
-Mod Podge
-Foam brush
-Scissors
-Printed pictures
First, start by finding the perfect wood slice. You want one that is big enough to fit your picture, but not too big or it will be overwhelming.
Once you have found the perfect slice, use scissors to cut your picture down to size. Next, apply a layer of Mod Podge to the wood using a foam brush. Be sure to cover the entire surface.
Then, place your picture onto the glue and press down gently. Apply another layer of Mod Podge over top of the picture and let it dry for about 30 minutes. Once it is dry, your ornament is ready to hang!
What is the Best Paint for Wood Slice Ornaments?
Wood slice ornaments are a popular craft project, and there are several types of paint that can be used on them. Acrylic paint is a good option, as it is easy to use and dries quickly. Tempera paint is another option, but it can be more difficult to work with.
Watercolor paint can also be used, but it can be tricky to get the right effect.
Conclusion
This post shows some creative ideas for wood slice ornaments. You can either buy pre-cut wood slices or cut your own from a tree branch. Once you have your slices, you can decorate them however you like!
Some ideas include painting them, adding embellishments, or even carving out designs. These make unique and personal gifts for friends and family!