Making a Carving Knife from a Saw Blade
Carving knives are an essential tool for any woodworker, and a carving knife from a saw blade is a great option for those who want to save money or be more eco-friendly. While it may seem daunting, making your own carving knife from a saw blade is actually quite simple, and only requires a few tools and materials.
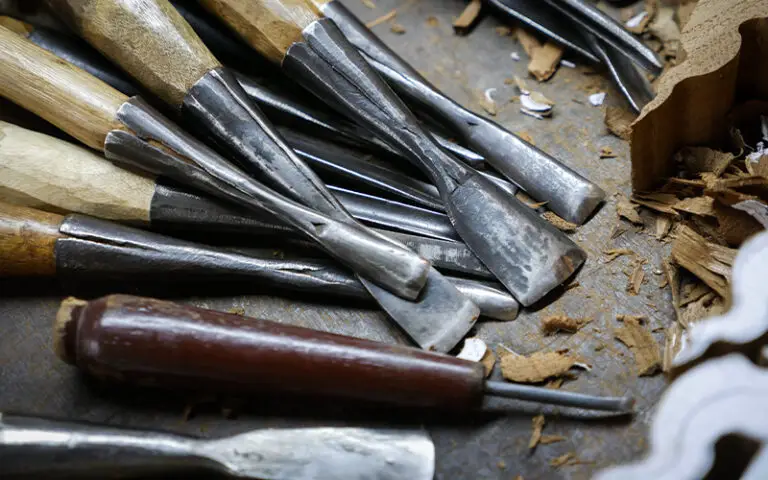
Carving knives are one of the most versatile tools in a woodworker’s arsenal. They can be used for everything from shaping intricate details to roughing out large chunks of wood. And while you can buy a carving knife ready-made, it’s also relatively easy to make your own from an old saw blade.
The first step is to find an old saw blade that’s still in good condition. A hand saw or circular saw blade will work fine, as long as the teeth are still sharp and there isn’t too much rust. Once you have your blade, use a file or grinder to remove any burrs or nicks from the edge.
Next, draw a line down the center of one side of the blade using a permanent marker. This will be your guide for grinding the bevel on the knife. Using a belt sander, angle grinder, or bench grinder, carefully grind away at the steel until you reach your marked line.
Try to keep the grind even and consistent so that your finished knife will have a nice sharp edge.
Once you’ve ground the bevel on one side of the blade, flip it over and do the same on the other side. When both sides are complete, use a fine grit sandpaper to remove any remaining burrs from the edge of your carving knife.
Now all that’s left to do is give your new carving knife a handle. You can get creative here and use anything from scrap wood to antler horn – whatever suits your fancy!
Making a Wood Carving Knife from an Old Saw Blade
How to Make a Wooden Knife Without Power Tools
In today’s world, it’s easy to forget the simple skills our ancestors used to survive. Making a knife is one of those skills. While you can easily buy a knife at your local store, there’s something special about making your own.
And you don’t need any power tools to do it!
Here’s what you’ll need:
-A piece of wood (we recommend hardwood like oak or maple)
-A saw (a hand saw will work fine)
-A sharpening stone
-Some sandpaper
-An old rag or t-shirt
first, find a straight piece of hardwood that’s long enough to make a comfortable handle. Cut the wood to size with your saw, then use the sharpening stone to create a nice, even edge.
If the edge isn’t perfect, don’t worry – we’ll fix that later.
Next, take your sandpaper and smooth out the entire surface of the wood. This step is important because it will help prevent splinters when you use the knife.
Now it’s time to give your knife a cutting edge. First, find the center of one side of the blade and draw a line from end to end. Then, using your saw, cut along this line until you’ve created two equal halves.
Finally, use your sharpening stone to sharpen each half of the blade. Work slowly and carefully until both sides are nice and sharp.
And that’s it! Your very own wooden knife without any power tools required!
How to Carve Wood With a Knife
Assuming you would like a blog post discussing how to carve wood with a knife:
Carving wood with a knife can be a fun and rewarding experience. With the right tools and some practice, anyone can produce beautiful carved pieces.
There are two main ways to carve wood with a knife: by hand or with the help of a power tool. Hand carving is the more traditional method and requires only basic tools: a sharp knife, gloves, and eye protection. You’ll also need a piece of wood to practice on.
For power carving, you’ll need an electric or pneumatic carving tool, such as a Dremel or Foredom. Power carving is faster but produces more dust and noise than hand carving.
To get started carving by hand, start by selecting the type of wood you want to use.
Softwoods like pine or basswood are good choices for beginners since they’re easy to carve. Hardwoods like oak or maple are better suited for experienced carvers because they’re more difficult to work with. Once you’ve selected your wood, find a comfortable place to sit or stand and put on your gloves and eye protection.
Next, decide what kind of design you want to carve into the wood. A simple relief carving (a design that’s raised above the surface of the wood) is a good place to start. Once you have your design sketched out, it’s time to start carving!
Hold the piece of wood in your non-dominant hand and carefully guide your knife along the lines of your sketch. Start with shallow cuts and gradually deepen them as you go; if you make too deep of a cut, you risk splitting the wood apart entirely. As you carve, periodically stop and assess your progress; if necessary, use sandpaper to smooth out any rough edges before continuing onward.
Once you’ve finished your relief carving, take a step back and admire your work! If everything looks good, proceed onwards by adding color or finishes of your choice; if not,… that’s okay too! Just try again next time – practice makes perfect!
How to Make a Chip Carving Knife
Chip carving is a type of wood carving in which small pieces of wood are removed from the surface of a piece of wood to create a design. A chip carving knife is a type of knife that is specifically designed for this type of carving.
The first step in making a chip carving knife is to select the right type of blade.
The blade should be made from high carbon steel and should be between 2 and 3 inches long. It is also important to choose a blade with a fine point so that it can be used for detailed work.
Once you have selected the right blade, you will need to attach it to the handle.
This can be done by using epoxy or another type of strong adhesive. Once the blade is securely attached to the handle, you will need to sharpen it so that it is ready to use.
When sharpening the blade, it is important to use a sharpening stone or file rather than power tools so that you do not damage the edge of the blade.
Once the blade is sharpened, you are ready to start chip carving!
How to Carve Wood Without Tools
Assuming you don’t have any tools and you need to carve wood, there are a few ways you can do it. One way is to use a sharp rock or piece of glass. You can also use your teeth if they’re strong enough.
Another way is to burn the wood with a hot poker until it’s soft enough to carve. Finally, you could also try using another piece of wood as a chisel.

Credit: blog.lostartpress.com
Can You Make Knives Out of Saw Blades?
It is possible to make knives out of saw blades, but it is not recommended. Saw blades are made out of high-carbon steel, which is not ideal for knife making. High-carbon steel is difficult to heat treat and can be brittle.
It is also difficult to sharpen. For these reasons, saw blades are not the best material for knives.
What is the Best Steel for a Carving Knife?
There are a few different types of steel that are commonly used for carving knives. The most common and widely available type is carbon steel. This type of steel is easy to sharpen and maintain, and it takes a very sharp edge.
Carbon steel is also relatively inexpensive, making it a good choice for budget-minded carvers.
Another popular type of steel for carving knives is stainless steel. Stainless steel holds its edge well and is resistant to corrosion.
However, it can be difficult to sharpen stainless steel blades, so they may require more maintenance than carbon steel blades.
Tool steels are another option for carving knives. Tool steels are designed to withstand high levels of wear and tear, making them ideal for heavy-duty carving tasks.
However, tool steels can be difficult to work with and are often more expensive than other types of knife steels.
No matter what type of steel you choose for your carving knife, be sure to keep it properly Sharpened and maintained. A dull blade will make your carving projects much more difficult (and dangerous) than they need to be!
How Thick Should a Wood Carving Knife Be?
Assuming you are referring to a knife used for wood carving, there is no definitive answer as to how thick the blade should be. It depends on the type of wood carving you will be doing and what feels comfortable for you. For general wood carving, a blade that is 3/16 to 1/4 inch thick is a good starting point.
If you will be doing more detailed work, such as relief carving or chip carving, a thinner blade may be better. Ultimately, it is up to you to decide what thickness works best for your needs.
What Angle Should a Wood Carving Knife Be?
Assuming you are referring to the angle of the blade on a wood carving knife:
The majority of wood carving knives will have a bevel angle between 20-25 degrees. Some carvers prefer a steeper angle for very hard woods, while others find a shallower angle works better for softer woods or if they are doing more delicate work.
There is no definitive answer and it really comes down to personal preference. Try out a few different angles and see what feels best for you and the type of wood you are working with.
Conclusion
In this post, the author shows how to make a carving knife from an old saw blade. First, the saw blade is heated in a fire until it is red hot. Next, it is cooled in water and then quenched in oil.
This process hardens the steel. The next step is to temper the steel by heating it again, this time to a lower temperature, and then cooling it slowly. This makes the steel more flexible so that it won’t break when you use it.
Finally, the saw blade is sharpened and ready to use as a carving knife.