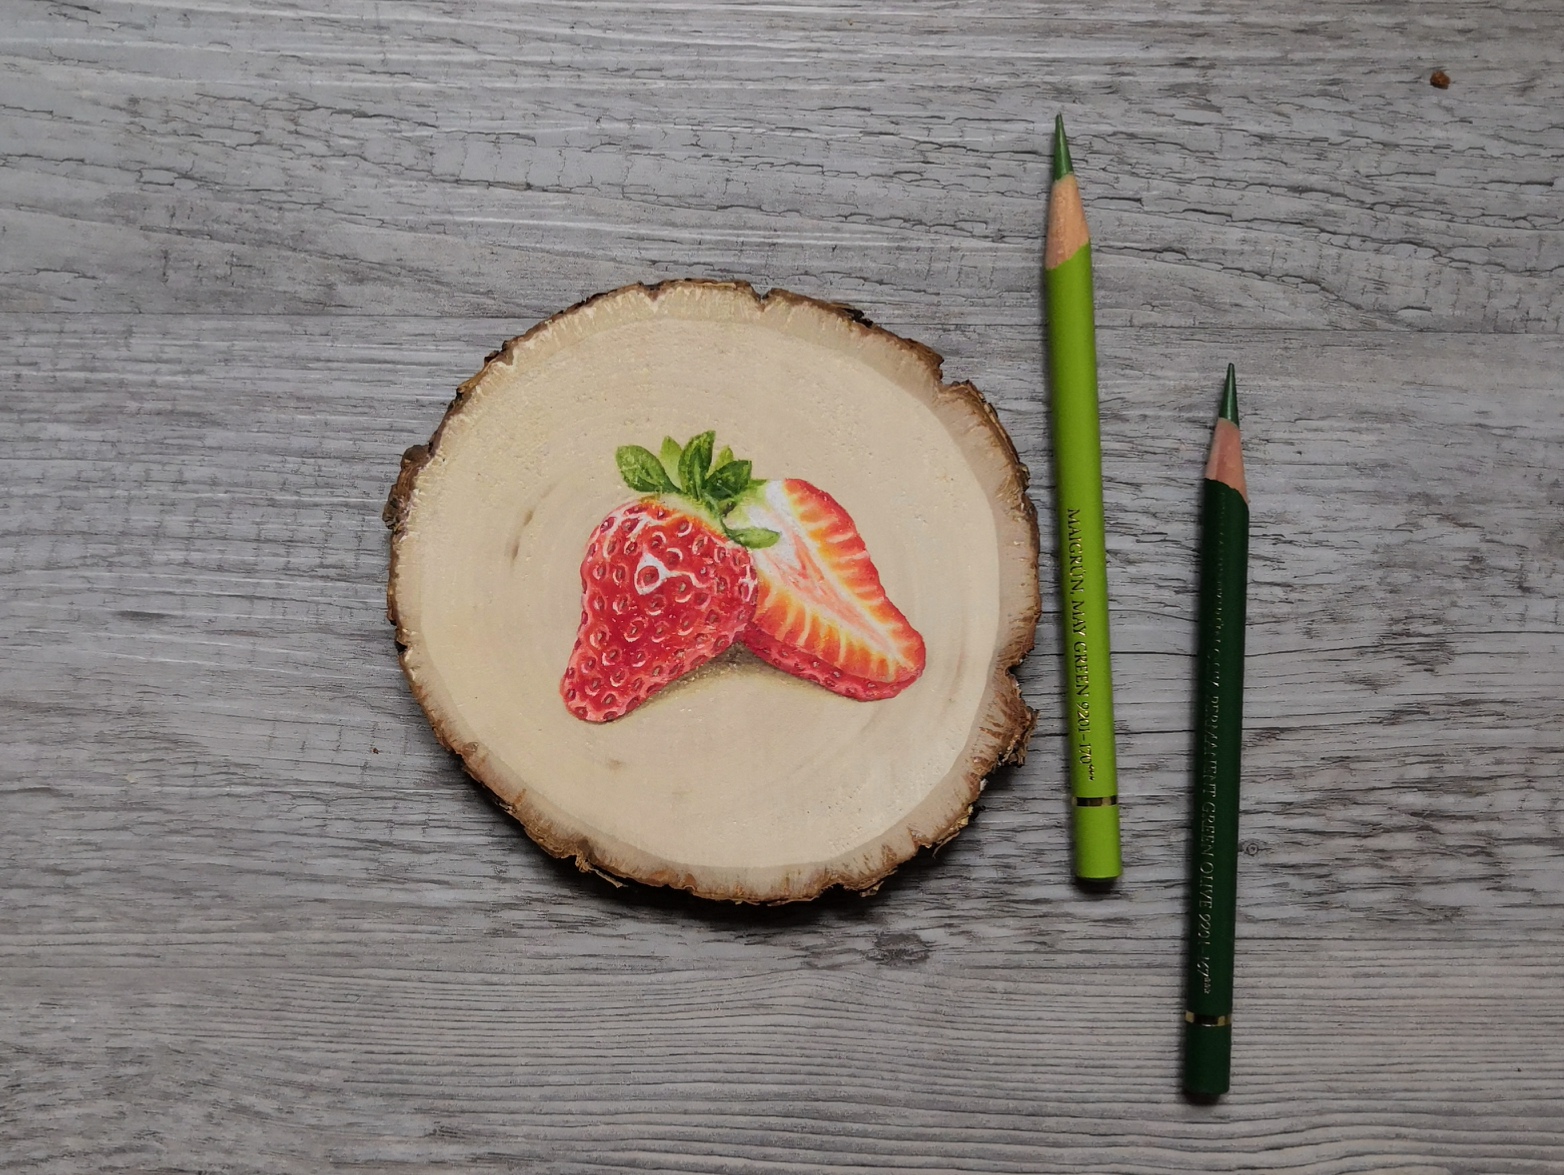
How to Seal Colored Pencil on Wood
One of the great things about colored pencils is that they can be used on a variety of surfaces, including wood. However, if you’re going to use your colored pencils on wood, you’ll need to make sure that the pencils are properly sealed so that the color doesn’t bleed through.
- Begin by sanding the wood surface to create a smooth base for the pencils
- Next, apply a layer of clear sealer to the wood using a foam brush or roller
- Allow this coat to dry completely before proceeding
- Once the sealer is dry, begin coloring your design onto the wood using colored pencils
- Work in small sections and color lightly at first, building up layers of color as desired
- When you’re finished coloring, apply another layer of clear sealer over top to protect the pencil work
- Allow this coat to dry completely before displaying or using your piece
Colored Pencil Art
If you’re ever feeling creative and want to try something new, why not give colored pencil art a go? It’s a fun and relatively easy medium to work in, and it’s also very versatile. You can create anything from delicate portraits to bold abstractions with colored pencils.
One of the great things about colored pencils is that they’re easy to find and relatively inexpensive. You can buy them just about anywhere – art supply stores, big box stores, even some supermarkets. And if you’re just starting out, you don’t need a huge set – a small set of 12 or 24 colors will do just fine.
When it comes to actually creating your artwork, there are a few things to keep in mind. First, take your time – rushing will only result in frustration. Second, be patient – colored pencils require multiple layers to build up color and achieve the desired effect.
And finally, experiment! Don’t be afraid to try new techniques or break the rules once in awhile. The worst that can happen is that you’ll end up with a piece of art that you don’t like – but even then, it can be fun to look back on later and see how far you’ve come.
How to Use Watercolor Pencils on Wood
Watercolor pencils are a great way to add a splash of color to your wood projects! Here are some tips on how to use watercolor pencils on wood:
1. Begin by lightly sketching your design onto the wood surface with a pencil.
This will help you plan out your colors and placement.
2. Once you have your sketch, start coloring in your design with the watercolor pencils. Start with light strokes and build up to darker colors as desired.
3. To add more depth and dimension to your colors, try wetting your brush before applying color to the wood surface. This will allow the colors to blend and create new shades.
4. Experiment with different techniques and have fun!
Watercolor pencils offer endless possibilities for creativity.
How to Add Color to Wood Burning
Adding color to wood burning is a great way to add some extra flair to your project. Whether you want to add a touch of color to highlight the grain of the wood or create a more colorful design, there are a few different ways that you can go about adding color to your wood burning.
One way to add color is by using colored pencils.
You can either use regular colored pencils or water-soluble colored pencils. Water-soluble pencils will allow you to mix colors together and create different shades. To use colored pencils, simply color in the area that you want to add color to.
Once you’re finished coloring, use a clear topcoat over the area to protect the coloring and make it last longer.
Another way that you can add color is by using paint pens or markers. Paint pens or markers will give you more control over the amount of color that you’re adding and where it’s going.
They also dry quickly, so you won’t have to worry about smudging your work as you’re working on it. To use paint pens or markers, simply draw or write whatever design you want in the area that you want to add color. Once again, be sure to seal it with a clear topcoat when you’re finished so that the design lasts longer.
There are also some speciality products made specifically for adding color to wood burning projects. These include crayons, pastels, and even oil paints. They each have their own advantages and disadvantages, so be sure to do some research before deciding which one is right for your project.
Whichever method you choose, just be sure to have fun with it and experiment until you find something that works best for you!
Prismacolor Pencils on Wood
Prismacolor pencils are a great way to add color to wood. They come in a wide variety of colors, so you can find the perfect shade for your project. They’re also easy to use, so you can get started right away.
When using Prismacolor pencils on wood, there are a few things to keep in mind. First, make sure the wood is sanded smooth before starting. This will help the pencils glide on more easily and prevent them from catching on any rough spots.
Next, start with light pressure and build up slowly as needed. The lead in Prismacolor pencils is soft, so too much pressure can cause them to break easily. Once you’ve found the right amount of pressure, apply the color evenly across the surface of the wood.
Finally, be sure to seal the wood once you’re finished coloring it. This will help protect the color from fading or chipping over time. You can use a clear acrylic sealer or varnish for this step.
Oil Based Colored Pencils
If you’re a fan of coloring, you’ve probably used both oil-based and water-based colored pencils. But what’s the difference between the two?
Oil-based colored pencils are made with a wax or oil core, which is why they’re also sometimes called wax-based colored pencils.
This type of pencil can produce very vibrant and intense colors, but they can also be difficult to blend. Oil-based colored pencils are also known for being quite smudge-resistant.
Water-based colored pencils have a water-soluble binder in their core, which makes them much easier to blend than their oil-based counterparts.
They’re not as intense in color as oil-based pencils, but they’re still quite pigmented. Water-based colored pencils are also much easier to erase if you make a mistake.
Credit: www.jamawu.com
How Do You Preserve Colored Pencils on Wood?
When it comes to preserving colored pencils on wood, there are a few things you can do to ensure that your artwork lasts for years to come. One of the most important things to remember is to use a fixative spray before you begin coloring. This will help seal in the pencils and prevent them from fading over time.
Another tip is to avoid using water-basedcolored pencils on wood, as they are more likely to bleed and cause damage to the wood surface. Instead, opt for oil-based or wax-based colored pencils, which will provide better coverage and protection. Finally, be sure to store your finished artwork in a cool, dry place away from direct sunlight – this will help prevent any further fading or damage.
Can You Seal Colored Pencil?
Yes, you can seal colored pencil with a clear varnish. This will protect your work from smudging and fading.
Can You Use Colored Pencil on Wood?
Yes, you can use colored pencils on wood. The type of wood will determine how the colored pencils will react and what kind of finish you’ll get. For example, if you use a water-based colored pencil on a piece of pine, the color will soak into the wood and create a more natural look.
However, if you use an oil-based colored pencil on maple, the color will sit on top of the wood and give it a more polished look.
Do You Need to Seal Colored Pencil?
If you’re using colored pencils for crafting, chances are you’ll want to seal the ink to prevent smudging or fading. But do you need to seal colored pencil? The short answer is no – colored pencils don’t need to be sealed.
However, there are some benefits to sealing your work with a clear topcoat, like added durability and protection from the elements. If you’re still undecided, read on for more information about sealing colored pencils.
There are two main types of colored pencils: wax-based and oil-based.
Wax-based pencils have a softer core that’s easy to blend, but they’re also more likely to smudge. Oil-based pencils have a harder core that doesn’t blend as easily, but they resist smudging better. Either type of pencil can be sealed with a clear topcoat, but it’s not necessary.
One benefit of sealing colored pencil is that it makes the colors more vibrant. The clear coat acts like a magnifying glass, intensifying the colors underneath. If you want your work to really pop, sealing it is a good option.
Another benefit is that it adds durability and protection from the elements. A sealed drawing will be less likely to fade in sunlight or get damaged by moisture than an unsealed one.
So should you seal your colored pencil drawings?
It’s up to you! If you’re planning on displaying your work outdoors or in a place where it might be exposed to moisture, sealing it is probably a good idea. Otherwise, it’s not necessary – just enjoy your beautiful work!
Art Q&A – sealing your graphite and Colored Pencil – w/ Lachri
Conclusion
If you’re looking for a way to seal your colored pencils on wood, there are a few things you can do. You can either use a clear varnish or polyurethane, or you can use a wax-based product. Whichever method you choose, make sure you test it on a small area first to see how it works and if it’s compatible with the finish of your wood.