How to Paint a Snowman on Wood
To paint a snowman on wood, you will need to gather a few supplies. You will need white paint, black paint, and orange paint. You will also need a small brush, a large brush, and a piece of sandpaper.
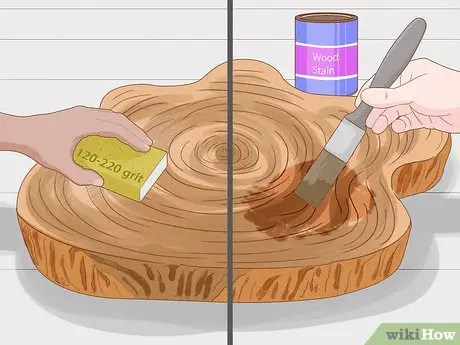
Once you have gathered your supplies, you will need to prepare your surface. Start by sanding down the piece of wood that you will be painting on. This will help the paint to adhere to the wood better.
Next, use the small brush to paint the entire surface of the wood white. Let this dry for about an hour before moving on to the next step.
How to Paint a Snowman on Wood! | Step by Step Tutorial
- Begin by sanding your wood piece to create a smooth surface for painting
- Next, select your paint colors and brushes
- For the snowman, you will need white, black, and orange paint
- Once you have everything you need, start by painting the entire wood piece white
- Once the white paint is dry, begin adding in the details of the snowman such as the eyes, mouth, and buttons with black paint
- Finally, use orange paint to add a carrot nose for your snowman! Allow all of the paint to dry completely before displaying or using your new painted wood piece
How to Paint a Cardinal Easy
Looking to add a little bit of color to your winter landscape? Why not try painting a cardinal! Cardinals are relatively easy to paint, and with just a few simple steps you can have your very own beautiful cardinal masterpiece.
To get started, you will need:
-Red, yellow, orange, black, and white acrylic paint
-A small brush
-A larger brush for blending colors
-A canvas or other surface to paint on
-Cardboard or paper plate for mixing colors on
1) Begin by sketching out your cardinal onto your canvas or surface. You can use light pencil strokes so that they are easy to erase if needed.
2) Once you have the basic shape of your cardinal sketched out, begin by painting the entire body with a base layer of red paint.
Allow this layer to dry completely before moving on.
3) Next, add in layers of yellow and orange around the edges of the wings and tail feathers. Use your smaller brush for this so that you can be as precise as possible.
Again, allow each layer to dry completely before moving forward.
4) To create depth and dimension within the feathers, start by adding some black paint along the outer edge of each feather. Then use your larger brush to blend the black into the red/yellow/orange layers beneath it.
This will give each feather a nice gradient effect.
5) Finally, add in some white highlights along the tips of the wings and tail feathers. Once again, use your smaller brush for precision and then blend with your larger brush if desired. Allow everything to dry completely before framing or displaying!

Credit: www.pinterest.com
How Do You Paint a Snowman Step by Step?
Assuming you would like a step by step guide on how to paint a snowman on canvas, here are the basics:
-Start with a white canvas. This will be the background of your snowman painting.
-Next, using a light blue or pale blue color, start painting the sky. Make sure to leave some areas of the white canvas showing through for clouds.
-Now it’s time to start painting the snowman!
Using a light grey color, start painting in his basic shape. Remember to make his arms slightly longer than they appear in real life, as this will make him look more jolly and cartoonish.
-Once the basic shape of the snowman is painted in, start adding details like his eyes, nose, mouth and buttons.
For his eyes you can either use small black dots or paint in small oval shapes. His nose can be an orange carrot shape or simply painted in with an orange color. The same goes for his mouth – you can either use a small curved line or paint it in with a dark red or brown color.
As for his buttons, you can either dot them on with black paint or carefully paint them in with different shades of grey (light grey for the top button, medium grey for the middle button and dark grey for the bottom button).
-Finally, give your snowman some extra personality by adding additional details like eyebrows (simple thin lines painted above his eyes), eyelashes (a few short strokes of black paint above and below each eye) or even freckles (small brown dots across his face)!
How Do You Paint a Snowman on a Board?
When it comes to painting a snowman on a board, there are a few things you’ll need to keep in mind. First, you’ll need to choose the right paint for the job. You’ll want to use either acrylic or latex paint, as these will adhere well to the board and won’t chip or peel over time.
Next, you’ll need to decide on your color scheme. For a traditional snowman, you’ll want to use white, black, and orange paint. However, feel free to get creative with your colors!
Once you’ve chosen your paint, it’s time to start painting. Begin by painting the entire surface of the board white. Once that layer is dry, start adding in your snowman’s features.
For the body of the snowman, use two large circles of white paint. Then, add two smaller circles for his eyes and an oval for his nose. For his arms, simply painted thin lines extending from his body.
And finally, give him a big black top hat and an orange carrot nose! Allow everything to dry completely before displaying your work of art!
How Do You Paint a Simple Snowman?
When it comes to painting a snowman, there are endless possibilities and no wrong answers. Whether you want your snowman to be traditional or unique, the key is to have fun with it! Here are a few tips on how to paint a simple snowman:
1. Choose your colors. For a traditional snowman, you’ll need white, black and orange paint. But feel free to get creative with other colors too!
2. Paint the entire surface of your canvas white. This will be the base color for your snowman.
3. Once the base color is dry, start adding in details like the eyes, nose and mouth with black paint.
You can also use orange paint for the carrot nose.
4. To finish off your snowman, add in some additional details like buttons or a scarf using whatever colors you like best!
How Do You Paint a Snowman for Christmas?
When it comes to painting a snowman for Christmas, there are a few things you’ll need to keep in mind. First, you’ll want to make sure that your paint is the right consistency. If it’s too thick, it won’t stick to the snowman very well and if it’s too thin, it will run.
You’ll also want to make sure that you have a good brush. A small brush will help you get into all of the nooks and crannies of your snowman and will give you more control over where the paint goes.
Once you have your supplies ready, you can start painting!
Begin by giving your snowman a white basecoat. This will help the other colors stand out and will make sure that your finished product is nice and even. Once the basecoat is dry, you can start adding in whatever other colors you’d like.
We suggest starting with the eyes, mouth, and buttons so that those features are nice and defined. Then move on to filling in the rest of the body however you see fit!
Remember – have fun with it!
Conclusion
This blog post will show you how to paint a snowman on wood. You will need some white paint, black paint, and orange paint. First, you will want to paint the entire piece of wood white.
Once the white paint is dry, you can start painting your snowman. Start with the head and then move down to the body. For the face, you will want to use the black paint for the eyes and mouth.
Then, use the orange paint for the nose. Once your snowman is painted, you can add some details like buttons or a scarf.