How to Make Wood Shingles
When it comes to making wood shingles, there are a few things you need to keep in mind. First of all, you need to make sure that the wood you select is of the highest quality. This means that it should be free of knots and blemishes, and it should be cut into thin strips.
Once you have your wood strips cut, you will then need to sand them down until they are smooth. After that, you can either paint or stain them, depending on your preferences.
EASY WAY TO MAKE MULTIPLE WOOD SHINGLES
- Choose the type of wood you want to use for your shingles
- Cut the wood into thin, uniform strips using a saw
- The strips should be about 3/8 inch thick and 16 inches long
- Place the strips on a work surface and smooth the edges with sandpaper
- Arrange the strips in overlapping rows, starting at the bottom of the roof and working up
- Make sure to offset each row so that the shingles are staggered
- Nail each strip in place using roofing nails or staples
How to Make Wood Shingles on a Table Saw
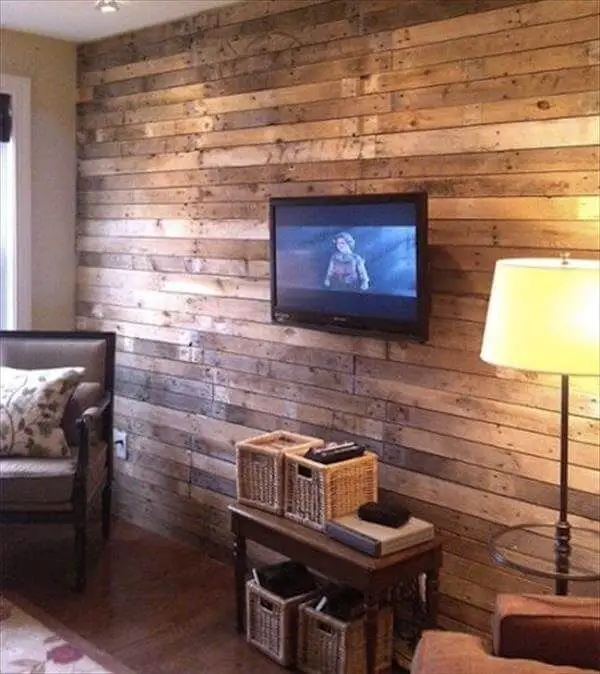
If you’re looking for a rustic look for your home, consider making your own wood shingles. Wood shingles can add an interesting texture and charm to any exterior surface. And best of all, they’re easy to make yourself with just a few tools and some patience.
Here’s how:
First, you’ll need to select the right lumber for your project. Cedar is a popular choice for wood shingles because it weathers well and has a nice grain pattern.
But you can use whatever type of wood you like. Just be sure it’s been properly dried so it doesn’t warp or crack once it’s installed.
Next, cut your lumber into strips that are about ¼ inch thick and 3-4 inches wide.
The length will depend on the size of the area you’re working on. Once all your strips are cut, use a table saw to rip them into thin shingles – aim for about 1/8 inch thickness.
Now comes the fun part: installing your new wood shingles!
Start at one end of your surface and work your way across, nailing each shingle in place as you go. Be sure to space them evenly so they look neat and tidy when finished. If necessary, trim off any uneven edges with a sharp knife or chisel before moving on to the next row.
And that’s all there is to it! With just a little bit of effort, you can give any surface – inside or out – a completely new look with wood shingles.

Credit: shopofminiatures.com
Can You Make Your Own Wooden Shingles?
Yes, you can make your own wooden shingles. You will need a few supplies and tools, but it is not a difficult process. Here are the steps to follow:
1. Choose the type of wood you want to use. Cedar is a good option because it is durable and resists rot. However, any type of wood will work.
2. Cut the lumber into thin strips using a saw. The thickness of the strips will determine the size of the shingles, so make them as thin or thick as you want.
3. Create a template for your shingles out of cardboard or another material.
This will help you get even cuts and avoid wasting wood.
4. Lay the strips of wood on top of the template and trace around it with a pencil. Then, use a handsaw to cut out each individual shingle following your traced lines.
5. Sand down any rough edges on the shingles using sandpaper until they are smooth to touch all around.
6 . If desired, stain or paint the shingles before installing them on your roof .
Be sure to let them dry completely before moving on to step 7 .
7 . Nail or screw the wooden shingles onto your roof , starting at the bottom edge and working up .
Make sure that each shingle overlaps the one below it by at least an inch ( 2 . 5 cm ) , in order to create a water-resistant seal .
Read: How to Make a Large Hole in Wood Without a Drill
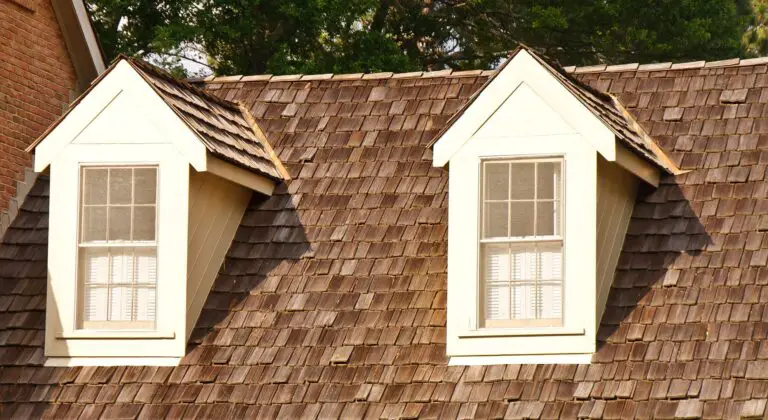
What Type of Wood is Used for Shingles?
There are a variety of woods that can be used for shingles, including cedar, redwood, and pine. Each type of wood has its own benefits and drawbacks that should be considered before making a final decision.
Cedar is a popular choice for shingles because it is naturally resistant to rot and insect damage.
Cedar is also easy to stain or paint, so it can be customized to match the look of your home. However, cedar is one of the more expensive options for shingles.
Redwood is another durable option for shingles that will last for many years.
Redwood is also resistant to rot and insects, but it can be more difficult to work with than cedar. Redwood shingles may also require more maintenance than other types of wood due to its high tannin content.
Pine is the least expensive type of wood used for shingles, but it does not have the same level of durability as cedar or redwood.
Pine is also susceptible to insect damage and will need to be replaced more frequently than other types of wood.
Can You Make Shingles Out of Plywood?
If you’re thinking of using plywood to make shingles for your home, you may want to think again. While plywood is a versatile material that can be used for a variety of projects, it’s not the best choice for making shingles.
There are a few reasons why plywood isn’t ideal for making shingles.
First, plywood is not as durable as other materials like cedar or asphalt. It’s also not as fire resistant, which is an important consideration if you live in an area prone to wildfires.
Additionally, plywood is not as easy to work with as other materials.
It can be difficult to cut and nail into place, and it’s also heavier than other options, so it can be challenging to install on your roof.
Overall, while you may be able to use plywood to make shingles, there are better choices out there that will provide more durability and easier installation. If you’re looking for the best material for your new roof, stick with cedar or asphalt shingles.
Read to know: How Do You Waterproof Plywood in a Bathroom?
What is the Difference between Wood Shingles And Wood Shakes?
Wood shingles and wood shakes are two types of roofing materials that are made from real wood. They both have their own unique look and feel, but there are some key differences between the two.
Wood shingles are cut thin and uniform in size, while wood shakes are split along the grain of the wood and can be thicker or thinner.
Wood shingles tend to be more expensive than wood shakes, but they also last longer.
When it comes to installation, wood shingles must be nailed in place, while wood shakes can either be nailed or anchored with screws. For this reason, many people prefer wood shakes for their ease of installation.
If you’re considering either type of material for your roof, it’s important to consult with a professional to see which option is best for your home.
Conclusion
Wood shingles are a classic roofing material that can give your home a rustic or traditional look. If you’re thinking about installing a wood shingle roof, here’s what you need to know.
First, you’ll need to choose the type of wood you want to use.
Cedar is a popular choice for wood shingles because it’s durable and has a natural resistance to rot and insects. You’ll also need to decide whether you want hand-split or machine-sawn shingles. Hand-split shingles are more expensive but have a more rustic appearance.
Once you’ve selected your wood, it’s time to install the shingles. Start by installing an underlayment of asphalt felt paper to protect your roof from leaks. Then, nail the shingles in place using galvanized nails.
Begin at the bottom of your roof and work your way up, overlapping each row as you go.
When installing wood shingles, it’s important to keep an eye on the weather forecast. Shingle installation is best done on days when there is no chance of rain or snow so that the adhesive can properly cure.