How to Make a Flute Out of Wood
In order to make a flute out of wood, you will need to have some basic carpentry skills and access to the proper tools. You will also need to find a piece of wood that is long and straight, and has a smooth surface. Once you have all of these things, you can follow these steps to create your own wooden flute.
How to make a wooden flute
- 1) Begin by cutting a piece of wood that is approximately two feet long
- 2) Cut the wood into thirds, making sure that each piece is equal in size
- 3) Take one of the pieces of wood and cut a slit down the middle, making sure that the slit is about an inch deep
- 4) Once you have cut the slit, take a knife and make small notches along the edges of the slit
- 5) Next, take another piece of wood and cut a hole in it that is large enough for you to blow into
- 6) Place the two pieces of wood together so that the slit lines up with the hole and tape them together
- 7) Finally, decorate your flute however you like!
How to Make a Flute Out of Wood With a Knife
Making a flute out of wood with a knife is not as difficult as it may seem. With the right tools and a little bit of patience, anyone can make a beautiful sounding flute.
The first step is to find a piece of wood that is the right size and shape.
It should be about 2 feet long and 6 inches wide. Once you have the piece of wood, use a saw to cut it into two pieces. One piece should be about 1 foot long and 6 inches wide.
This will be the body of the flute. The other piece should be about 1 foot long and 4 inches wide. This will be the mouthpiece of the flute.
Next, use a sharp knife to carve out a hole in the center of each piece of wood. The hole in the body of the flute should be about 1 inch wide and 3 inches deep. The hole in the mouthpiece should be about ½ inch wide and 2 inches deep.
Once you have carved out the holes, it’s time to start shaping the pieces of wood into their final form. First, use sandpaper to smooth out all of the rough edges on both pieces of wood. Then, use a file or rasp to create a gradual taper on both sides of each hole (this will help with airflow when you play).
Finally, use sandpaper again to give both pieces an overall smooth finish.. If desired, you can now stain or paint your flute before moving on to assembly.
.
To assemble your flute, first insert the mouthpiece into the body so that ¼ inch ˗ ½ inch ˗ofthe mouthpiece sticks out from top (this is where your lips will go when playing). Next, take two small screws (about 1/2inch long)and screw them into either side of wherethemouthpiece meetsthebody – this will help keep everything secure .Now it’s time try playing your newflute!

Credit: flutecraft.org
Can You Make a Flute from Wood?
Yes, you can make a flute from wood. The most common type of wood used for flutes is maple, although other woods such as cherry, walnut, and birch are also used. The type of wood you use will affect the sound of your flute, so it’s important to choose wisely.
Maple is a hardwood that produces a bright sound, while cherry is a softer wood that produces a warmer sound. Walnut and birch are somewhere in between.
When choosing wood for your flute, it’s important to select straight-grained lumber with few knots.
The grain should be fine and even, without any cracks or splits. You’ll also want to avoid woods that are treated with chemicals, as these can potentially damage your flute. Once you’ve selected the perfect piece of wood, you’re ready to get started on making your flute!
The first step is to cut the lumber into strips that are about 1 inch wide and 18 inches long. Next, use a router to carve out a groove down the center of each strip. Be sure to make the groove nice and deep – at least 3/8 of an inch deep.
Once all of your strips have been grooved, it’s time to start assembling them into the finished product.
To do this, simply take two strips and glue them together along their edges (be sure to use waterproof glue). Repeat this process until all strips have been glued together into one long tube – this is the body of your flute.
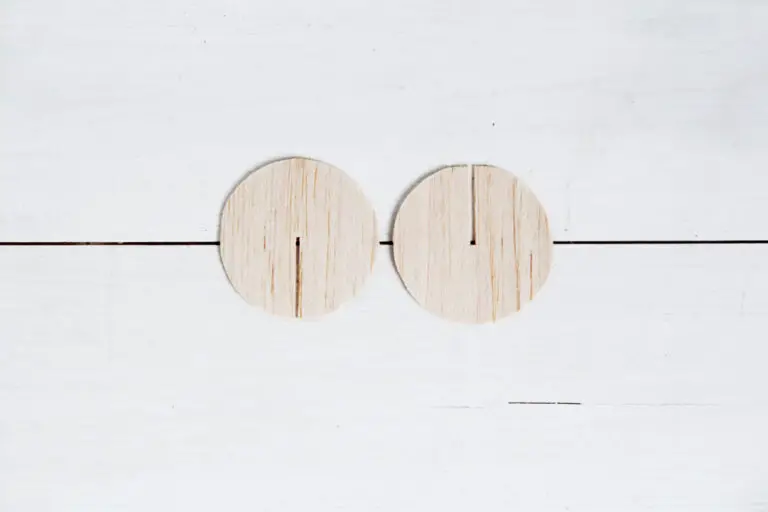
Now it’s time to add the mouthpiece. Cut a small disc out of another piece of wood (preferably something harder than maple) and drill a hole through its center just big enough for your breath to pass through easily. Glue this onto one end of the tube; this is now the mouthpiece end of your flute!
Finally, cut eight small slits evenly spaced around the other end of the tube – these will serve as finger holes when playing your flute later on. That’s it – you’re now ready to start playing music!
Which Wood is Used to Make Flute?
There are a few different woods that can be used to make flutes, each with its own unique characteristics. The most common wood used for flutes is grenadilla, which is a very dense and hard wood. This makes it ideal for producing a clear, focused sound.
Other woods that are sometimes used include rosewood and cocobolo, which both have a softer tone.
How Do You Make a Flute Step by Step?
Assuming you would like a tutorial on making a flute:
You will need:
-a saw (a coping saw or jewelry saw works well)
-a file
-small, round needle files
-sandpaper in various grits
-wood glue
-tape measure or ruler
-pencil
1. Cut two lengths of tubing to the desired length of your flute using the saw. The length will depend on the type of flute you want to make. For example, a traditional Native American flute is about 18 inches long.
2. Cut a third piece of tubing that will be used as the mouthpiece. This piece should be about 1 inch long.
3. File the ends of all three pieces of tubing until they are smooth.
4. Using sandpaper, smooth the outside of the tubing until it is completely free of any sharp edges or burrs.
5. Measure and mark where you will need to make holes for finger placement along one of the longer pieces of tubing . . .
How is a Wooden Flute Made?
Wooden flutes have been around for centuries, and their popularity is only increasing. But how are these beautiful instruments made? Let’s take a look at the process of making a wooden flute.
The first step is to find the right piece of wood. The most common type of wood used for flutes is grenadilla, though other woods like rosewood and maple can be used as well. Once the wood has been selected, it is cut into pieces that will eventually become the body, headjoint, and footjoint of the flute.
Next, holes are drilled into the wood for the various keys that will be added later. Once all of the holes are drilled, it’s time to start shaping the pieces into their final form. This is done by hand, using chisels and other tools to carefully carve out the desired shape.
After all of the pieces have been shaped, they are sanded smooth and then lacquered or varnished to protect them from moisture. Then, it’s time to add any final touches like keys or engravings before putting everything together. Finally, each piece is fitted together and glued in place to create your finished wooden flute!
Conclusion
If you’re looking for a fun and easy project, why not try making your own flute out of wood? It’s a great way to spend some time with your kids or grandkids, and you’ll end up with a beautiful musical instrument that you can enjoy for years to come. Here’s how to do it:
First, find a piece of wood that is about two feet long and four inches wide. You can use any type of wood, but a softerwood like cedar or pine will be easier to work with. Cut the wood into three pieces using a saw – one piece should be about eight inches long, and the other two should be six inches long.
Next, use a drill to make two holes in each of the shorter pieces of wood. These holes should be about an inch from the top and bottom of the wood, and they should be big enough to fit your pinky finger through.
Now it’s time to start shaping the flute.
Sand down all of the rough edges on the wood so that they are smooth. Then, using a sharp knife, carve out a small notch in each hole that you drilled earlier. This is where the air will escape when you play the flute, so make sure that the notches are big enough – but not too big!
Finally, assemble your flute by sliding the longer piece of wood through both of the holes in the shorter pieces. Once everything is snugly in place, give it a try! Put your lips around one of the holes and blow gently – you should hear a beautiful note coming from your homemade flute!