How to Electrify Wood With Microwave
Wood is a material that has been used for centuries to create a variety of objects, from furniture to houses. While wood is strong and durable, it is not typically considered a conductive material. This means that it cannot easily be used to create electrical circuits.
However, there is a way to electrify wood using microwave radiation.
- Find a piece of wood that is small enough to fit inside your microwave
- Rub the piece of wood with a cloth to remove any dirt or debris
- Place the piece of wood on a microwave-safe plate or surface
- Set the power level on your microwave to high and cook the wood for 1-2 minutes, or until it begins to smoke and spark
- Remove the piece of wood from the microwave carefully using oven mitts or gloves, as it will be hot
- Place the electrified piece of wood on a non-flammable surface, such as concrete, to avoid starting a fire
How to Make a Wood Burner Out of a Microwave Transformer
If you’re looking for a way to burn wood without using expensive equipment, then you’ve come to the right place. With a little bit of know-how, you can easily make a wood burner out of a microwave transformer.
First, gather your supplies.
You’ll need a microwave transformer, some heavy-duty wire, and some wood. Once you have everything, follow these steps:
1) Cut the wood into small pieces that will fit inside the transformer’s coil.
2) Wrap the wire around the coil tightly. Make sure there are no gaps between the turns of wire.
3) Connect one end of the wire to the positive terminal of the transformer, and the other end to the negative terminal.
4) Turn on the power and watch as your wood starts to smoke and then catch fire!
With this simple setup, you can now start burning wood anytime you want. Just be sure to exercise caution when working with electricity.
Fractal Wood Burning Microwave Transformer
A fractal wood burning microwave transformer is a device that can be used to create fractal patterns in wood. It works by using a high-powered microwave to heat the wood, which causes the wood to burn in a fractal pattern.
The fractal wood burning microwave transformer is a relatively new tool that has been used to create some stunning pieces of art.
It is still being perfected, but the results so far have been very impressive. With this tool, it is possible to create beautiful and intricate patterns in wood that would otherwise be very difficult or impossible to achieve.
If you are interested in trying out this new tool, there are a few things you should know before getting started.
First, you will need access to a high-powered microwave. Second, the piece of wood you want to use for your project must be completely dry. If it is not dry, it will not burn correctly and the results will be disappointing.
Once you have everything you need, the process of creating fractal patterns in wood is actually quite simple. First, choose the piece of wood you want to use and place it on the platform inside the microwave transformer. Then, turn on the power and wait for the microwaves to start heating up the wood.
As the microwaves heat up the wood, it will start toburn in a fractal pattern. The longer you leave it in the transformer,the more complex and detailed yourpattern will become. Once you are happy with your design, simplyturn offthe power and remove your piece of art fromthe transformer!
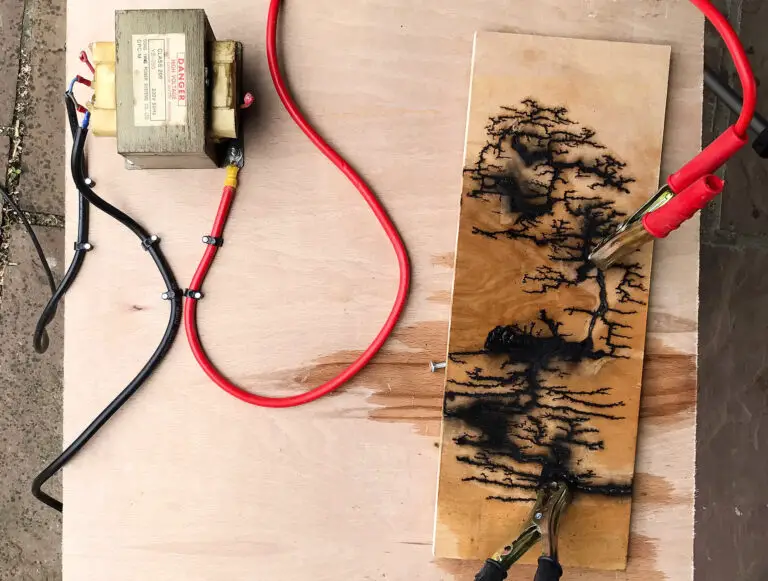
How to Make Lichtenberg Machine from Microwave Transformer
Lichtenberg machines are devices that create Lichtenberg figures, also known as fractal patterns. These patterns are created when electrical current is discharged through a dielectric material. The discharge creates a web of branching lines that form a beautiful pattern.
You can make your own Lichtenberg machine at home with a few simple materials. You will need a high voltage power supply, some sort of dielectric material, and something to discharge the electricity through the material (this can be anything from a metal rod to an aluminum foil).
Here’s a step-by-step guide to making your own Lichtenberg machine:
1. Start by winding your transformer. You’ll need about 10 turns of enameled copper wire for this. If you’re using an AC transformer, you can just wrap the wire around one of the prongs.
For a microwave transformer, you’ll need to remove the core from the center of the transformer and wind the wire around that. Keep in mind that microwaves operate at high frequency and voltage, so be very careful when handling these parts!
2. Once you’ve wound your transformer, connect it to your power source and turn it on.
Slowly increase the voltage until you see sparks starting to jump across the gap between the two electrodes (this is called corona discharge). At this point, you can either leave it on or slowly decrease the voltage until there is no longer any corona discharge occurring.
3a.
If you’re using an AC transformer: once corona discharge has started, touch one of the electrodes to your piece of dielectric material and hold it there until sparks start jumping from electrode to electrode (if they don’t start within 30 seconds or so, increase the voltage slightly). Move your hand away quickly once they do start jumping!
Diy Fractal Wood Burning Machine
Fractal wood burning is a technique used to create detailed and intricate designs in wood. It involves using a high-powered laser to burn away small sections of wood, creating patterns that resemble those found in nature.
This type of burning is often used for decorative purposes, but can also be used to create functional items like cutting boards or serving trays.
The process is relatively simple and only requires a few tools and materials.
If you’re interested in trying fractal wood burning, here’s what you need to get started:
A high-powered laser cutter/engraver.
These can be purchased online or at many hardware stores.
Wooden boards or blanks. Make sure to select a type of wood that won’t catch fire easily (e.g., maple, cherry, etc.).
Avoid using pressure-treated lumber as it may release harmful chemicals when burned.
Goggles and gloves for safety.
A design template.
This can be created using any graphics software (e.g., Adobe Illustrator) or found online .
once you have all of your supplies, simply load your design onto the laser cutter/engraver and adjust the settings as needed . Then, carefully place your wooden board onto the machine bed and press start .
The laser will do the rest!
Lichtenberg Wood Burning Microwave
Lichtenberg wood burning is a process of using high voltage to burn designs into wood. This can be done with a microwave oven, as the microwaves cause the water in the wood to vaporize and create steam. The steam then creates pressure that pushes the hot plasma away from the anode, which in turn burns the design into the wood.
This process was first discovered by Georg Christoph Lichtenberg, who was a German physicist. He noticed that when he discharged static electricity into resin, it would leave behind a beautiful fern-like pattern. He began experimenting with different materials and found that wood was the best conductor for this effect.
Lichtenberg wood burning is now commonly used to create art pieces and souvenirs. It’s a popular technique because it’s relatively easy to do and produces unique results every time. If you’re interested in trying your hand at Lichtenberg wood burning, all you need is some high voltage equipment and a piece of conductive material like copper or aluminum foil.

Credit: www.youtube.com
How Do You Use a Microwave to Burn Wood?
If you’re looking to add a bit of rustic charm to your home décor, one way to do it is by burning wood in your microwave. This technique is actually quite simple and only requires a few supplies that you likely already have on hand. Here’s how to burn wood in your microwave:
What You’ll Need:
– 1 piece of wood (any type will work, but softer woods like cedar or pine are easier to burn)
– A sharp knife
– A microwavable container filled with water (this will act as a humidifier and help prevent the wood from catching fire)
– A plate or other flat surface on which to place the wood while it burns
– matches or a lighter
Instructions:
1. Start by using your knife to carve designs or patterns into your piece of wood. The deeper the cuts, the more pronounced they’ll be once the wood is burned.
If you want, you can also use a stencil for this step.
2. Once your design is complete, place the piece of wood on top of the plate or other flat surface. Then, carefully pour some of the water from the container onto the wood.
Be sure not to use too much water, as this can cause the wood to warp or crack when heated.
3. Next, put the plate with the wetted down piece of wood into the microwave and set it for two minutes on high power. Depending on how thick your piece of wood is, you may need to adjust this time slightly – just keep an eye on it so that it doesn’t catch fire.
4. After two minutes have passed, remove the plate from the microwave cautiously – there will likely be some steam coming off of it so be careful not to get burned!
How Do You Do Fractal Burning on Wood?
Fractal burning is a technique used to create images on wood using a laser cutter. The laser cutter burns away small areas of the wood, creating a design that is made up of small, repeating patterns. This technique can be used to create both simple and complex designs, and the results can be very striking.
To fractal burn an image onto wood, you will first need to create a design file. This can be done in any graphics program that supports vector files (such as Adobe Illustrator or Inkscape). Once you have your design file ready, you will need to send it to a laser cutting service.
There are many companies that offer this service, and you can find them by doing a search online.
When choosing a company to do your fractal burning, it is important to make sure that they have experience with this type of work. You should also ask to see examples of their previous work before making your final decision.
Once you have found a company that you are happy with, simply send them your design file and let them know what size piece of wood you would like them to use for your project.
Once the laser cutting service has received your file and processed it, they will send you back a proof of your design. This proof will show you how the final product will look once it has been burned onto the wood.
If everything looks good, then all you need to do is approve the proof and wait for your finished piece!
What Voltage is Needed for Fractal Burning?
When it comes to fractal burning, the voltage that is needed will vary depending on a few factors. These include the type of material being burned, the size of the fractal, and the desired effect. In general, however, a higher voltage is needed for fractal burning than for traditional burning.
This is because fractals are more intricate designs than regular burns, and thus require more precise control. The best way to determine the exact voltage that you need for your project is to experiment with different settings until you find one that works well.
What Voltage is Needed for Lichtenberg?
Lichtenberg figures are created when high voltage is applied to a dielectric material, causing electrical charge to flow through the material in a branching pattern. The voltage needed to create Lichtenberg figures depends on the type of dielectric material being used. For example, acrylic can be etched with as little as 10-20 kV, while polycarbonate requires voltages in the range of 30-50 kV.
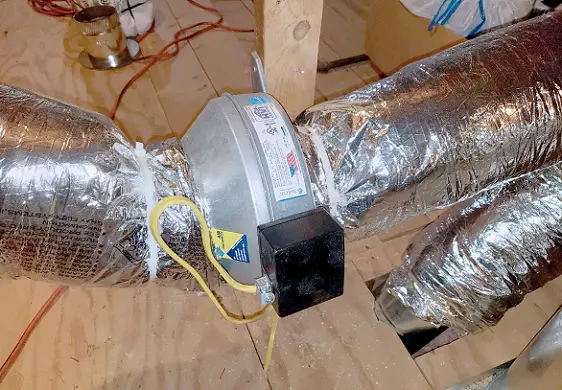
Safer Fractal Wood Burning (Lichtenberg) Setup
Conclusion
If you’re looking for a quick and easy way to electrify wood, then microwaving it is the way to go! This method is ideal for small projects where you need a bit of electricity, but don’t want to go through the hassle of wiring up a traditional electrical system. Plus, it’s safe and easy to do.
Here’s how:
First, gather your materials. You’ll need some wood that’s been sanded smooth, a microwave-safe container filled with water, and a 9-volt battery.
Next, place the wood in the container of water and make sure it’s completely submerged. Then, microwave the container for 2 minutes on high power.
After 2 minutes, carefully remove the container from the microwave (it will be hot!) and touch one end of the battery to the wood.
If everything was done correctly, you should see sparks flying! If not, try microwaving the wood for another minute or two before trying again.
That’s all there is to it!
Now you know how to electrify wood using nothing more than a microwave and a 9-volt battery.