How to Burn a Name into Wood
This is a guide on how to burn a name into wood. First, you will need to find a piece of wood that is big enough to fit the name you want to burn into it. Next, you will need to gather some supplies including a pencil, paper, and a wood burning tool.
Once you have all of your supplies, you will need to trace the outline of the name onto the piece of wood with the pencil. After tracing the outline, you will then use the wood burning tool to carefully fill in the letters. Be sure to go slowly and be careful not to burn too deeply.
Once you are finished filling in the letters, you can leave the wood as is or apply a finish if desired.
- -To start, gather the supplies you will need which include a piece of wood, a lighter, and a sharp object
- -Next, use the sharp object to carve out the name or design you want on the wood
- -Once you have carved out your design, use the lighter to lightly go over the carving
- -You may need to do this a few times until the wood is burned to your liking
- -And that’s it! You’ve now successfully burned a name or design into wood
How to Burn Letters into Wood Without Tools
If you want to add a personal touch to a wood project, burning letters into the wood is a great way to do it. And the best part is that you don’t need any fancy tools to do it! All you need is a piece of wood, some paper, and a pencil.
Here’s how to do it:
1. Trace your letters onto the paper. Make sure they are mirror images of what you want them to look like on the finished product.
2. Place the paper letter-side down onto the wood. Use a pencil or other pointed object to trace around the outline of each letter.
3. Remove the paper and you should see faint outlines of your letters on the wood.
4. Now it’s time to start burning! Use a small butane torch or lighter and carefully run the flame along each outline until the wood starts to darken and char. Keep the flame moving so that you don’t burn too deep into the wood – you just want superficial burns for this project.
5 .
How to Burn Large Letters into Wood
Wood burning is a fun and easy way to add personal touches to your home décor. You can use it to create artwork, write messages or even brand your initials into wood. If you’re new to wood burning, start with small projects like adding embellishments to picture frames or creating personalized coasters.
Once you get the hang of it, you can tackle larger projects like writing large letters into wood.
Here’s how to do it:
1. Choose the right type of wood.
Soft woods like pine are good for beginners because they’re easy to carve. Hardwoods like oak or maple will require more effort but they yield beautiful results.
2. Sketch your design onto the wood using a pencil or pen.
If you want perfectly straight lines, use a ruler or other straight edge as a guide while you draw.
3. Start carving out your design with a pyrography tool . This tool heats up and allows you to burn designs into the wood surface.
Don’t press too hard—just let the tip of the tool glide across the surface of the wood as you follow your sketch lines.
4. Experiment with different strokes and speeds to create different effects . For instance, try burning slowly for bolder lines or quickly for thinner ones.
You can also create shading by varying the pressure you apply with the pyrography tool—press harder for darker lines and lighter for softer edges .
5 Fill in any areas that need touch ups and allow the piece to cool completely before handling .
How to Burn Designs into Wood With a Torch
Are you looking for a unique way to personalize your woodworking projects? If so, consider using a torch to burn designs into the wood. This technique is relatively easy to do and can add a beautiful and intricate look to your work.
To get started, you’ll need a few supplies including a hand held torch, some scrap wood, and some tracing paper. Trace your design onto the tracing paper and then tape it onto the scrap wood. Next, use the torch to carefully trace over the lines of your design.
The heat from the torch will cause the paper to darken and eventually catch fire. Continue tracing until the entire design is complete.
Once you’re finished, let the wood cool completely before removing the paper.
Your burned design should be visible on the surface of the wood. You can leave it as-is or finish it with a clear sealer for added protection.
How to Wood Burn Small Letters
One of the most popular ways to wood burn small letters is by using a stencil. This allows you to create very precise and intricate designs. You can purchase pre-made stencils, or you can make your own.
If you decide to make your own, it’s important to use a material that will withstand the heat of the wood burning process. Cardboard or heavy paper work well.
Once you have your stencil ready, it’s time to start burning!
Make sure you’re working in a well-ventilated area, and wear gloves to protect your hands from the heat. Start by holding the tip of your wood burning tool against the edge of the stencil. Slowly move it along the edge, following the contour of the lettering.
As you work, apply more pressure or less pressure as needed to get a consistent line width.
After you’ve finished tracing around all of the letters in your stencil, go back and fill them in with color. To do this, simply hold the tip of your wood burner against one side of each letter and move it back and forth until the entire letter is filled in evenly.
When you’re finished filling in all of the letters, allow them to cool completely before removing the stencil.
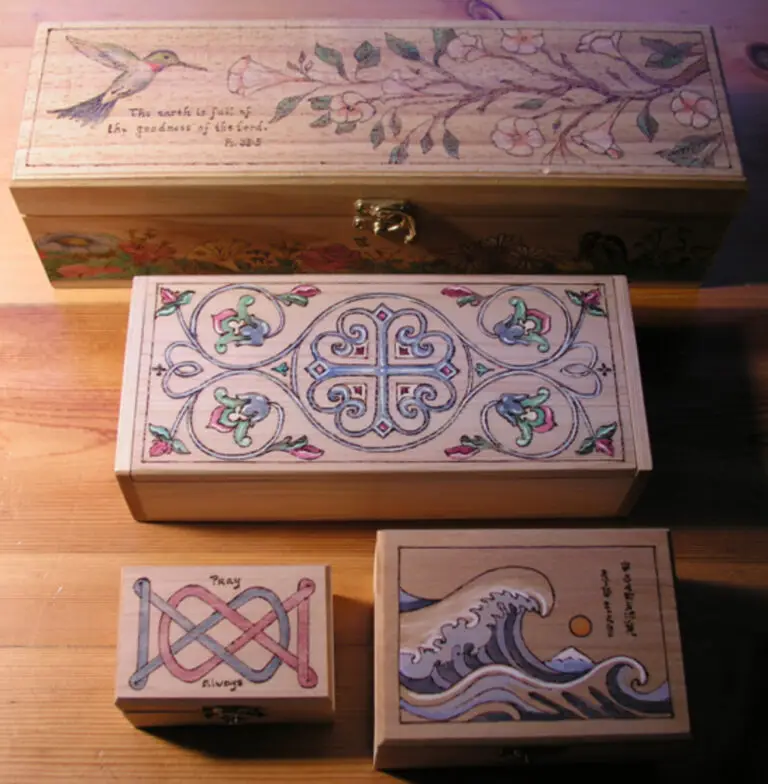
Wood Burning Letter Stamps
Wood burning letter stamps are a great way to add a personal touch to your projects. Whether you’re creating a sign, a piece of art, or just want to add some unique details, wood burning letter stamps are an easy way to do it.
There are different ways to use wood burning letter stamps.
You can either burn them into the wood directly, or use them as stencils and burn around the edges. Either way, they’re easy to use and give you lots of control over the final look of your project.
When choosing wood burning letter stamps, there are a few things to keep in mind.
First, consider the size and scale of your project. You’ll want to make sure the stamps are large enough to be seen but not so large that they overpower everything else. Second, think about the font style you want.
There are many different options available, so take some time to browse until you find something you like. Finally, don’t forget about the practicalities – make sure the stamp is comfortable to hold and easy to use before you commit to it!

Credit: www.pinterest.com
How Can You Burn Letters into Wood?
If you want to add a unique and personal touch to your woodworking projects, why not try burning letters into the wood? This technique is relatively simple and only requires a few supplies.
To get started, you’ll need some wood that is at least 1/4 inch thick.
Soft woods like pine or cedar are ideal for this project. You’ll also need a soldering iron or pyrography pen with a fine tip. And finally, you’ll need some letter stencils or templates.
Once you have all of your supplies gathered, set up your workspace in a well-ventilated area. Then, plug in your soldering iron or pyrography pen and let it heat up to the proper temperature. While it’s heating up, position your stencils or templates on the wood so that they’re ready to go.
When the tip of your soldering iron or pyrography pen is hot enough, begin tracing over the outlines of the letters with steady pressure. The goal is to evenly burn the outline of each letter into the wood without going too deep. After you’ve burned all of the letters into the wood, remove the stencils or templates and allow the wood to cool completely before handling it further.
How Do You Burn Letters in Wood Without Tools?
There are a few ways that you can burn letters into wood without using any tools. One way is to use a soldering iron. Another way is to use a wood burning pen.
If you’re using a soldering iron, the best way to do it is to find a thin piece of wood that you can easily hold onto with one hand. Place the end of the soldering iron against the piece of wood and quickly move it back and forth in the same spot until you’ve burned through the wood. You’ll need to move quickly so that the heat doesn’t have time to spread out and cause uneven burns.
If you’re using a wood burning pen, start by heating up the tip of the pen on an open flame. Once it’s hot, touch it briefly to the surface of the wood in order to create a small charred area. Then, use this area as your starting point and draw your letters or designs onto the wood.
The key here is to apply just enough pressure so that the pen leaves a dark mark, but not so much pressure that you actually remove any charred material from the surface of the wood.
What is It Called When You Burn a Name into Wood?
When you burn a name into wood, it’s called pyrography. Pyrography is the art of burning designs into wood using a heated tool. It’s a centuries-old technique that was once used to decorate furniture and other household items.
Today, pyrography is enjoying a resurgence in popularity as people rediscover the beauty and versatility of this unique art form.
How Do You Burn a Name into Wood With a Torch?
To burn a name into wood with a torch, you will need:
-A torch
-Wooden board
-Tape
-Pencil
First, use the tape to secure the wooden board to a flat surface.
Then, use the pencil to write the name you want to burn into the wood. Make sure the letters are large and evenly spaced.
Next, light the torch and hold it close to the wood, moving it slowly over the letters.
The heat from the torch will cause the wood to darken and char. Keep moving until all of the letters have been burned into the wood.
Finally, let the board cool completely before removing it from the surface.
Your burnt name should now be permanent!
How To Wood Burn Letters
Conclusion
This blog post describes how to burn a name into wood. The author starts by explaining what tools you will need, including a pencil, a piece of wood, and a burning tool. Next, the author provides step-by-step instructions for how to burn the name into the wood.
Finally, the author offers some tips for troubleshooting and finishing the project.