How to Add Wood Beams to Ceiling
Wood beams are a great way to add character and charm to any room in your home. Here are a few tips on how to add wood beams to your ceiling:
1. Determine the size, shape and number of beams you need.
2. Cut the beams to size using a saw.
3. Install the beams by nailing them into place or by screwing them into place with lag screws.
4. Finish off the look by adding trim around the edges of the beams if desired.
- Choose the location of your beams
- You will want to consider both aesthetics and function when deciding where to place your beams
- Cut the lumber for your beams to the desired length
- If you are using real wood, you will also want to distress the lumber before assembly
- Assemble your beams by nailing or screwing the pieces of lumber together
- Install the assembled beams onto your ceiling joists using hangers or other supports as needed
- Finish off the look of your beams by adding trim or other decorative touches as desired
Cost to Install Wood Beams on Ceiling
If you’re considering adding wood beams to your ceiling, you may be wondering about the cost. Here’s a breakdown of what you can expect to pay for this project.
The first thing you’ll need to do is decide on the type of wood beams you want.
There are many different options available, so be sure to do your research and choose the style that best fits your home. Once you’ve made your selection, it’s time to start thinking about installation costs.
Generally speaking, installing wood beams is not a DIY project.
Unless you have extensive experience working with lumber and construction, it’s best to leave this job to the professionals. Installation costs will vary depending on the size and scope of your project, but expect to pay at least $500 for labor alone.
In addition to labor costs, there are also materials to consider.
The price of lumber will vary depending on the type of wood you select, but plan on spending at least $100 for enough material to complete your project. When it’s all said and done, expect to pay between $600-$1,000 for a basic wood beam installation job.
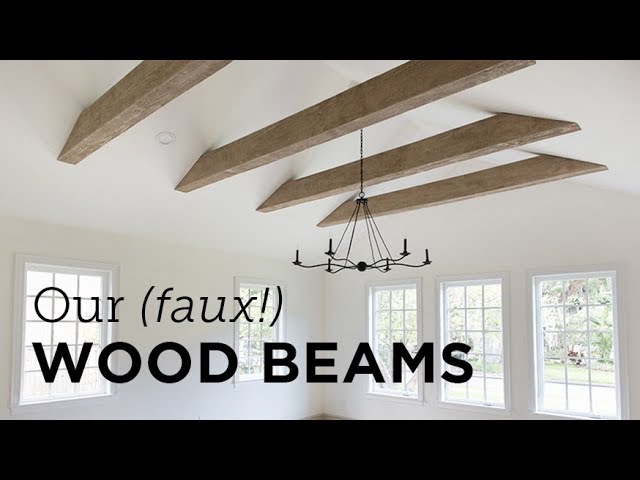
Faux Wood Beams for Ceiling
Faux wood beams are an excellent way to add character and warmth to a room. They can be used to create a variety of looks, from rustic to modern. Faux wood beams are made from high-quality polyurethane that is designed to last for years.
They are also easy to install and can be painted or stained to match your existing decor. Whether you’re looking for a quick and easy way to add some charm to your home or you’re planning a major renovation, faux wood beams are a great option.
How to Install Faux Wood Beams in Vaulted Ceiling
One of the most popular design trends today is to install faux wood beams in a vaulted ceiling. This gives your home an instant “upgrade” and can really transform a space. If you’re thinking about installing faux wood beams in your own home, here’s what you need to know!
The first step is to determine where you want your beams to go. It’s important to consider things like doorways and windows when making your decision – you don’t want your beams to block any natural light coming into the room. Once you have a general idea of where they should go, use a tape measure to get the exact measurements.
Next, it’s time to order your beams! There are many different companies that sell faux wood beams, so take some time to compare prices and styles before making your final decision. Once you have your beams, it’s time for installation.
If you’re comfortable working with tools, then installing the beams yourself is definitely an option. However, if you’d rather leave it to the professionals, that’s perfectly fine too. Either way, once the beams are in place, all that’s left to do is sit back and enjoy your new vaulted ceiling!
Faux Wooden Beams
If you’re looking to add some character and charm to your home, faux wooden beams are a great way to do it! Faux beams are made from various materials including polyurethane, polystyrene, and fiberglass – making them much lighter and easier to install than real wood beams. And because they come in a variety of styles and sizes, you can find the perfect set of beams for your home.
Once you’ve decided on the style of faux beam you want, installation is easy! Most fake beams come with all the necessary hardware needed for installation. And if you’re not comfortable doing it yourself, many companies offer installation services.
Once installed, enjoy your new faux wood beams for years to come!
Faux Ceiling Beams
Faux ceiling beams are an excellent way to add architectural interest to a room without having to do any major construction. They can be made from a variety of materials, including wood, polyurethane, and even plaster. There are many different ways to install them, so you can really get creative with your design.
Here are some things to keep in mind when choosing faux beams for your ceiling:
Size – Faux beams come in all sorts of sizes, so you’ll need to measure your space before selecting the right ones. Keep in mind that they will also add some height to the room, so account for that when planning where they will go.
Style – There are many different styles of faux beams available, from rustic barn wood to sleek and modern designs. Browse through pictures online or in magazines to get an idea of what would look best in your space.
Material – As mentioned above, faux beams can be made from a variety of materials.
Wood is the most popular option since it looks the most realistic, but polyurethane beams are much lighter and easier to install. Plaster beams are another option if you want a more traditional look.
Installation – Faux beams can be installed in several different ways.
The easiest is probably using adhesive strips or brackets that attach directly to the ceiling joists. But if you want a more permanent solution, you could also nail or screw the beams into place. Just make sure you consult with a professional before tackling this project yourself!
Credit: www.youtube.com
How Much Does It Cost to Add Wood Beams to a Ceiling?
Adding wood beams to a ceiling can range in cost from $500 to $5,000 or more, depending on the size and type of beams used. Beams are typically made of real wood, but can also be constructed from faux wood or metal. The cost of installation will also depend on the difficulty of the project and the height of the ceiling.
How Do You Attach Wood Beams to a Ceiling?
There are a few ways to attach wood beams to a ceiling. The most common way is to use hangers or brackets that are screwed into the ceiling joists. Another way is to use lag bolts or screws that go through the beam and into the ceiling joist.
Whichever method you choose, make sure the fasteners are rated for holding the weight of the beam.
How Much Does It Cost to Add Wood Beams?
Adding wood beams to a home is not as expensive as one might think. The cost of the wood beams themselves is relatively low, and the installation costs are also reasonable. on average, adding wood beams to a home will cost between $1,000 and $4,000.
How to Build a Wooden Beam for a Ceiling?
Whether you’re constructing a new home or renovating an existing one, you may need to add or replace ceiling beams. Beams can serve both structural and aesthetic purposes. If your ceilings are in good condition but lack character, adding beams can give your home an updated look.
Or if your ceilings are sagging or otherwise in need of reinforcement, installing beams will provide the support needed to keep your ceilings looking great for years to come.
Building a wooden beam for a ceiling is not as difficult as it might seem at first glance. With some basic carpentry skills and the right tools, you can have your beam installed in no time.
Here’s what you’ll need to do:
1. Measure the span of the area where the beam will be installed. This will determine the length of lumber you’ll need to purchase.
2. Cut two pieces of lumber to the determined lengths. These will serve as the top and bottom plates of your beam.
3. Cut additional lumber into smaller pieces, called studs, that will fit snugly between the top and bottom plates.
The number of studs you’ll need will depend on the width of your beam; wider beams require more studs than narrow ones.
4 . Nail or screw the studs into place between the top and bottom plates, spaced evenly apart (usually about 16 inches).
Be sure to predrill holes for screws to prevent splitting the wood.)5 Attach any decorative molding you desire around the perimeter of the beam before installation begins..6 To install the beam, first find its center point by measuring from each end and mark with a pencil.
.7 Affix L-brackets to either side of this center point on both top plate and bottom plate..8
DIY Box Beams | Easy Faux Beams
Conclusion
Adding wood beams to your ceiling can give your home an elegant, rustic look. Here are some tips on how to add wood beams to your ceiling:
1. Decide where you want the beams to go.
Measure and mark the spots on the ceiling where the beams will be installed.
2. Cut the lumber for the beams to the correct size. If you’re not sure how to do this, ask a friend or family member who is handy with tools for help.
3. Install brackets or other supports for the beams, following the manufacturer’s instructions.
4. Place the beam in position and secure it with screws or nails. Repeat this process for each beam until all of them are installed.