How Do You Stabilize Wood
The most common way to stabilize wood is by using a vacuum chamber. This chamber removes all the air from around the wood, which prevents it from drying out and cracking.
One of the most common questions we get asked at our woodworking shop is “how do you stabilize wood?” The answer is actually quite simple – you use a process called stabilization. Stabilization is a method of treating wood so that it becomes more resistant to changes in temperature and humidity.
This makes the wood less likely to warp, crack, or split over time. There are several ways to stabilize wood, but the most common method is to use a stabilizing resin.
Stabilizing resin is a clear liquid that penetrates deep into the pores of the wood.
Once it has penetrated, the resin hardens and creates an invisible barrier against moisture and temperature changes. This barrier helps to prevent the wood from warping, cracking, or splitting over time. There are several brands of stabilizing resin on the market, but we prefer using Crystal Clear™ from Equalizer®.
It’s easy to use and gives great results every time.
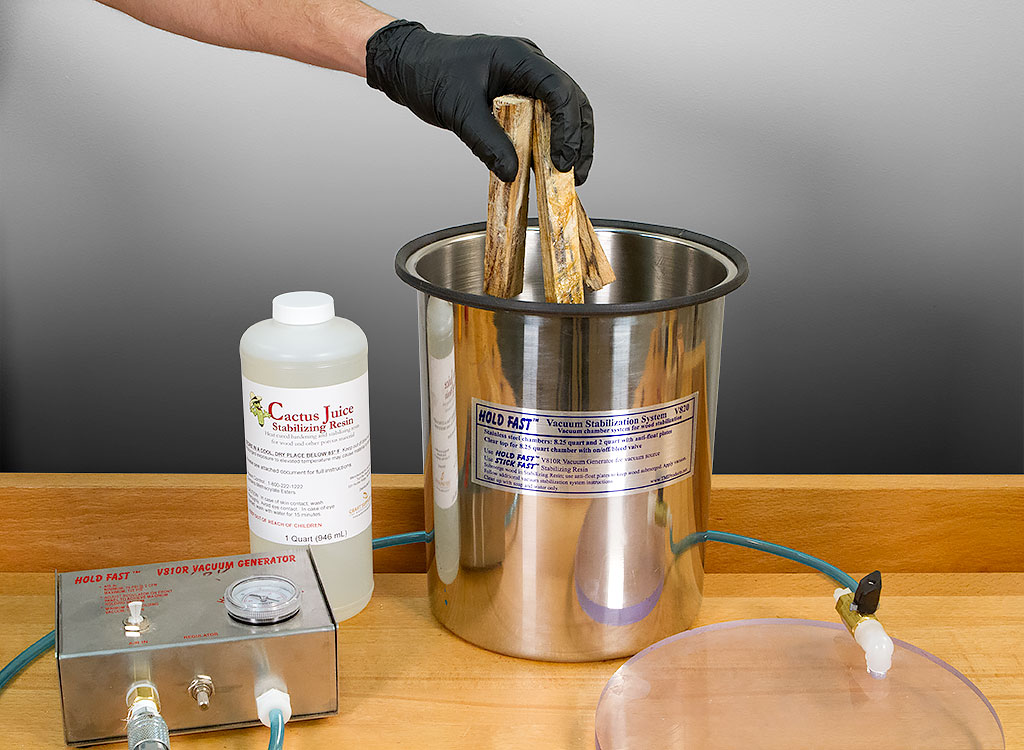
To stabilize wood with stabilizing resin, simply apply a generous amount of resin to all surfaces of the piece using a brush or sprayer. Make sure to saturate all areas evenly – you don’t want any bare spots!
Once all surfaces are coated, place the piece in a vacuum chamber and seal it tight. Then turn on the vacuum pump and let it run for 24 hours or until the desired level of vacuum has been reached (usually around 28 inches Hg). After this time has passed, remove the piece from the chamber and allow it to cure for 24 hours before proceeding with your project.
Now your piece of wood is stabilized and ready for whatever you have planned!
Stabilizing Wood Without Vacuum
One of the most common ways to stabilize wood is by using a vacuum. This method is often used on larger pieces of wood that are too big to fit into a kiln. The vacuum pulls all of the air out of the chamber and replaces it with nitrogen.
This removes all of the moisture from the wood and makes it much more stable.
How to Stabilize Wood at Home
Stabilizing wood is a process of adding strength and stability to wood so that it can be used for construction or other purposes. There are many ways to stabilize wood, but the most common method is to use chemicals.
There are several chemicals that can be used to stabilize wood.
The most commonly used chemical is polyurethane. Polyurethane is a polymer that bonds with the cellulose in the wood, making it stronger and more resistant to moisture. Other chemicals that can be used include epoxy, resin, and wax.
The process of stabilizing wood usually begins with soaking the wood in water for 24 hours. This allows the water to saturate the wood and make it easier for the chemicals to bond with the cellulose. After soaking, the wood is then placed in a vacuum chamber where it is exposed to high pressure and low temperature.
This removes any air bubbles from the wood and makes sure that all of the pores are filled with chemicals. Finally, thewood is cured under ultraviolet light or heat lamps until it is completely dry.
How to Stabilize Wood for Turning
Are you interested in turning wood but don’t know how to stabilize it? Stabilizing wood is an important process that ensures your finished product will be strong and durable. There are a few different ways to stabilize wood, and the best method for you will depend on the type of wood you’re using and the end result you’re hoping to achieve.
One popular method of stabilizing wood is by using super glue. This method works well for small pieces of wood that will be used for decorative purposes. Simply apply a generous amount of super glue to the piece of wood and allow it to dry completely.
Once dry, the wood will be much stronger and less likely to warp or break during the turning process.
Another common method used to stabilize wood is by treating it with a resin solution. This method works well for larger pieces of wood that need to be extra strong, such as table legs or chair arms.
To treat your wood with resin, simply soak it in the solution for 24 hours before beginning your project. The resin will help strengthen the fibers in thewood, making it less likely to warp or break during turning.
No matter which method you choose, stabilizing your wood before turning is an important step that should not be overlooked!
Wood Stabilizing Kit
Are you interested in working with wood, but worried about it warping or cracking? A wood stabilizing kit can help you prevent these issues and allow you to work with confidence.
Wood stabilizing kits usually include a resin and hardener that are mixed together and applied to the wood.
The mixture penetrates into the wood, filling any voids or pores. Once it cures, the wood is much less likely to warp or crack.
There are many different brands and types of wood stabilizing kits available on the market.
Some are designed for specific types of wood, while others can be used on any type of wood. Be sure to read the instructions carefully before use, as each kit will have its own mixing and application instructions.
A wood stabilizing kit can be a great investment if you want to work with wood without worrying about damage.
It can give you the peace of mind knowing that your projects will turn out just the way you want them to!
How to Stabilize Wood for Knife Handles
If you’re looking to make your own knife handles, you’ll need to know how to stabilize wood. This process will ensure that your handle is strong and durable, able to withstand the rigors of use. Here’s how to do it:
First, select the piece of wood you’ll be using for your handle. It’s important to choose a piece that is free of cracks or knots, as these can weaken the overall structure. Cut the wood to size, then sand it smooth.
Next, drill a series of holes into the wood. These holes should be evenly spaced and go all the way through the thickness of the material. Fill each hole with epoxy resin, then insert metal rods into the holes.
The rods should be slightly longer than the thickness of the material so that they protrude out slightly on either side.
Allow the epoxy to cure completely, then trim off any excess rod that protrudes from the sides of the wood. Your handle is now stabilized and ready for use!
Credit: blog.woodturnerscatalog.com
What Can You Use to Stabilize Wood?
There are a few different ways that you can stabilize wood. One way is to use a product called Wood Hardener. This is a liquid that you brush onto the wood, and it soaks in and hardens the wood fibers, making them less likely to break or splinter.
Another option is to use epoxy resin. This is a stronger adhesive that will bond the wood fibers together, making them more resistant to damage. You can also use screws or nails to fasten the pieces of wood together, which will help prevent them from moving or shifting and becoming unstable.
How Do You Dry And Stabilize Wood?
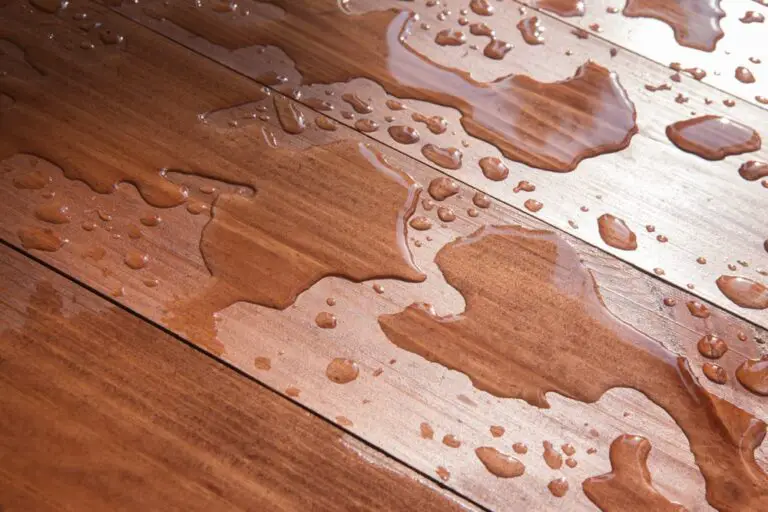
Wood is a hygroscopic material, meaning it naturally absorbs and retains water. This can cause problems when trying to dry and stabilize wood, as the moisture content can fluctuate depending on the humidity levels. If the wood is not dried properly, it can warp, crack or even rot.
There are several methods that can be used to dry and stabilize wood. The most common method is air drying, which involves slowly drying the wood in a controlled environment. This can take several weeks or even months, depending on the thickness of the wood.
Another option is kiln drying, which uses heat to speed up the drying process. This method can be quicker than air drying but it can also be more expensive and may cause some damage to the wood if not done correctly.
Once the wood has been dried, it needs to be stabilized so that it doesn’t absorb too much moisture from its surroundings.
This can be done by using a sealant or a stabilizer solution. Sealants will create a barrier around the wood that will prevent moisture from getting in, while stabilizers penetrate into the wood and help to regulate its moisture content.
How Do You Stabilize Wood Steps?
If your wood steps are starting to show signs of wear and tear, or if they’re just looking a little bit dated, you can give them new life by stabilizing them. Stabilizing wood steps is a relatively easy process that anyone can do, and it will make your steps look like new again.
The first step in stabilizing wood steps is to clean them thoroughly.
Be sure to remove any dirt, dust, or debris that has built up on the surface. Once the steps are clean, you’ll need to sand them down using a medium-grit sandpaper. This will help to create a smooth surface for the next step.
Now it’s time to apply a primer to the wood steps. This will help the stabilization products adhere better and also provide a barrier against moisture damage. Once the primer is dry, you can start applying the stabilization products according to the manufacturer’s instructions.
These products usually come in aerosol cans so they’re easy to apply evenly across the surface of the wood steps.
After allowing the stabilization products to dry completely, you can optional finish off your newly revitalized wood steps with a fresh coat of paint or stain. Now enjoy your beautiful, stabilized wood steps for years to come!
How Do You Stabilize Large Pieces of Wood?
If you’re working with large pieces of wood, there are a few things you can do to stabilize them. First, make sure the wood is dry. Wet wood is more likely to warp and twist as it dries, so it’s important to start with dry lumber.
Next, use clamps to secure the piece of wood to a work surface. This will help prevent it from moving around while you’re working on it.
Finally, use support blocks under the wood to keep it level and steady.
This will help prevent the wood from tipping or wobbling as you work.
How to Stabilize Wood and What is Stabilization
Conclusion
In order to stabilize wood, you need to first identify the problem areas. Once you have done that, you can then begin the process of repairing those areas. In some cases, this will involve simply sanding down the wood and then applying a sealant or other type of finish.
In other cases, it may be necessary to replace damaged boards or even sections of the wood.