Best Wood Burning Tip for Lines
If you’re looking for the best wood burning tip for lines, then you’ve come to the right place. Here are a few tips that will help you get started:
1. Start by finding a piece of wood that is the right size and shape for your project.
2. Once you have your piece of wood, use a pencil to sketch out your design.
3. When you’re ready to start burning, use a thin line tool to slowly trace over your pencil lines.
4. As you work, keep the tip of your tool at a consistent distance from the surface of the wood so that your lines are even and clean.
There are a few different ways that you can get nice, clean lines when burning wood. The most important thing is to use a sharp knife or chisel to make your cuts. This will ensure that the lines are crisp and clean.
Another tip is to use a template. You can either purchase one online or make your own out of thin plywood or cardboard. Simply trace the outline of your design onto the template and then use it as a guide when burning your lines into the wood.
Finally, practice makes perfect! The more you burn, the better you’ll get at it. So don’t be discouraged if your first few attempts aren’t perfect.
Just keep at it and soon you’ll be churning out beautiful wood burned designs like a pro!
Best Wood Burning Tip for Writing
There are a few things to keep in mind when you’re writing with a wood-burning pen. First, make sure the wood is dry – otherwise, your ink will smudge. Second, use a light touch – too much pressure will cause the pen to skip.
And finally, be patient – it takes a little practice to get the hang of it!
With those tips in mind, here’s how to get started:
1. Choose your wood.
Any type of wood will work, but some burn more evenly than others. Softwoods like pine or cedar are good choices, as are hardwoods like oak or maple. Avoid using treated lumber, which can release harmful chemicals when burned.
2. Prepare your wood surface. Sand it smooth so that your ink will glide across the surface without catching on any rough edges. If you’re working with an unfinished piece of wood, you may want to apply a layer of primer before sanding (this step is optional).
3. Draw your design. Use a pencil or other sharp object to sketch out your design on the prepared wood surface. Keep in mind that the lines you draw will be permanent – so take your time and double-check your work before moving on!
4 . Start burning! Hold the tip of your pen against the paper and start tracing over your lines slowly and evenly.
The heat from the pen will darken the wood as you go – so don’t be afraid to experiment with different pressures and speeds until you find what works best for you . Just remember: go slow and steady for best results . 5 . Let it cool . Once you’ve finished burning , give t he piece time t o cool completely before handling it further . This will help prevent any accidental smudging or damage .
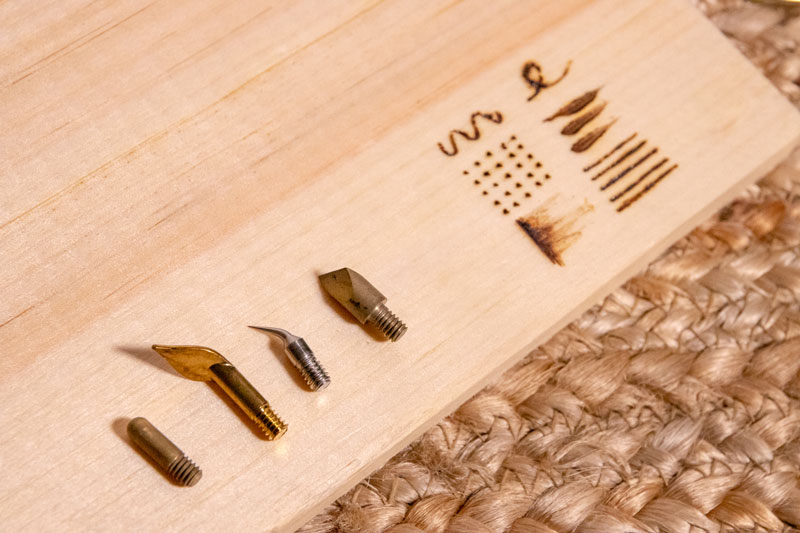
Wood Burning Tip Types
There are three main types of wood burning tips: the chisel tip, the pencil tip, and the universal tip. Each one is designed for a different purpose, so it’s important to choose the right one for your needs.
The chisel tip is great for creating wide, sweeping strokes.
It can also be used to create fine lines and detailed work. The pencil tip is perfect for creating precise lines and details. And the universal tip can be used for both wide strokes and fine lines.
No matter which type of wood burning tip you choose, always remember to use caution when working with fire. Be sure to follow all safety precautions, and never leave your project unattended while it’s still hot.
Wood Burning Tip Guide
Are you looking for some tips on how to best burn wood? If so, then you’ve come to the right place! Here are a few tips that will help you get the most out of your wood burning experience:
1. Make sure the wood is dry. Wet wood doesn’t burn as well and can produce more smoke.
2. Cut the wood into smaller pieces.
Smaller pieces will burn more evenly and produce less smoke.
3. Use a good quality firewood. Hardwoods like oak or maple burn better than softwoods like pine.
4. Don’t overload the fire. A small fire is easier to control and produces less smoke.
5. Keep a close eye on the fire and add more wood as needed.
Don’t let it get too low or it will start smoking heavily.
Wood Burning Tips for Beginners
Are you interested in taking up wood burning as a hobby? If so, then you’ve come to the right place! In this blog post, we’ll be giving you all the tips and tricks you need to get started with wood burning.
One of the most important things to keep in mind when burning wood is safety. Always make sure that your work area is well-ventilated and that you’re wearing protective gear, such as gloves and a face mask.
When you’re ready to startBurning your design into the wood, there are a few different techniques that you can use.
One popular method is to use a stencil; this will help ensure that your design is clean and crisp. Another option is freehand burning; this gives you more flexibility with your design but can be more challenging to master.
Once you’ve burned your design into the wood, it’s time to add some color!
You can do this by using stains or paints specifically made for woodburning projects. Experiment with different colors and techniques until you find a look that you love.
Thanks for reading!
We hope these tips have inspired you to give wood burning a try.
How to Make Your Own Wood Burning Tips
Making your own wood burning tips is easy and only requires a few supplies. You will need a sharp knife, some sandpaper, and a piece of metal or wood to use as a base. The most important part of making your own tips is to make sure the edges are nice and sharp.
This will ensure that you get a clean burn when using them.
To start, take your knife and carefully sharpen the edge. It doesn’t have to be perfect, but you want it to be nice and sharp.
Once the edge is sharpened, take your sandpaper and lightly sand down any roughness on the surface of the metal or wood. This will help create an even surface for burning.
Now it’s time to start burning!
Take your tip and press it firmly against the surface of your chosen material. Apply pressure evenly as you move the tip across the surface. You should see a thin line of smoke coming from the tip as you burn; this means that you’re doing it correctly!
Keep moving until you’ve created the design or pattern that you want.
And that’s all there is to it! Making your own wood burning tips is easy and only requires a few supplies.
With a little practice, you’ll be able to create beautiful designs in no time at all!
Credit: www.momsandcrafters.com
How Do You Burn Fine Lines on Wood?
If you’re looking to add a bit of character to your woodworking projects, burning fine lines into the surface is a great way to do it. But how exactly do you go about doing it?
The first thing you’ll need is a woodburning tool.
These come in a variety of shapes and sizes, so choose one that will be comfortable for you to use. Once you have your tool, practice using it on some scrap wood before moving on to your project piece. This will help you get a feel for how the tool works and how much pressure you need to apply.
When you’re ready to start burning lines into your wood, sketch out your design first. This will help you plan where each line needs to go and make sure everything is symmetrical. Then, simply hold the tip of your woodburning tool against the wood and move it along the line that you’ve drawn.
The heat from the tool will cause the wood to darken and burn away, leaving behind a crisp line.
If at any point you make a mistake or want to change something, simply sand down the area until it’s smooth again and start over. With a little practice, you’ll be able to create beautiful burned designs on all kinds of wooden surfaces!
What is the Best Wood Burning Tip for Writing?
One of the best tips for wood burning is to use a pencil to sketch your design onto the wood before you start burning. This will help you visualize where you want your lines to go and give you a better idea of how the final product will look. It’s also a good idea to practice on some scrap wood first so that you can get a feel for how much pressure to apply and how fast or slow to move your pen.
When you’re ready to start burning, be sure to use even strokes and go slowly at first until you get the hang of it.
Which Wood Burning Tip is Best for Shading?
There are a few different ways that you can shade your wood burning project. One way is to use a pencil or other pointed object to lightly draw lines where you want the shading to be. Another way is to use a piece of carbon paper between your project and the tracing paper.
The carbon paper will transfer the image onto your project and you can then use a pen or pencil to fill in the shading.
Are Wire Tips Better for Woodburning?
There is a lot of debate out there about whether wire tips or woodburning tips are better for pyrography. In this blog post, we will take an in-depth look at both types of tips to see which one is better suited for the art of woodburning.
Wire Tips
Wire tips are made from, you guessed it, wire! They come in a variety of shapes and sizes, but they all have one thing in common – they conduct heat very well. This makes them ideal for woodburning because it means that the heat can be transferred evenly to the tip of the pen, making it easier to control the burn.
Wire tips also tend to be cheaper than woodburning tips, so if you’re just starting out with pyrography, they may be the best option for you.
The downside of wire tips is that they can wear down quickly if you use them frequently. The constant heating and cooling of the tip can cause it to break down over time, meaning that you’ll need to replace them more often than woodburning tips.
They can also be more difficult to control than woodburning pens, so if you’re new to pyrography, it might be worth starting with a different type of pen.
Woodburner Tips
Woodburner pens have metal tips that are coated in a material called “colophony.”
Colophony is a resin that’s derived from pine trees, and it has excellent heat-conducting properties. This means that when you use a colophony-coated tip on your woodburner pen, the heat will be transferred evenly to the tip – making it easier for you to control your burns. Woodburner pens also tend to last longer than wire tipped pens – meaning that you won’t have to replace them as often.
And because they’re easier to control than wire tipped pens, they may be a better option for those who are new to pyrography.
5 BEST Wood Burning Tips – Which Tips to Use for Wood Burning
Conclusion
If you’re looking to give your wood burning projects some extra flair, then try out this tip for creating lines! All you need is a piece of paper and a pencil. First, lightly draw your lines on the paper.
Next, burn along the edge of the drawn line with your wood burner. The heat from the burner will cause the paper to char and lift away, leaving behind a crisp, clean line. This technique is great for adding details and embellishments to any wood burning project!