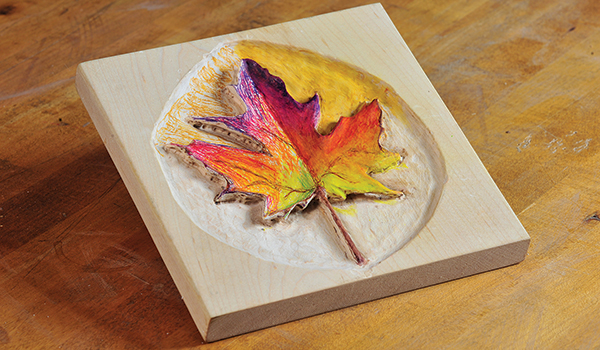
How to Use Watercolor Pencils on Wood
Watercolor pencils are a type of colored pencil that can be used to create beautiful works of art. They are made with a water-soluble binder, which allows them to be used with water to create different effects. Watercolor pencils can be used on wood to create unique and stunning pieces of art.
To use watercolor pencils on wood, start by sketching out your design with a light-colored pencil. Once you have your sketch, start coloring in your design with the watercolor pencils. To add water to the picture, wet a paintbrush and lightly brush over the area you want to add color to.
The more water you add, the lighter the color will be. You can also layer colors by adding one color over another when it is still wet. Experiment with different techniques to see what effects you can achieve!
- Begin by lightly sketching your design on the wood surface with a pencil
- Next, start to add in some basic colors with your watercolor pencils
- Start light and build up to darker shades as desired
- Once you have the basic colors in, begin to blend them together with a wet brush
- Work in small sections and don’t over-blend
- Allow the piece to dry completely before adding any final details or highlights
How to Seal Colored Pencil on Wood
When it comes to using colored pencil on wood, there are a few things you need to do in order to make sure your work lasts. First, you need to sand the wood surface that you’ll be coloring on. This will help create a smooth base for your pencil strokes.
Next, apply a layer of primer to the wood. This will provide another barrier between the wood and your colored pencils. Finally, when you’re ready to start coloring, use a sealer before and after each stroke.
This will ensure that your work is protected from water damage and fading over time.
How to Add Color to Wood Burning
Adding color to wood burning is a fun way to customize your projects and add a personal touch. Here are some tips on how to add color to wood burning:
1. Choose the right type ofwood.
Softwoods like pine or cedar are best for adding color because they absorb stains and dyes more readily than hardwoods.
2. Prepare the wood by sanding it smooth. This will help the color adhere better and provide a more even finish.
3. Apply a base coat of primer before adding any colorants. This will help the colors stand out and prevent them from running together.
4. Experiment with different techniques for applying color, such as staining, painting, or using colored pencils or markers.
You can also try combining several colors to create unique effects.
5 . Be sure to test your colors on scrap pieces of wood before applying them to your project, so you can see how they will look once they’re finished .
Prismacolor Pencils on Wood
Prismacolor pencils are a great way to add color to wood. They come in a wide variety of colors, so you can find the perfect shade for your project. The pencils are easy to use and provide a smooth, even coverage.
To get started, choose the color of Prismacolor pencil you would like to use. Then, lightly sand the area of wood where you will be applying the color. This will help the pencils glide on smoothly and prevent them from snagging on the grain of the wood.
Next, apply pressure evenly as you color in your desired area. You can build up layers of color for a deeper hue, or go lighter for a more subtle effect. Be sure to blend colors together well for a seamless look.
Once you’re finished coloring, seal the wood with a clear varnish or lacquer to protect your work and make it last longer. Enjoy your beautiful colored wood creation!
Can You Wood Burn Over Pencil
Wood burning, also known as pyrography, is a craft that allows you to burn designs into wood. It’s a relatively simple process that can be done with a few basic tools. Pencils are often used to help transfer designs onto wood before burning them.
But can you actually burns over pencil?
The answer is yes! You can definitely wood burn over pencil.
In fact, many people prefer to do this because it gives them more control over the final design. Burning over pencil also allows you to create very intricate designs that would be difficult to achieve otherwise.
If you’re new to wood burning, then starting with pencil lines is a great way to get comfortable with the process.
Once you’ve mastered the basics, you can experiment with other mediums like paint or even carving into the wood itself.
Oil Based Colored Pencils
Oil-based colored pencils are made with a wax or oil binder and pigments. They lay down color smoothly, evenly and are rich in pigment. Oil-based colored pencils provide excellent blending capabilities due to the waxy nature of the lead.
A wide variety of colors is available with these types of pencils. Because they do not contain water, oil-based colored pencils tend to be less soluble than water-based colored pencils when exposed to water.
Credit: www.woodworkersjournal.com
Can You Use Watercolour Pencils on Wood?
Yes, you can use watercolour pencils on wood. The results can be quite stunning, as the pigments in the pencils react with the natural grain of the wood to create unique patterns and effects.
To get started, simply draw your design onto the wood surface with a watercolour pencil.
Then, using a wet paintbrush, blend the colours together to create your desired effect. You can also experiment with different techniques, such as dry-brushing or stippling, to create different textures and effects.
One word of caution: depending on the type of wood you’re working with, and how porous it is, your colours may bleed more than usual.
So it’s always best to test out your technique on a scrap piece of wood first before committing to your final project.
Do You Dip Watercolor Pencils in Water?
Yes, you can dip watercolor pencils in water to create a more intense color. First, draw your desired image with the watercolor pencils. Next, use a brush to wet the area where you want the color to be more intense.
Finally, apply pressure to the pencil lead to release the pigment into the water.
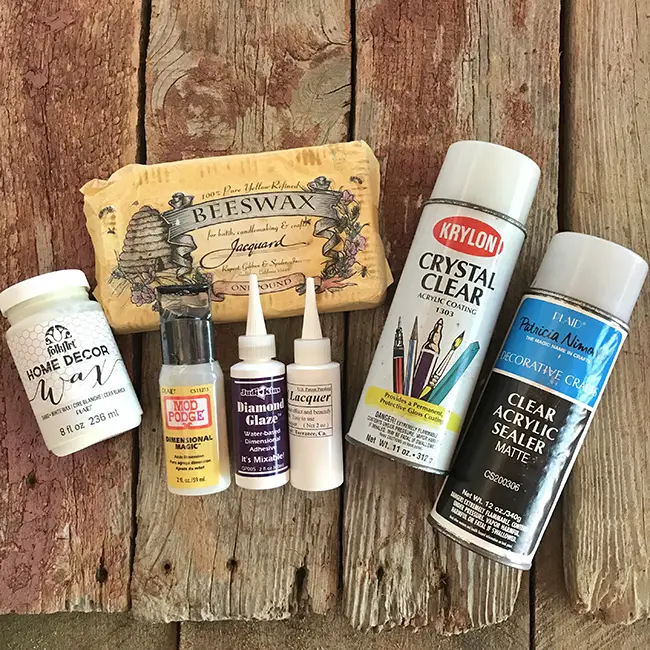
How Do You Seal Pencil Drawings on Wood?
If you’re looking to seal your pencil drawings on wood, there are a few different routes you can take. You can either use a layer of clear varnish or polyurethane, or you can apply a thin layer of beeswax before buffing it out.
Clear varnish or polyurethane will provide the most protection for your drawing, as they create a hard, durable barrier against moisture and wear-and-tear.
However, these finishes can also yellow over time, so if you’re looking for a more natural look, beeswax may be the way to go.
To apply beeswax, start by melting it down until it’s in liquid form. Then, using a soft cloth or brush, evenly coat the surface of your drawing.
Allow the wax to dry and then buff it out until you’ve achieved the desired sheen.
How Do You Use Colored Pencils With Wood Burning?
Colored pencils can be used for wood burning in a number of ways. The first way is to use the colored pencils as you would any other type of pencil, by holding them against the wood and burning the image into the surface. This method works best on lighter woods, such as balsa or maple.
The second way to use colored pencils with wood burning is to actually burn the pencils themselves onto the wood. This creates a more textured look and can add depth to your design. To do this, simply hold the tip of the colored pencil against the wood and heat it up with your burner until it starts to melt and smoke.
Then move the pencil around in whatever design you like.
How To Use Watercolor Pencils | TIPS FOR BEGINNERS | How To For Beginners
Conclusion
Watercolor pencils are a versatile tool that can be used on a variety of surfaces, including wood. Here are a few tips on how to use watercolor pencils on wood:
1. Begin by sketching your design onto the wood surface with a pencil.
This will help you plan your colors and composition.
2. To add color, start with the lightest hue and build up to the darkest. Use a wet brush to blend the colors together for a smooth finish.
3. When working with watercolors, it’s important to work quickly before the paint dries. Have all of your supplies ready and within reach so you can keep moving forward with your painting.
4. Allow the paint to dry completely before adding any final details or highlights with a white gel pen or marker.