How to Make Wood Grain Icing
Start by mixing your desired colors of gel food coloring with a few drops of vodka. This will help the color to spread more evenly when you’re painting it on later. Next, take a piece of wood grain fondant and roll it out until it’s about 1/8 inch thick.
Once you have your fondant rolled out, use a pastry brush to paint on the gel food coloring mix. Start in the middle of the fondant and work your way outwards, using light strokes. Allow the first layer of color to dry completely before adding additional colors or layers.
Sugarcraft Step-by-Step – Woodgrain
- Preheat oven to 375 degrees F (190 degrees C)
- Cream together the butter, confectioners’ sugar and almond extract until light and fluffy
- Gradually add the flour, mixing until well blended
- The dough should be stiff enough to knead
- If it is too soft, chill in the refrigerator for about 15 minutes
- On a lightly floured surface, roll the dough 1/8 inch thick or less
- Cut into desired shapes with cookie cutters dipped in flour
- 7 Place cookies on ungreased baking sheets and bake for 8 minutes or until golden brown around the edges
How to Make Royal Icing Look Like Wood
When it comes to decorating cakes and cookies, there are endless possibilities. You can go for a classic look with fondant or buttercream, or get creative with unique icing designs. If you’re looking for something different, why not try creating the illusion of wood grain using royal icing?
It’s actually quite simple to do – all you need is some brown food coloring and a few tools to create the desired effect. Start by tinting your icing a light brown color. Then, using a fork or toothpick, drag it through the icing in short strokes to create lines that resemble wood grain.
Once you’re happy with the design, allow the icing to dry completely before serving or packaging up your treats.
With a little practice, you’ll be able to create beautiful wooden effects that are perfect for any occasion!
Credit: www.sweetambs.com
What is Wood Grain Icing
If you’re a fan of rustic cakes with a bit of natural flair, then wood grain icing is the perfect technique for you! This unique decorating style gives your cakes and cupcakes a textured, wood-like finish that is both eye-catching and stylish. Plus, it’s surprisingly easy to do!
Here’s everything you need to know about wood grain icing, from how to make it at home to some inspiring ideas for using it on your next baking project.
What Is Wood Grain Icing?
Wood grain icing is a type of cake decoration that creates a textured, wood-like finish on your desserts.
It’s made by piping lines of icing onto your cake or cupcake in a specific pattern, then using a fork or other tool to drag through the lines and create a “grainy” look.
The effect is similar to that of embossing, but with a more organic feel. And unlike other decorating techniques like fondant or buttercream flowers, wood grain icing can be done relatively quickly and easily at home.
All you need is some practice and patience – plus, of course, the right tools and ingredients!
How Do You Make Wood Grain Icing
Assuming you would like a recipe for wood grain icing:
Ingredients:
1 cup (2 sticks) butter, softened
2 cups granulated sugar
4 large eggs
1/3 cup light corn syrup
1 teaspoon clear vanilla extract
5-6 cups confectioners’ sugar, sifted if lumpy
Brown gel food coloring paste, as needed
Instructions: 1. Beat the butter on medium speed in the bowl of a stand mixer until creamy. Gradually add the granulated sugar, mixing until light and fluffy. Mix in the eggs one at a time, then mix in the corn syrup and vanilla.
With the mixer on low speed, gradually add 5 cups of the confectioners’ sugar until incorporated. If the icing is too thin, add up to 1 more cup of confectioners’ sugar. If too thick, add a few drops of water.
Reserve 1/4 cup of this brownish “woodgrain” mixture in a small bowl and set aside.
2. Tint remaining icing with brown gel food coloring paste to desired darkness; mix well (if necessary, use additional paste to deepen color). Working with one cookie at a time, spread or pipe dark brown icing onto cookies; let dry completely before proceeding.
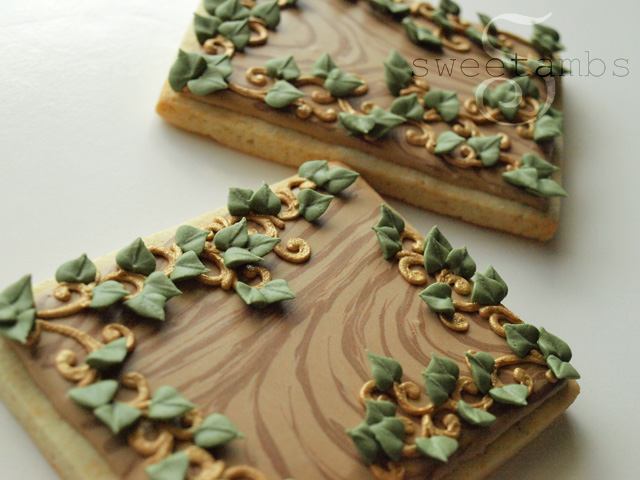
Once dark brown icing is dry, randomly spoon reserved “woodgrain” mixture over top; using toothpick or skewer, lightly swirl colors together (be careful not to overmix or colors will become muddy).
What Does Wood Grain Icing Look Like
Wood grain icing is a type of icing that is used to give cakes and other desserts a wood-like appearance. It is made by combining different colors of icing to create a realistic wood grain effect. Wood grain icing can be used on any type of cake, but it is most commonly seen on wedding and birthday cakes.
How Can I Use Wood Grain Icing
There are a few different ways that you can use wood grain icing. You can either pipe it on, or use a spatula to spread it on. If you want to pipe it, you will need to use a piping bag with a small round tip.
Start by drawing a line down the center of your cake. Then, start at the top and pipe lines out from the centerline, going back and forth until you reach the bottom of the cake. To create the wood grain effect, simply drag a toothpick or skewer through the icing lines.
If you want to spread the icing on with a spatula, start by spreading a thin layer of icing over your cake. Then, using a butter knife or offset spatula, create lines in the icing going in one direction. Once you have your lines made, take your toothpick or skewer and drag it through the lines, going back and forth until you have achieved the desired wood grain look.
Conclusion
This blog post provides a recipe and instructions for making wood grain icing. The ingredients needed are: powdered sugar, cocoa powder, cornstarch, water, vanilla extract, and food coloring. To make the icing, first mix together the powdered sugar, cocoa powder, and cornstarch.
Then add water and vanilla extract and mix until smooth. Finally, add food coloring to create the desired wood grain effect.