How to Level Wood Floor for Vinyl Planks
Use a self-leveling compound to level your wood floor before installing vinyl planks. Mix the leveling compound according to the manufacturer’s instructions and pour it into any low spots on your floor. Use a straight edge to spread the leveling compound evenly over the entire floor.
Allow the leveling compound to dry for the amount of time specified by the manufacturer before proceeding with your vinyl plank installation.
- Begin by sweeping the floor clean of any debris or dirt
- Inspect the floor for any bumps, unevenness, or dips
- Use a hand sander to even out any irregularities in the floor
- Sweep and vacuum again to remove any dust created by sanding
- Lay down a layer of self-leveling compound over the entire floor surface
- Allow the compound to dry according to package instructions before proceeding
How to Level a Floor Without Leveling Compound
If your floor is out of level, there are a few ways that you can level it without having to use leveling compound. First, you can check the subfloor to see if it is level. If the subfloor is not level, you will need to use shims to level it.
Once the subfloor is level, you can install a new layer of flooring on top. Another option is to use self-leveling concrete. This can be poured over the existing floor and will level itself as it dries.
How Flat Does Subfloor Need to Be for Vinyl Plank
For a successful installation of vinyl plank flooring, your subfloor needs to be as flat as possible. If your subfloor is not level, you may experience issues with your flooring later on, such as gaps between planks or an uneven appearance. Use a self-leveling compound to flatten out any dips or divots in your subfloor before installing vinyl plank flooring.
Cheap Way to Level Floor
If your home has uneven floors, you may be wondering what the best way to level them is. After all, you don’t want to spend a lot of money on something that may not even work. Luckily, there are a few cheap ways to level your floors that are definitely worth trying!
One of the easiest ways to level your floors is by using shims. Shims are thin pieces of wood or metal that can be placed under furniture or other objects in order to level them out. You can find shims at most hardware stores, and they’re relatively inexpensive.
Simply place them under any furniture or objects that are uneven and voila – your floor is now level!
Another cheap way to level your floors is by using self-leveling compound. This is a liquid compound that you pour onto your floor and it will automatically Level itself out as it dries.
You can find this at most hardware stores as well, and it’s also relatively inexpensive. Just pour it onto any areas that seem uneven and let it dry – it’s really that simple!
If neither of these methods seem to be working for you, then you may need to call in a professional.
However, if you’re on a budget, these cheap methods are definitely worth trying first!
How to Level a Floor With Plywood
If your floor is out of level, there are a few ways that you can level it yourself. One way is to use plywood. Here’s how:
1. Measure the height difference from one end of the room to the other. You’ll need enough plywood to make up this height difference plus 1/4″. For example, if the height difference is 4″, you’ll need 4-1/4″ worth of plywood.
2. Cut the plywood into strips that are as long as the room and as wide as necessary to make up the height difference plus 1/4″. For example, if your strips are 4′ long and 4-1/4″ wide, you’ll need four strips.
3. Install the first strip at one end of the room with screws or nails driven into the floor joists. Make sure that the strip is level before moving on to installing the next strip. Repeat until all strips are installed.
How to Level a Floor in an Old House
If you have an old house with a floor that isn’t level, you may be wondering how to level it. There are a few different ways that you can go about doing this, and the method that you choose will depend on the severity of the issue and the type of flooring that you have. In some cases, you may be able to do it yourself, but in other cases, it’s best to hire a professional.
The first thing that you need to do is identify the problem areas. This can be done by using a level or by simply placing a ball in different spots on the floor and seeing which way it rolls. Once you know where the dips and bumps are, you can start to figure out how to fix them.
If the problem is minor, there are a few things that you can try before calling in a professional. One option is to use self-leveling compound. This can be found at most hardware stores and home improvement centers, and it’s relatively easy to use.
Just pour it into any low spots and give it time to dry; then, sand down any high spots until everything is level.
Another option for minor problems is shimming. This involves adding thin strips of material (usually wood) under doorways or other areas where there are noticeable dips or unevenness.
Shimming is fairly easy to do yourself and doesn’t require any special tools or materials; however, if your problem areas are large or numerous, shimming might not be practical.
For more serious problems, such as severe sagging or major cracks, leveling will likely require the help of a professional contractor who has experience dealing with older homes. They’ll be able to assess the situation and determine what needs to be done in order to get your floors looking level again.
In some cases, they may need to jack up sections of your floor in order to make adjustments; in others, they may simply need to add new supports underneath sagging beams. Either way, it’s best not to try tackling these sorts of problems on your own unless you’re confident in your ability (and knowledge) – otherwise, you could end up making things worse instead of better!
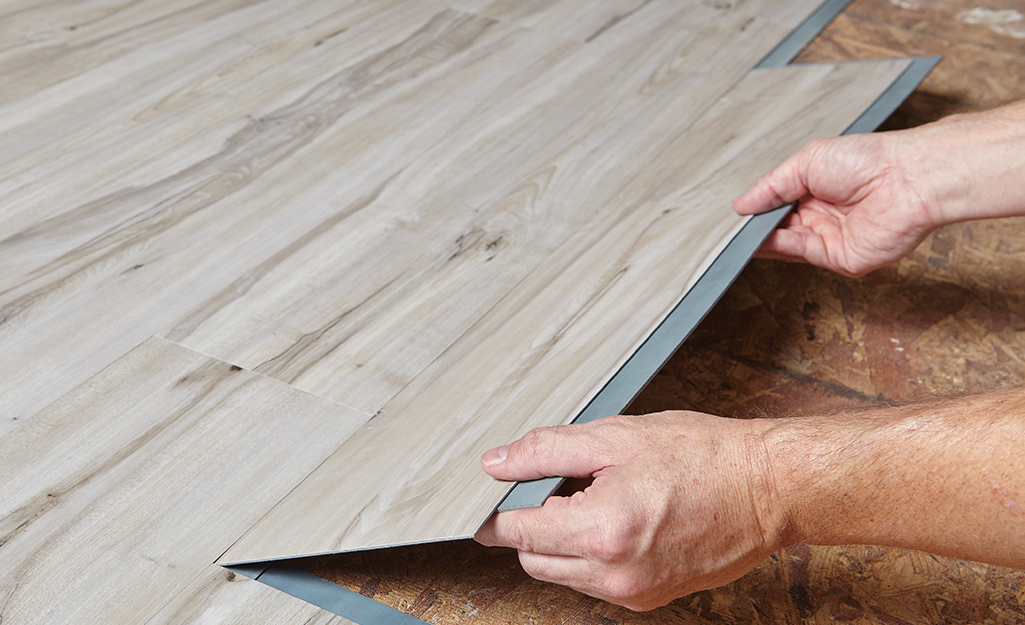
Credit: www.homedepot.com
How Do You Level a Floor before Installing Vinyl Planks?
If you’re installing vinyl plank flooring, you want to make sure the surface is completely level before you start. Otherwise, your planks could end up uneven and your floor will look terrible. Here’s how to level a floor before installing vinyl planks:
1. Start by clearing out the room. Remove all furniture, rugs, and other items from the space. This will give you a clear area to work in and make it easier to level the floor.
2. Inspect the floor for any irregularities. Look for high spots or low spots that could throw off your leveling process. If you find any, use a hand sander or power sander to even them out as much as possible.
3. Once the floor is sanded smooth, vacuum up all the dust particles with a heavy-duty shop vac. Then clean the floors with a damp mop to remove any leftover dust or debris.
4..
To level the floor, start by spreading self-leveling concrete evenly over the surface using a trowel or putty knife.. You’ll want to pour enough so that it’s about 1/8 inch thick in most areas.
. As you spread it out, keep an eye on low spots and add more concrete as needed to even things out..
Be sure to work quickly since self-leveling concrete sets fast!
5…After letting the self-leveling concrete set for at least 24 hours, check again for any irregularities.. If everything looks good, then you’re ready to install your vinyl planks!.
Does Floor Have to Be Perfectly Level for Vinyl Plank Flooring?
No, your floor does not have to be perfectly level for vinyl plank flooring. In fact, most floors are not perfectly level and that’s okay! Vinyl plank flooring is very forgiving when it comes to minor imperfections in your subfloor.
However, if your floor is significantly uneven, you may want to level it first before installing vinyl plank flooring.
How Do You Level a Wood Subfloor for Vinyl Flooring?
Vinyl flooring is a popular choice for many homeowners due to its durability and easy maintenance. In order to install vinyl flooring, the subfloor must be level. If the subfloor is not level, the vinyl flooring will not lay flat and may buckle or cup.
There are a few different ways that you can level a wood subfloor for vinyl flooring. One way is to use shims. Shims are thin pieces of wood that can be used to fill in any gaps between the joists and make the surface level.
Another way to level a wood subfloor is to use self-leveling compound. This type of compound can be poured directly onto the surface of the subfloor and will spread evenly, filling in any dips or irregularities. Once it dries, it will create a perfectly level surface for vinyl flooring installation.
What is the Best Way to Level a Wood Floor?
There are a few different ways that you can level a wood floor. The best way to do it will depend on the type of flooring that you have, as well as the subfloor underneath. If you have a concrete subfloor, then you’ll likely need to use self-leveling compound.
This is a liquid that you pour onto the floor and spread around with a trowel. It will fill in any low spots and create a smooth surface for your wood flooring. If you have a plywood subfloor, then shimming may be the best option.
This involves adding thin pieces of wood (shims) to any areas that are not level. Once the shims are in place, you can install your wood flooring over top.
Floor Prep for Beginners Installing Vinyl Plank
Conclusion
If you’re looking to install vinyl plank flooring over an existing hard surface, you’ll first need to make sure that the surface is level. Uneven floors can cause problems with both installation and performance of the finished product. In this blog post, we’ll show you how to level a wood floor for vinyl plank installation.
The first step is to clean the floor and remove any dirt, dust or debris that could potentially interfere with the leveling process. Once the floor is clean, begin by checking for any high spots that will need to be sanded down. You can use a straight edge or level to check for high spots; anything that sticks up more than 1/8″ will need to be sanded flush with the rest of the floor.
Next, fill any low spots or depressions in the floor with a self-leveling compound. This will help create a smooth, even surface for your vinyl plank flooring. Once all of the low spots have been filled, allow the self-leveling compound to dry completely before proceeding with installation.
Now you’re ready to install your new vinyl plank flooring! Thanks for reading and good luck with your project!