How to Build Wood Lattice Wine Rack
A wood lattice wine rack is a great way to display your wine collection and add a bit of character to your home. Here’s how to build one:
Start by measuring the space where you want to put your wine rack.
Cut four pieces of 2×4 lumber to the appropriate length, then use a drill and dowel jig to create evenly spaced holes in each piece. Next, cut eight pieces of 1×2 lumber to fit snugly between the 2x4s.
Assemble the frame by inserting the 1x2s into the holes in the 2x4s, then screwing everything together with 3-inch deck screws.
Once the frame is assembled, lay it on its back and measure out equally spaced triangles along the top edge. These will be used as supports for the lattice.
- You will need: wood lattice, 1×2 lumber, screws, wire mesh, wire cutters, drill and bit set
- Cut the wood lattice to size using a saw
- Drill pilot holes in the corners of the lattice
- Screw the 1×2 lumber around the perimeter of the lattice
- Cut a piece of wire mesh to fit over the front of the wine rack
- Attach the wire mesh to the frame with small screws or staples
Wine Rack Inserts for Kitchen Cabinets
If you’re a wine lover, then you know that having a good wine rack is important. But finding the right wine rack for your kitchen cabinets can be a challenge. There are so many different types and styles of wine racks out there, it’s hard to know where to start.
One option is to look forwine rack inserts for kitchen cabinets. These inserts are designed to fit into specific types of cabinets, making it easy to find one that will work in your kitchen. And they come in a variety of styles and materials, so you’re sure to find one that fits your taste.
Another option is to buy a pre-made wine rack. These racks come in all sorts of shapes and sizes, and they’re usually made from wood or metal. If you want something that’s going to last, then this is probably the way to go.
But if you’re on a budget, then an insert might be the better option.
Whichever route you choose, make sure you take the time to measure your cabinets before you buy anything. That way, you’ll know for sure that the insert or rack you choose will fit perfectly into your space.
How to Build a Wine Rack in a Cabinet
Building a wine rack in a cabinet is a great way to store and display your wine collection. Here are some tips on how to build a wine rack in a cabinet:
1. Decide on the size and shape of your wine rack.
It should be big enough to hold all the bottles you want to store, but not so large that it takes up too much space in your cabinet.
2. Cut out pieces of wood or plywood to create the shelves for your wine rack. Make sure they are all the same width so that your bottles will fit snugly on them.
3. Assemble the shelves inside the cabinet using screws or nails. Make sure they are level and secure before adding any bottles of wine.
4. Start adding your bottles of wine to the shelves, starting with the largest ones first.
You can arrange them by size, type, or simply randomly – it’s up to you!
Diy Lattice Wine Rack
Looking for a unique wine rack that will make your friends say “wow”? Check out this easy to make lattice wine rack! This design is both attractive and functional, holding up to 18 bottles of your favorite vino.
This project requires some basic woodworking skills and tools, but anyone with a little experience should be able to handle it. Start by cutting the lumber to size according to the cut list. Next, use a jigsaw or circular saw to cut the notches in the vertical supports.
These notches will allow the horizontal slats to fit snugly in place.
Now it’s time to assemble everything! Begin by attaching the vertical supports to the base using screws or nails.
Then, insert the horizontal slats into the notches and secure with more screws or nails. That’s it – you’re done!
If you want extra protection for your wine bottles, consider adding a layer of cork board or felt pads to the inside of each slot.
And if you really want to go all out, add some LED lights inside for a dramatic display!
Wine Rack Lattice
A wine rack lattice is a great way to store your wine collection while also adding a touch of style to your home. There are many different types of wine rack lattices available, so you can find one that fits your taste and budget. Here is some information to help you choose the right wine rack lattice for your home.
The first thing to consider when choosing a wine rack lattice is the size of your collection. If you have a large collection, you will need a larger lattice. If you only have a few bottles, you can get away with a smaller one.
The next thing to consider is the type of wood that you want your lattice to be made from. There are many different woods available, so take some time to look at all of your options before making a decision.
Once you have decided on the size and wood for your wine rack lattice, it is time to choose a design.
There are many different designs available, so take some time to browse through all of the options until you find one that you like best.
How to Build a Diamond Wine Rack
A wine rack is a great way to show off your wine collection, and it can be a great conversation starter at parties. If you’re looking for a unique way to display your wine, try building a diamond wine rack. This design is both elegant and functional, and it’s sure to impress your guests.
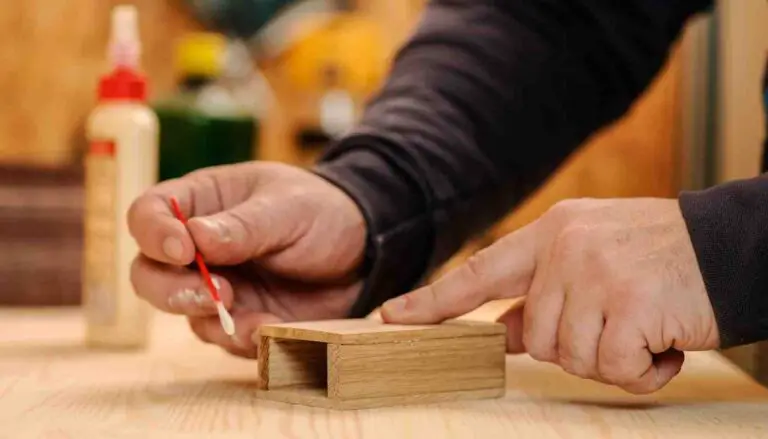
Building a diamond wine rack is fairly simple, and all you need are some basic woodworking skills and materials. You’ll need four pieces of wood that are the same length, two cross supports, wood glue, clamps, and sandpaper. Start by cutting the pieces of wood into equal lengths using a miter saw or handsaw.
Next, cut the cross supports so they’re slightly shorter than the width of the pieces of wood.
Now it’s time to assemble the frame of the rack. Apply wood glue to the ends of the cross supports and clamp them in place between two pieces of wood.
Be sure to align the edges so that everything is flush when you’re done. Once the glue has dried completely, sand down any rough edges and finish as desired.
Your diamond wine rack is now complete!
Fill it with your favorite wines and enjoy showing it off to your friends and family.
How Far Apart Should Wine Rack Lattice Be?
It is generally recommended that wine rack lattice be spaced apart at least 1/2 inch to allow for proper air circulation. Closer spacing may be used if desired, but this can result in the racks being more difficult to clean and may promote the growth of mold or mildew.
How Do You Make a Simple Wooden Wine Rack?
If you’re looking for a simple wine rack that you can make yourself, here’s a great project to try. With just a few supplies and some basic woodworking skills, you can create a beautiful and functional wine rack in no time.
Here’s what you’ll need to get started:
– 1 piece of lumber (we used an 8′ 2×4), cut into 4 equal pieces
– 1 piece of lattice (we used an 8′ x 4′ piece), cut into 4 equal pieces
– Wood glue
– Nail gun with 1″ nails
– Drill with 3/4″ spade bit
Start by cutting your lumber and lattice into four equal pieces.
If you’re using an 8′ 2×4, we recommend cutting it down to 6′. This will give you plenty of room to work with and will make the final product more manageable. Next, drill two holes into each end of each piece of lumber using a 3/4″ spade bit.
These holes should be about an inch from the ends and spaced evenly apart. Now it’s time to assemble! Run a bead of wood glue along the length of one side of each lattice piece and fit it onto the corresponding piece of lumber.
Use your nail gun to secure the two pieces together, driving one nail into each hole that you drilled earlier. Repeat this process until all four pieces are assembled. And that’s it!
Your new wine rack is now ready to use. Just add your favorite bottles of wine and enjoy!
How Do You Make a Wine Rack Diagonally?
If you’re looking to add a unique touch to your home and have some extra wine bottles lying around, why not make a wine rack diagonally? It’s a fun and easy project that anyone can do, and it’ll definitely be a conversation starter when guests come over. Plus, it’s a great way to show off your collection of wines!
Here’s what you’ll need:
-A few spare wine bottles (the number will depend on the size of your rack)
-A piece of wood (we used a 1×4), cut into 4 equal pieces
-Some wire or string
-Paint or stain (optional)
we started by sanding down the edges of our wood so they were nice and smooth.
If you’re going to paint or stain your rack, now is the time to do it. We decided to go with a simple black paint. Once the paint was dry, we took our four pieces of wood and arranged them in a diamond shape.
We then tied some wire around the middle to keep everything together. That’s it! Your very own DIY wine rack is now complete.
How Do You Make an Angled Wine Rack?
An angled wine rack is a great way to add interest and dimension to your wine collection. There are a few different ways that you can go about making an angled wine rack, but we will show you the most common and easiest method.
First, you will need to decide on the angle that you want your wine rack to be.
This will largely be determined by the space that you have available and how many bottles of wine you want to be able to store. Once you have decided on the angle, cut a piece of wood or plywood to that size. If you are using wood, make sure that it is sanded smooth so that your bottles will not get scratched when they are sitting in the racks.
Next, measure and cut out slats for the front and back of your rack. The number of slats will depend on the width of your Rack as well as how many bottles of wine you want to be able to store. Once again, sand these pieces smooth before attaching them to the sides with screws or nails.
Now it’s time to attach your shelves! Cut some more pieces of wood or plywood to size and screw or nail them into place between the front and back slats. Make sure that these shelves are level so that your bottles will not tip over when they are stored in the racks.
Finally, finish off your angled wine rack by staining or painting it however you like! You could even add some decorative trim for an extra touch of class.
Conclusion
This blog post provides a step-by-step guide for building a wood lattice wine rack. The author starts by outlining the tools and materials needed for the project, including a drill, saw, clamps, wood glue, and sandpaper. Next, the author walks readers through the process of cutting the wood to size and assembling the lattice frame.
Once the frame is assembled, the author attaches it to a baseboard using screws and nails. Finally, the author finishes up by sanding down any rough edges and staining or painting the rack as desired.