How to Build a Wood Countertop
Building a wood countertop is a great way to add both function and style to your kitchen. While there are many different ways to build a countertop, the most important thing is to make sure that it is level and sturdy. Here are some tips on how to build a wood countertop:
1. Choose the type of wood you want to use for your countertop. Some popular choices include maple, oak, or cherry.
2. Cut the lumber to size using a saw.
Make sure that all of the pieces are exactly the same size so that your countertop will be level when assembled.
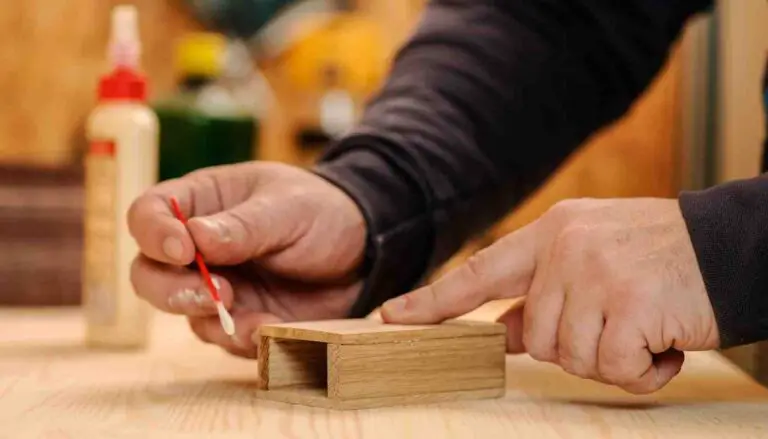
3. Drill holes in the pieces of lumber so that you can screw them together. Be sure to countersink the screws so that they will be flush with the surface of the wood when tightened.
4 . Assemble thecountertop by screwingthe piecesoflumber together. Ifyouare using agluetoattachthepieces together,make suretoapplyit evenly sothatthejointswill be strongand won’t show through once thecountertopis finished .
5 Onceassembled , sandthecountertoplevelusing progressivelyfinergritsandpaper until it issmooth .
- Choose the type of wood you want to use for your countertop
- Some popular options include butcher block, reclaimed wood, or bamboo
- Cut the boards to size, using a circular saw or table saw
- Make sure all of the boards are exactly the same length
- Apply a generous amount of wood glue to the edges of each board, then clamp them together overnight
- Once the glue has dried, sand down the countertop with progressively finer grits of sandpaper until it’s smooth to the touch
- Apply a sealer or beeswax to protect the wood and give it a nice shine
How to Build a Countertop from Scratch
A countertop is one of the most important parts of a kitchen. It’s where we prepare our food, and it needs to be durable and easy to clean. Building a countertop from scratch may seem like a daunting task, but with the right materials and tools, it’s actually quite simple.
The first step is to choose the material you want to use for your countertop. There are many options available, such as granite, marble, soapstone, butcher block, and laminate. Once you’ve selected your material, it’s time to measure the area where your countertop will go.
Be sure to account for any appliances or fixtures that will be attached to the countertop.
Next, cut your chosen material to size using a saw designed for cutting stone or another hard material. If you’re not experienced in using power tools, it’s best to have someone else do this step for you.
Once the pieces are cut to size, they need to be sanded down so that they’re smooth and even. Then, they can be glued together using an epoxy designed for stone surfaces.
After the glue has dried completely (which usually takes 24 hours), it’s time to install your new countertop.
This step will vary depending on what type of material you used and how it will be supported (by cabinets or by posts). Generally speaking though, installation is simply a matter of setting the pieces in place and then securing them with screws or brackets.
Once your new countertop is installed, you can enjoy its beauty and functionality for years to come!
How to Make Wood Countertops Waterproof
If you’re planning to install wood countertops in your kitchen or bathroom, you’ll need to make sure they’re properly sealed and waterproofed. otherwise, they could be susceptible to water damage.
There are a few different ways you can waterproof your wood countertops.
You can use a sealer, which will create a barrier between the wood and any water that comes into contact with it. You can also use a waterproofing agent, which will soak into the wood and help repel water.
Whichever method you choose, make sure you apply several coats for maximum protection.
And be sure to let the countertops dry completely between each coat. With proper care, your wood countertops should last for many years to come!
Diy Wood Countertops Over Laminate
When it comes to kitchen countertops, there are a lot of different options out there. But if you’re looking for something a little more unique and custom, then DIY wood countertops might be the way to go!
Installing wood countertops over laminate is actually pretty easy to do, and it’s a great way to add some warmth and character to your kitchen.
Plus, it’s a relatively inexpensive project too!
Here’s what you’ll need to get started:
-1/2″ plywood (we used 4’x8′ sheets)
-Wood glue
-1 1/4″ wood screws
-Circular saw
-Jigsaw
-Sandpaper (120 grit and 220 grit)
-Stain or paint (optional)
First things first, you’ll need to measure your countertop space and cut the plywood down to size. We used a circular saw for this, but if you don’t have one, you can always have the plywood cut at your local hardware store. Just be sure to measure twice and cut once!
😉
Once your pieces are cut down to size, it’s time to start gluing them together. Be generous with the glue and use clamps or heavy books to help hold everything in place until the glue dries.
Once the glue is dry, flip the countertop over and screw everything into place using 1 1/4″ wood screws.
Now comes the fun part – giving your new countertop some personality! If you want a natural look, simply sand down the surface with 120 grit sandpaper until smooth and then finish with 220 grit sandpaper. You can also stain or paint your countertop if you want something more colorful!
And that’s it – all done! Now enjoy your beautiful new DIY wood countertop!
Inexpensive Wood Countertops
If you’re looking for a inexpensive way to update your kitchen counters, wood countertops are a great option! Wood countertops can provide a warm, natural look to your kitchen and they are surprisingly affordable. Here’s everything you need to know about inexpensive wood countertops:
Wood Countertop Materials
There are a few different options when it comes to choosing a wood countertop material. The most popular choices are butcher block (made from hardwood strips glued together), solid wood slabs, and engineered wood boards.
Butcher block is the most economical option, while solid wood slabs will give you the largest variety of color and grain patterns to choose from. Engineered wood boards are somewhere in between in terms of price and offer more durability than solid wood slabs.
Wood Countertop Finishes
The type of finish you choose for your wood countertop will have a big impact on its overall appearance. A natural finish will show off the beauty of the wood grain, but it will require more maintenance than other finishes since it’s susceptible to staining and water damage. A protective sealer or lacquer finish will give you more protection against stains and water damage, but it may slightly change the color of the wood.
If you want an ultra-durable finish that won’t change the color of the wood, consider using epoxy resin – this is often used on commercial bar tops since it’s so resistant to wear and tear!
How to Make a Butcher Block Countertop Out of 2X4
If you’re looking for a durable, stylish and affordable countertop option, butcher block is a great choice. And if you’re handy with woodworking, you can even make your own butcher block countertop out of 2×4 lumber.
Here’s how to do it:
1. Cut the lumber into lengths that will fit your desired countertop size. You’ll need four pieces for the main countertop surface, plus two more for the ends (if desired).
2. Sand all of the pieces thoroughly, then apply a coat of mineral oil or another food-safe finish.
This will help protect the wood and ensure a long lifespan for your countertop.
3. Assemble the pieces by nailing or screwing them together, then apply another layer of oil or finish. Allow this to dry completely before using your new butcher block countertop.
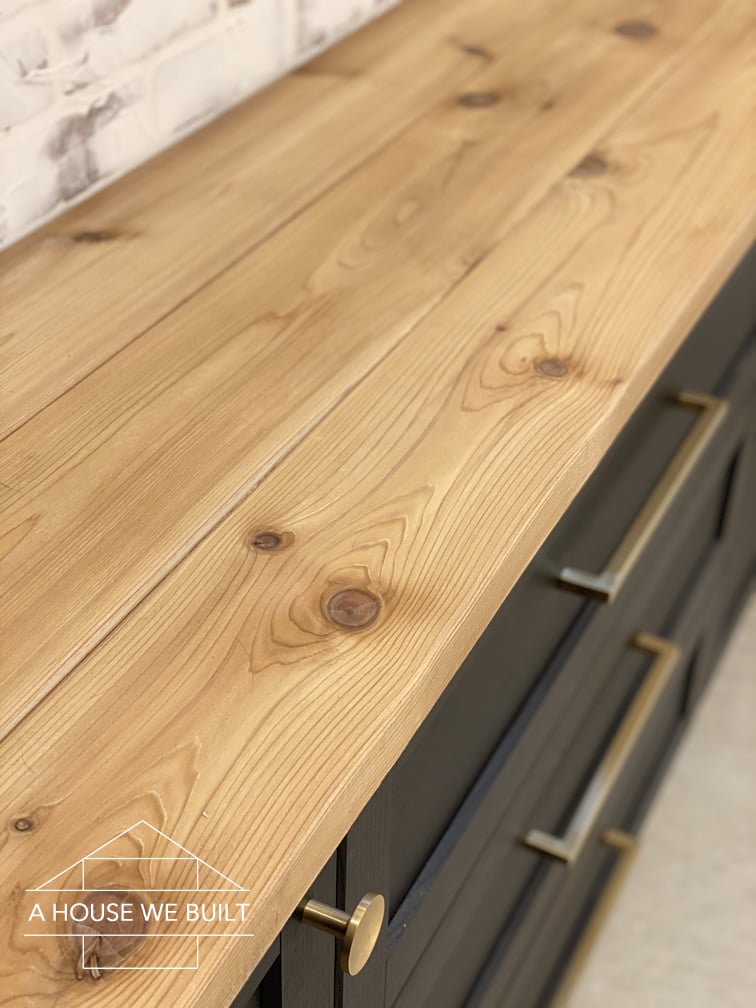
Credit: www.ahousewebuilt.com
What Kind of Wood Should I Use to Build a Countertop?
There are many different types of wood that can be used to build a countertop, but some are more suitable than others. Hardwoods such as oak and maple are ideal, as they’re strong and durable. Softer woods like pine may be cheaper, but they’re more likely to dent or scratch.
If you’re looking for a natural wood countertop, then make sure to choose a species that won’t stain easily, such as cherry or teak. And if you plan on putting hot pans or dishes on your countertop, then make sure to select a heat-resistant variety like mahogany or bamboo.
Whatever type of wood you choose, make sure it’s been properly sealed and treated so that it can withstand years of use in your kitchen.
How Do You Make a Homemade Wood Countertop?
Assuming you would like a tutorial on how to make a wood countertop:
You will need the following supplies:
-4ft x 8ft sheet of 1/2 inch plywood
-Circular saw
-Ruler or measuring tape
-High-grit sandpaper
-Stain (optional)
-Polyurethane
-(2) 2x4s, cut to size of desired countertop length
-(8) L brackets
Instructions:
1. Begin by cutting your sheet of plywood down to the size you desire for your countertop using a circular saw.
If you need help deciding on dimensions, take measurements of your current countertop and use those as a guide. Keep in mind that you will be adding trim later, so don’t make the cuts too close to the edge of the plywood.
Cut two strips of 2×4 that are as long as your desired countertop length.
These will serve as supports for underneath the countertop. Place them about 4 inches apart from each other, directly in the middle of the width of the plywood sheet. Screw them into place using screws and washers at least 3 inches long.
Make sure they are flush with the top edge of the plywood so that they provide support without being visible from above.
3. Next, sand down all sides and edges of the plywood using high grit sandpaper until smooth. Wipe away any dust with a damp cloth before proceeding to step 4.
4a) If you choose to stain your countertop, now is the time to do it! Follow directions on your chosen stain product– generally, apply evenly with a rag or brush and wipe away excess after waiting the recommended amount of time (usually around 15 minutes). Again, make sure to wipe away any dust before applying polyurethane in step 5.
5) Apply polyurethane generously and evenly over all surfaces of your now stained (or unstained!) countertop using a foam brush or paint roller designed for this purpose.. Be sure not to miss any spots, especially along edges where water damage is more likely occur if left unprotected.. Allow 24 hours for drying time between coats; apply at least 3 coats total for best results.. Sand lightly with fine grit sandpaper between each coat if desired for an extra smooth finish..
How Thick Does a Wood Countertop Need to Be?
When it comes to wood countertops, thickness is definitely something you’ll want to take into consideration. The general rule of thumb is that the thicker the better – especially when it comes to durability and stability.
For most average sized kitchens, a countertop that is 1-1/2″ thick should be more than sufficient. However, if you have a larger kitchen or one with particularly heavy use, you may want to opt for something even thicker – like 2″ or even 3″.
Of course, thickness isn’t everything – the type of wood you choose will also make a big difference in how your countertop looks and performs. So be sure to do your research and pick out a material that will suit your needs best!
Can You Make Countertops Out of Wood?
Wood countertops are a beautiful and unique addition to any kitchen. They’re also relatively easy to install, as long as you have basic carpentry skills. Here’s what you need to know about installing wood countertops in your kitchen.
The first step is to choose the right wood for your countertop. Hardwoods like maple or oak are ideal, since they’re less likely to scratch or dent than softwoods like pine. You’ll also want to make sure the wood is properly sealed and finished before installation.
Once you’ve chosen the perfect wood for your counters, it’s time to measure and cut it to size. It’s important to get precise measurements, so that your countertop will fit perfectly into your kitchen space.
After cutting the wood to size, the next step is to attach it to the base cabinets using screws or brackets.
Make sure everything is level and plumb before proceeding with the next step.
Now it’s time to apply a finish of your choice – whether it’s stain, paint or varnish – and enjoy your new wood countertop!
How to Build & Seal Wood Countertops
Conclusion
A wood countertop is a great way to add character and warmth to your kitchen. If you’re planning on putting in a new countertop, here’s how to build one yourself.
First, cut the lumber to size and shape using a circular saw.
Then, sand the edges smooth with sandpaper. Next, apply a coat of primer and let it dry. Once the primer is dry, paint the countertop with a color of your choice.
Finally, apply two coats of polyurethane to protect the finish.