How to Build a Walk-In Shower on a Wood Floor
Installing a walk-in shower on a wood floor requires some special considerations to prevent leaks. The first step is to install a waterproof membrane over the subfloor. This can be done with a sheet of plastic or a specialized product like Schluter Kerdi.
Once the membrane is in place, you can install the shower base and walls. Be sure to use silicone sealant around all joints to create a watertight barrier. Finally, install your tile or other finish material.
Again, use silicone sealant at all joints and seams to keep water from seeping through.
- Remove any existing flooring material from the shower area, down to the subfloor
- If necessary, install new plywood or OSB subflooring to create a solid base for the new shower
- Install a water-resistant barrier on top of the subflooring, such as an asphalt-coated felt paper or 6-mil polyethylene sheeting
- Install metal flashing at all corners and joints where the shower will meet walls or other vertical surfaces
- Install wood studs around the perimeter of the shower area, using corrosion-resistant fasteners such as screws or nails
- Cut and install waterproof gypsum board on all walls surrounding the shower area; be sure to use greenboard or another type of moisture-resistant drywall in wet areas like showers
- Prime and paint all drywall surfaces with a waterproof sealant designed specifically for bathrooms
- Install your chosen flooring material in the shower area; vinyl sheeting, ceramic tile, and stone are all common choices that can withstand repeated exposure to water
How to Build a Shower Pan on Plywood Floor
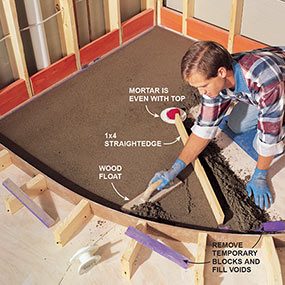
The first step is to cut a hole in the plywood for the shower drain. The second step is to install a layer of Schluter Kerdi over the entire floor. This will create a waterproof barrier.
Next, you will need to install a layer of mortar over the Kerdi. Be sure to smooth it out as much as possible. Then, you will need to set the shower pan into place and attach it to the studs with screws.
Finally, you seal around the shower pan with silicone caulk.
How to Build a Walk-In Shower Floor
A walk-in shower is a great way to add value to your home. It can also be a relaxing oasis after a long day. But before you can enjoy your new shower, you need to build the floor.
Building a walk-in shower floor is not as difficult as it may seem. With a little planning and the right materials, you can have a beautiful and functional shower in no time. Here are the steps you need to take to build your own walk-in shower floor:
1. Decide on the size and location of your shower. Walk-in showers can be placed in any room of the house, but they are most commonly found in bathrooms. They can be either stand-alone units or built into an existing bathroom space.
Once you know where your shower will go, you can start planning the rest of the project.
2. Choose your tile. Tile is the most popular choice for walk-in showers because it is waterproof and easy to clean.
There are many different types and styles of tile available, so take some time to browse through your options before making a final decision. Keep in mind that darker tiles will show dirt more easily than lighter ones, so choose accordingly based on how much maintenance you’re willing to do.
3 Make a plan for your drainage system .
One of the most important aspects of any walk-in shower is proper drainage . Without it, water will pool at your feet every time you use the shower , which isn’t very pleasant (or safe). To ensure proper drainage , make sure that there is at least a 1/4″ slope from all sides of the shower towards the drain .
This can be accomplished by using thicker tiles along the edges of the floor or by installing curbs around the perimeter of the space . You may also need to install additional drains if your chosen tile doesn’t have good drainage properties . Consult with a professional if you’re unsure about how to properly drain your walk – in shower .
How to Build a Walk in Shower on a Concrete Floor
If you’re looking to add a walk in shower to your home, you may be wondering how to go about it if you have a concrete floor. While traditional showers are built on top of a subfloor, it is possible to build a walk in shower on a concrete floor with the proper preparation. Here’s what you need to know about building a walk in shower on a concrete floor:
The first step is to create a sloped surface for the drain. This can be done by attaching furring strips around the perimeter of the shower area and then installing a layer of plywood over top. The plywood should be sloped so that water will drain towards the center of the shower.
Once the plywood is installed, you can then tile over top of it.
Another option for creating a sloped surface for drainage is to use self-leveling cement. This type of cement is applied over the entire shower area and then allowed to dry.
Once it’s dry, it creates an even surface that slopes towards the drain. Self-leveling cement can be found at most hardware stores and home improvement centers.
Once you have created a sloped surface for drainage, you need to install a waterproof membrane over top of it before tiling.
This will help prevent water from seeping through cracks in the tile and causing leaks. There are several different types of waterproof membranes available, so be sure to consult with someone at your local home improvement store before making your purchase.
After the waterproof membrane has been installed, you’re ready to start tiling!
Begin by measuring out where each tile will go and then spreading adhesive onto the back of each one.
How to Build a Shower Floor
If you’re planning on installing a new shower, one of the most important aspects to consider is the floor. The base of your shower needs to be strong and level in order to prevent leaking, but it also needs to be comfortable and slip-resistant. Here’s a step-by-step guide on how to build a shower floor that meets all of these criteria:
1. Begin by leveling out the area where you’ll be installing the shower. This may require some demolition work if there are existing walls or fixtures in the way.
2. Once the area is prepped, it’s time to start laying down a vapor barrier.
This will help keep water from seeping through and damaging your subflooring.
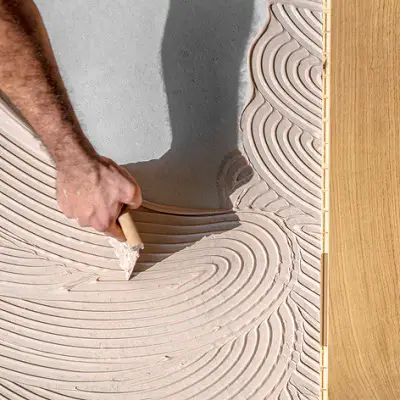
3. Next, install a layer of concrete board over the vapor barrier. This will provide an extra layer of protection against leaks.
4. Once the concrete board is in place, you can now begin tiling your floor. Make sure to use mortar or another type of adhesive designed for showers; regular tile adhesive won’t stand up to moisture as well as something specifically made for wet areas like showers.
5 11 After your tiles are installed, grout them into place using a waterproof grout sealer .
This will help keep water from seeping between tiles and causing mold or mildew growth . Allow the grout sealer to dry completely before continuing . Choose a color that coordinates with your tile selection , then apply it evenly with a sponge or brush following manufacturer’s directions .
Rinse off any excess grout sealer with clean water once you’re finished . 12 Lastly , silicone caulk should be applied around all perimeter seams where tile meets tub , walls , or other surfaces both inside and outside of the shower stall . Apply caulk smoothly using even pressure ; avoid stopping and starting because this can create gaps which allow moisture through 13 Your new shower floor is now complete!
By following these simple steps , you can rest assured knowing that your space is both beautiful and functional .
How to Build a Walk-In Shower from Scratch
Building a walk-in shower from scratch may seem like a daunting task, but with the right tools and materials, it can be easily accomplished. Here are the basic steps to take when building a walk-in shower:
1. Choose the location for your walk-in shower.
The location should be large enough to accommodate the size of shower you want, as well as any additional features such as benches or shelves.
2. Mark out the perimeter of the shower with chalk or tape so you know where to begin construction.
3. Begin framing out the walls of the shower using 2×4 lumber.
It is important to use pressure-treated lumber if your shower will be located in an area that gets wet frequently, such as near a pool or hot tub.
4. Once the walls are framed, attach plywood or drywall to enclose the space completely. Be sure to use moisture-resistant materials if your shower will be located in a damp area.
5 Install insulation in between the studs of your framed walls to help keep water from seeping through into other areas of your home. This is especially important if you live in a colder climate where temperatures could freeze and cause pipes to burst inside your home.
6 Hang waterproof sheeting on all sides of the enclosure, taping it securely into place so no water can enter behind it later on during showers .
Finish by caulking around all edges and seams where water could potentially enter . This will create a barrier against leaks . Waterproofing is essential since even small leaks can cause extensive damage over time .
Credit: www.familyhandyman.com
How to Build a Shower on a Wood Floor?
Assuming you would like a step-by-step guide on how to build a shower on a wood floor:
1. Decide where the shower will be located and take proper measurements. It’s important that the area is large enough to comfortably fit both you and your showering needs.
2. Once you’ve decided on the location, clear out any debris or obstacles that may be in the way. This includes furniture, carpets, etc.
3. Next, use a straight edge to draw lines marking the perimeter of the shower space on the floor.
Be sure to double check your measurements before making any cuts!
4. Using a saw, cut along the lines you just drew to create an opening for your shower base. If you’re not comfortable using power tools, you can always hire someone to do this part for you.
5. With the hole cut out, it’s time to install your shower base according to its specific instructions. In most cases, this will involve setting it in place and attaching it with screws or another type of fastener.
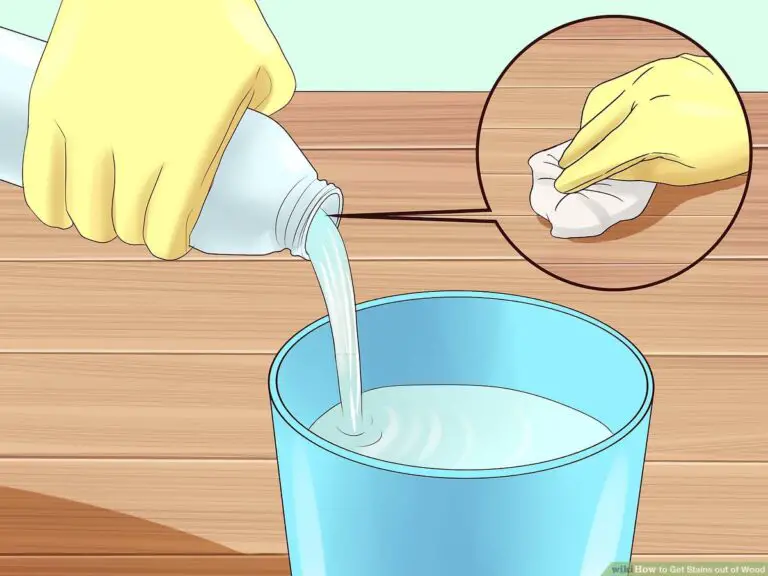
6 waterproofing is key when building a shower on a wood floor!
Before continuing with installation, make sure all seams are properly sealed with caulk or another waterproof sealant according to manufacturer instructions . This will help prevent water damage down the road .7 Now that everything is sealed up tight , it ’s time for tile ! Choose whatever type of tile best suits your taste and style – there are endless possibilities .
Just be sure that each individual tile is properly adhered to the surface according . 8 After letting the adhesive dry completely , apply grout between each tile joint . Once again , follow manufacturer instructions carefully here in order achieve optimal results 9 The last step is installing your drain assembly kit which typically includes a drain grate , drain body , rubber gasket , and metal washer / nut combination 10 All done !
What Do You Put on Floor for Walk-In Shower?
When it comes to walk-in showers, there are a few things you need to take into consideration in order to ensure the space is both safe and stylish. The flooring you choose will play a big role in this, as certain materials are more slip-resistant than others and some can also make the space feel more luxurious. Here are a few of the best flooring options for walk-in showers:
Tile: Tile is one of the most popular choices for walk-in shower floors as it provides good traction and is easy to clean. You can opt for classic white tiles or go for something more adventurous with patterned or colored options.
Stone: Stone floors can give your walk-in shower an upscale look and feel.
They’re also slip-resistant, making them a good choice if safety is a concern. However, stone floors can be pricey and require more maintenance than other options.
Wood: Wood floors are another luxurious option that can add warmth to your walk-in shower.
They’re also slip-resistant when treated properly, but they will require more upkeep than tile or stone floors.
Concrete: Concrete is a durable option that works well in both large and small spaces. It’s easy to clean and maintain, but does not provide as much traction as some of the other materials on this list.
What is the Best Base for a Walk-In Shower?
A walk-in shower can be a great addition to any bathroom. They are especially convenient if you have a small bathroom as they take up less space than a traditional shower/tub combo. But what is the best base for a walk-in shower?
There are two main types of bases for walk-in showers – tile and acrylic. Tile is the most popular choice as it is durable and easy to clean. Acrylic bases are also popular as they are easier to install and maintain than tile.
The best base for a walk-in shower really depends on your needs and preferences. If you want a durable and easy-to-clean base, then tile is the way to go. If you want an easier-to-install and maintain base, then acrylic is the better option.
How Do You Level a Wooden Floor for a Shower Base?
If you’re planning on installing a shower base in your bathroom, you’ll need to make sure the floor is level first. This is especially important if you’re using a prefabricated shower base, as these are designed to sit flush against the ground. Leveling the floor will help ensure that your shower drains properly and doesn’t leak.
There are a few different ways that you can level a wooden floor for a shower base. One option is to use self-leveling concrete. This can be poured directly over the existing floor and will quickly set and harden, creating a perfectly level surface.
Another option is to install plywood sheets over the existing floor. You’ll need to use shims or wedges to create an even surface, but this method is more time-consuming than using self-leveling concrete. Once the plywood is in place, you can then install your shower base according to the manufacturer’s instructions.
Whichever method you choose, leveling the floor before installing your shower base is essential for ensuring proper function and preventing leaks.
How to Build a Walk-In Shower (Part 1: Wedi Shower Pan Install)
Conclusion
Building a walk-in shower on a wood floor is not as difficult as it may seem. With the right tools and materials, you can easily install a walk-in shower in your home. Here are the steps to follow:
1. Choose the location for your walk-in shower. The most important factor to consider is the drainage. Walk-in showers need good drainage to avoid water damage to your floors.
2. Mark the area where the drain will be located. This is typically done by driving a nail into the center of the drain location.
3. Cut out the center of the marked area using a saw or other cutting tool.
Be sure to wear protective gear when using power tools.
4. Install the drain assembly according to manufacturer’s instructions.5 。Create wooden frame around marked area if needed .
This will provide support for tile or other finishes you choose for your shower walls 6。Apply waterproofing material to entire shower area, paying special attention to seams and joints 7。Install tile or other finish material on shower walls 8。
Install glass doors or curtain 9、Enjoy your new walk-in shower!