How to Apply Varathane Wood Stain
Whether you’re looking to add color to wood furniture or protect outdoor surfaces, Varathane Wood Stain is a great option. This oil-based stain is available in a variety of colors and can be applied with a brush, roller, or sprayer. Here’s how to apply Varathane Wood Stain for best results:
Start by sanding the surface you’ll be staining. This will help the stain adhere better and create a smoother finish. If you’re working with bare wood, start with 120-grit sandpaper and work your way up to 220-grit.
If the surface has already been stained or painted, use 120-grit sandpaper to remove any existing finishes before applying Varathane Wood Stain.
Once the surface is sanded, wipe away any dust with a clean cloth. Then, choose the application method that best suits your project.
For large surfaces like decks and fences, a pump sprayer will make quick work of applying the stain. For smaller projects like furniture, using a brush or roller will give you more control over the amount of stain being applied.
Whichever application method you choose, always work in sections and keep a wet edge to avoid creating lap marks.
To ensure even coverage, always start at one end of the surface and work your way towards the other end. Once you’ve finished applying the stain, let it dry for at least two hours before putting anything back on top of it (like furniture) or walking on it (like a deck).
- Decide which varnish you would like to use
- You can choose from a variety of colors and finishes
- Make sure the area you will be working in is well ventilated and that you are wearing gloves and a mask to avoid inhaling fumes
- sand the surface of your wood project with fine-grit sandpaper until it is smooth
- Wipe away any dust with a tack cloth
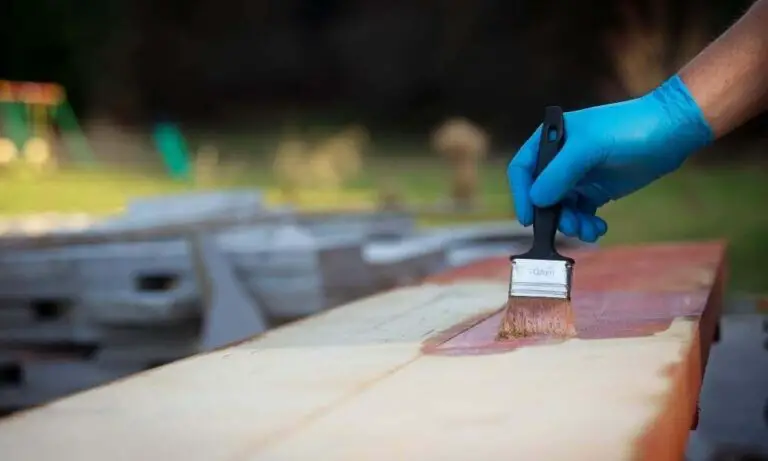
- Apply a thin, even coat of stain with a brush, working in the direction of the grain
- Allow the stain to dry completely before applying a topcoat or varnish (optional)
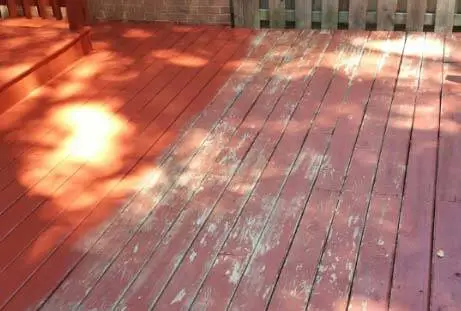
How to Apply Varathane Wood Stain to Floors
Are you considering staining your floors but don’t know where to start? Look no further! This guide will show you how to apply Varathane wood stain to your floors, step by step.
Before you begin, it’s important to sand your floors and remove any existing finish. Once that’s done, you can vacuum up the dust and then wipe the floors down with a damp cloth. Now you’re ready to start staining!
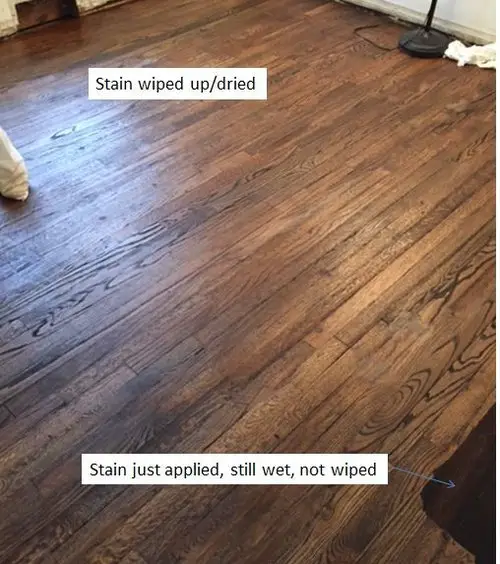
To apply the stain, pour a small amount onto a clean rag or brush and then spread it evenly over the floor. Be sure to work in small sections so that the stain doesn’t dry before you have a chance to spread it around. Once you’ve covered the entire floor, let the stain sit for about 15 minutes before wiping off any excess with a clean rag.
That’s it! Your floors are now stained and protected against wear and tear.
Read: How to Remove Alcohol Stains from Wood Floor
Varathane Premium Wood Stain Oil Or Water Based
There are two main types of wood stains available on the market today: oil-based and water-based. Both have their pros and cons, so it’s important to know which one is right for your project before you get started.
Oil-based stains have been around the longest and are generally more durable than water-based stains.
They penetrate deeper into the wood, making them ideal for thicker pieces of lumber or for staining hardwoods. However, oil-based stains can be difficult to work with and cleanup can be a challenge since they require mineral spirits or paint thinner.
Water-based stains are newer to the market but have quickly become a favorite among professionals and DIYers alike.
They’re much easier to apply and cleanup is a breeze since all you need is soap and water. Water-based stains also don’t have the strong odor that comes with oil-based options. The downside is that they don’t penetrate as deeply into the wood, so they’re not ideal for thick pieces or hardwoods.
Read to find good one: Water-Based Wood Stain on Concrete
Varathane Pre Stain Wood Conditioner
Prepping your wood before you stain is always a good idea, and Varathane’s Pre-Stain Wood Conditioner is a great option. This conditioner helps to even out the absorbency of the wood, so that the stain will be applied evenly. It also helps to prevent blotching and streaking, so that your final product has a professional finish.
Simply apply the conditioner with a clean cloth according to the directions, let it dry for about 15 minutes, and then proceed with staining as usual. Your wood will thank you for taking this extra step!
Essential: How to Apply Pre Stain Wood Conditioner Varathane
Varathane Wood Stain Water-Based
If you’re looking for an easy-to-use wood stain that will give your projects a beautiful, professional finish, then Varathane Wood Stain Water-Based is the perfect product for you! This stain is available in a variety of colors, so you can choose the perfect shade to match your project. Plus, it goes on smoothly and evenly, making it simple to achieve consistent results.
Best of all, cleanup is a breeze with just soap and water.
So what are you waiting for? Get started staining your wood projects today with Varathane Wood Stain Water-Based!
Varathane Wood Stain Dry Time
It’s important to know how long your wood stain will take to dry. This is especially important if you’re doing a project that requires several coats of stain. Varathane Wood Stain has a dry time of about 2-4 hours, depending on the temperature and humidity levels in your area.
If it’s particularly hot or humid, it may take longer for the stain to dry completely. You can speed up the drying process by using a hairdryer or fanning the area with a piece of cardboard. Once the stain is dry, you can apply a sealer or topcoat if desired.

Credit: repurposeandupcycle.com
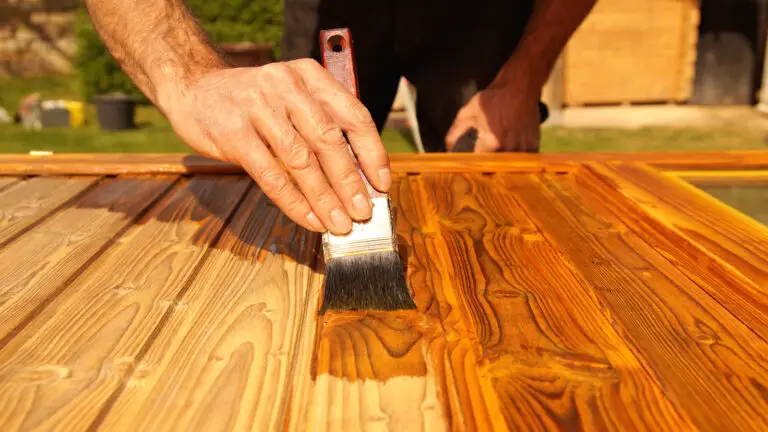
What is the Best Way to Apply Varathane?
The best way to apply Varathane is by using a brush or roller. For small projects, you can use a paintbrush. For larger projects, you will want to use a roller.
Apply the Varathane in a thin, even coat and allow it to dry completely before applying another coat.
How Do You Apply Wood Stain Step by Step?
Assuming you would like a blog post on how to apply wood stain: Applying wood stain is not difficult, but there are a few things you need to do in order to ensure that the job is done properly. Here are the steps you need to follow:
1. Start by sanding your piece of wood. This will help create a smooth surface for the stain to adhere to. If the wood is already smooth, you can skip this step.
2. Next, wipe down the wood with a damp cloth to remove any dust or dirt that may be on it. Allow the wood to dry completely before proceeding. 3. Now it’s time to apply the stain.
For best results, use a brush or rag designed for staining purposes. Dip your brush or rag into the stain and then apply it evenly across the surface of the wood. Be sure to work in small sections so that the stain doesn’t have a chance to dry before you’re finished with it.
4 .Once you’ve applied the stain evenly, allow it to sit for a few minutes before wiping away any excess with a clean cloth. You don’t want there to be any pooling of stains, as this can lead to an uneven finish once everything dries completely.
Read to know: How Long to Let Oil-Based Stain Dry before Water Based Poly
Do You Have to Seal Varathane Wood Stain?
Yes, you need to seal Varathane wood stain. If you don’t, the stain will eventually wear away and your wood will be unprotected.
How Long Do You Leave Varathane Stain In?
It is recommended that you leave varathane stain on for at least two hours, but no more than 24 hours. This will give the stain time to penetrate the wood and achieve the desired color. If you leave it on for too long, the stain may start to peel or flake off.
How To Stain Wood With Varathane
Conclusion
When it comes to woodworking, staining is a necessary evil. But with the right technique and product, you can achieve beautiful results without all the hassle. Here’s how to apply Varathane wood stain like a pro.
The first step is to sand your project piece smooth. This will help the stain evenly penetrate the wood and avoid any blotching or streaking. Once you’ve sanded, vacuum up any dust and wipe down the surface with a damp cloth to remove any lingering debris.
Now it’s time to apply the stain. For best results, use a natural bristle brush or lint-free rag and work in long, even strokes in the same direction as the grain of the wood. Be sure to overlap each stroke so there are no bare spots.
Once you’ve covered the entire surface, let the stain sit for about five minutes before wiping away any excess with a clean cloth. You’ll want to work quickly here so that the stain doesn’t have a chance to dry on top of the wood and cause streaks or uneven coloration.
Finally, allow the stained piece to dry completely before applying a clear finish such as polyurethane or lacquer.
This will protect your hard work and ensure that your project looks great for years to come!