How Do You Engrave on Wood
The best way to engrave on wood is to use a laser engraver. Laser engravers are able to precisely and quickly engrave complex designs onto wood surfaces. If you do not have access to a laser engraver, you can try using a rotary tool with a carbide bit.
There are a few different ways that you can engrave on wood. The most popular method is to use a laser engraver. This type of engraving uses a high-powered laser to burn away the top layer of wood, revealing the grain below.
Another popular method is to use a CNC router. This type of machine uses a rotating bit to carve away at the wood. Both of these methods require some level of skill and experience to get good results.
If you’re looking for a more DIY approach, you can try using a Dremel tool. This handheld rotary tool can be fitted with various bits that will allow you to etch or carve into the wood surface. Again, this method takes some practice to perfect but can be great for smaller projects.
How to Engrave Wood Without Tools
Assuming you would like a blog post discussing how to engrave wood without any tools:
One of the simplest ways to add a personal touch to your home is by engraving words or images into wood. This technique can be used on everything from picture frames and jewelry boxes to end tables and headboards.
And best of all, it doesn’t require any fancy tools or materials – just a little bit of time and patience! Here’s how to get started:
First, gather your supplies.
You’ll need some wood (obviously), a sharp pencil, and something sharp enough to scratch the surface of the wood (a nail, paperclip, or even a toothpick will work). If you want to add color to your engraving, you can also grab some paint or markers.
Next, decide what you want to engrave on the wood.
This can be anything from a simple word or phrase to an intricate design. Once you have your image in mind, use your pencil to lightly trace it onto the surface of the wood.
Now it’s time for the fun part – starting your engraving!
Using whatever sharp object you chose earlier (a nail, paperclip, etc.), start scratching away at your pencil lines. Be sure not to press too hard – you don’t want to gouge out chunks of wood! If necessary, go over your lines multiple times until they’re nice and deep.
If you’re adding color to your engraving, now is the time to do it. Simply fill in the scratched lines with paint or markers – let dry completely before moving on.
That’s it!
You’ve successfully engraved words or images into wood without any fancy tools required. Now enjoy showing off your unique creation!
How to Engrave Wood by Hand
When it comes to engraving wood by hand, there are a few things you need to know in order to get started. First, you’ll need to determine what type of wood you’d like to use for your project. This will largely be determined by the look you’re going for and the size of the piece you’re working on.
Once you have your wood selected, the next step is to gather your tools.
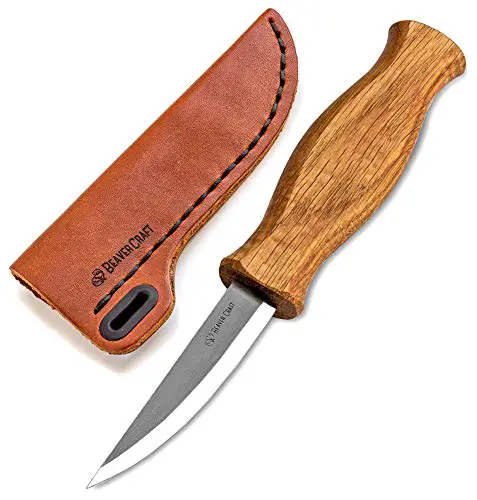
For smaller projects, a sharp knife or an X-Acto knife will suffice. However, if you’re looking to do some more detailed work, you may want to invest in a Dremel tool or similar rotary tool.
These can be found at most hardware stores. Next, you’ll need something to use as a stencil for your design. This could be anything from a simple pencil sketch to a more intricate template.
If using a template, make sure it is properly secured before beginning any carving.
Now that you have all of your materials gathered, it’s time to start engraving! For best results, start with slow and shallow strokes before increasing both speed and depth as needed.
If at any point during the process you find that your tools are slipping or catching on the wood, simply stop and adjust accordingly – there’s no need to force anything. And last but not least, don’t forget to sand down your work once you’ve finished!
Wood Engraving for Beginners
Wood engraving is a type of relief printing that involves carving lines into a block of wood. The block is then inked and pressed onto paper to create an image. Wood engraving can be used to create both text and images, and it is often used for illustrations in books or other publications.
If you’re interested in trying wood engraving, there are a few things you’ll need to get started. First, you’ll need a piece of wood that’s fairly thin (no more than 1/8 of an inch thick) and smooth. You’ll also need a sharp knife or gouge and some sort of printing press.
A simple hand-held drill can also be useful for making small holes in the wood block.
Once you have your materials, you’re ready to start carving! Begin by sketching out your design on the piece of wood.
It’s important to use light strokes so that you can easily erase any mistakes. When you’re happy with your design, start carving out the lines with your knife or gouge. Be careful not to carve too deeply, as this will make it difficult to print your image properly.
Once you’ve finished carving, it’s time to ink the block. Use a brayer (a roller) to evenly distribute ink over the entire surface of the block. Then place your paper on top of the inked block and run it through a printing press (or use something heavy like a book to apply pressure).
Lift up the paper carefully to reveal your printed image!
How to Engrave Wood With Dremel
Almost any home improvement project you undertake is going to require some kind of engraving. Whether it’s for adding detail to a piece of furniture or labeling tools in your workshop, knowing how to use a Dremel to engrave wood can come in handy. Here’s a quick guide on how to do it:
1. Choose the right bit: The type of bit you’ll need will depend on the depth and detail of the engraving you want to create. For shallow lines, use a pointed tip; for deeper grooves, go with a ball tip or cone tip.
2. Set the speed: A higher speed is better for lighter-duty jobs like detailed work or cutting curves; lower speeds are better for heavier-duty tasks like removing material quickly.
Use the chart on your Dremel tool as a guide.
3. Start slow: It’s always best to start at a slower speed and increase as needed rather than starting at full power and risk making mistakes. You can always go back and adjust if necessary, but it’s much harder to fix an accidental mistake!
4. Apply light pressure: Again, less is more when you’re first starting out. Too much pressure can damage both the wood and the bit, so take it easy at first until you get a feel for how much pressure is needed.
With these tips in mind, grab your Dremel tool and get started on your next woodworking project!
How to Etch Wood With Cricut
Etching wood with a Cricut machine is a great way to add personalization to your woodworking projects. With this method, you can easily add text, images, or other designs to your wood pieces. Here are the steps you need to follow to etch wood with a Cricut machine:
1) Select the design you want to use for your etching project. You can create your own design using the Cricut Design Space software, or choose from one of the many pre-made designs available in the Cricut Image Library.
2) Once you have your design ready, load it into your Cricut machine and select “Wood” as the material type.
Then adjust the blade depth and cutting speed settings according to the instructions that came with your machine.
3) Next, place your piece of wood onto the cutting mat and load it into the Cricut machine. Then press “Go” to start cutting out your design.
4) When the cutting is complete, remove your wood piece from the mat and sand down any rough edges around the etched area.
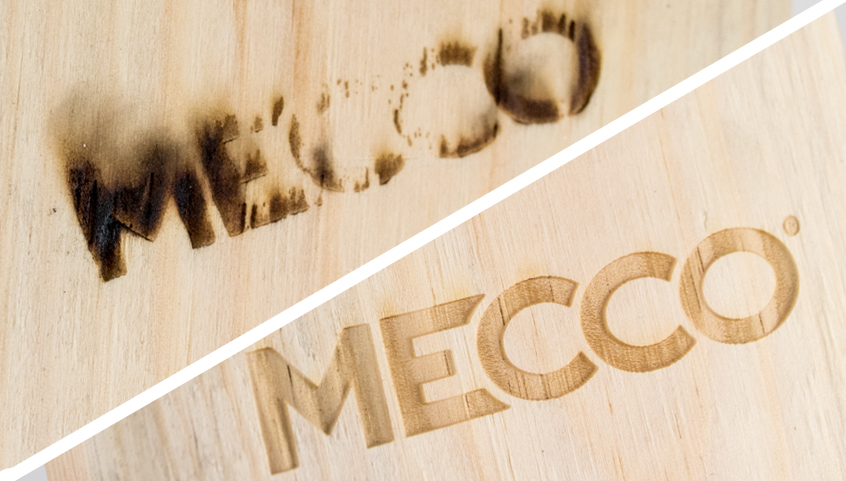
Credit: www.mecco.com
How Do You Engrave Words on Wood?
If you’re looking to add a personal touch to a woodworking project, engraving is a great way to do it! There are many different ways to engrave words on wood, and the best method for you will depend on the tools and materials you have available.
One popular method is to use a Dremel tool with an engraving bit.
This gives you great control over the depth and width of your cuts, allowing you to create very detailed designs. If you don’t have a Dremel, you can also use a handheld rotary tool like a Foredom or Proxxon.
Another option is to use a stencil and paint or markers.
This is a quick and easy way to get started with engraving, but it’s not as precise as using power tools. You can also try using stamps or carving blocks instead of stencils for more control over your design.
No matter what method you choose, be sure to practice on scrap wood first so that you can get a feel for how deep your cuts need to be.
And when you’re ready to start engraving, just remember to take your time – it’s all about making beautiful, lasting memories!
What Do I Need for Wood Engraving?
Assuming you would like an answer to the question of what one needs for wood engraving:
The most important tool for wood engraving is the burin. This is a small, hand-held chisel with a sharp point that is used to carve lines into the wood.
A burin can be made from various materials, but steel is the most common. Other tools that may be used in wood engraving include hammers, saws, files, and sandpaper.
Engravers will also need a workbench or some other type of sturdy surface on which to rest the piece of wood they are working on.
A vise may also be used to hold the wood in place while it is being worked on. Engravers will also need a light source so that they can see what they are doing. Finally, engravers will need a supply of carving knives in various sizes and shapes.
How is Wood Engraving Done?
Wood engraving is done by carving a design into the surface of a piece of wood. The carving can be done with a variety of tools, including a knife, chisel, or router. The depth of the carving will determine how much of the design is visible.
shallower carvings will result in a more subtle look, while deeper carvings will be more pronounced.
To get started, you’ll need to select a piece of wood that is smooth and free of knots or other imperfections. You’ll also need to decide on the size and shape of your design.
Once you have your materials and design ready, you can begin tracing your pattern onto the wood using a pencil or other marking tool.
Next, start carving out your design using whatever tools you have chosen. If you’re using a knife, be sure to use short strokes and go slowly to avoid accidents.
With each stroke, remove only as much wood as necessary to create the desired effect. It’s important to take your time with this step so that you don’t damage the wood or make any mistakes in your carving.
Once you’re finished carving, sand down the edges of your work until they are smooth.
Is It Easy to Engrave Wood?
Wood engraving is a form of relief printing and is different from woodcut in that the design is cut into the surface of the block. As opposed to woodcut, where the artist carves away the negative space, in wood engraving, it is the positive space that remains.
Wood engraving has a long history dating back to at least the 17th century.
It was commonly used for book illustrations, as well as for maps and other prints.
Today, wood engraving is still used for printmaking, but it has also gained popularity as a decorative technique for furniture, jewelry, and other objects.
So, is it easy to engrave wood?
The short answer is yes! With the right tools and some practice, anyone can learn how to engrave wood.
Of course, like any skill, there is a bit of a learning curve involved.
But once you get the hang of it, wood engraving can be quite therapeutic – not to mention rewarding! There’s nothing quite like seeing your own designs come to life on a piece of wood.
Engraving on wood
Conclusion
Wood engraving is a form of printmaking that involves carving out a design on a piece of wood. The wood is then inked and pressed onto paper to create an image. Engraving on wood is a delicate process that requires precision and skill.
There are two main types of wood engraving: relief printing and intaglio printing. Relief printing is the more common type of wood engraving, and it involves carving out the design so that it sits above the surface of the wood. Intaglio printing, on the other hand, involves carving into the wood so that the design is below the surface.
This type of engraving is more difficult to do but produces a higher-quality image.
To begin engraving on wood, you will need to select a piece of wood that is smooth and free of knots or blemishes. You will also need to choose a design that you want to carve into the wood.
Once you have your materials ready, you can start carving out your design using a variety of tools including chisels, knives, and gouges.
Wood engraving can be used to create both functional and decorative items. Some people use it to make signs or plaques while others may use it to decorate furniture or picture frames.
No matter what you use it for, wood engraving is a great way to add personalization and beauty to any project!