Wood Burning Tip Types
There are different types of wood burning tips that you can use for your projects. Each type of tip has its own advantages and disadvantages, so it is important to choose the right one for the job. Here are some of the most popular types of wood burning tips:
The first type of wood burning tip is the round tip. This is the most common type of tip and it is great for general purpose work. The round tip produces a smooth, even line and it is easy to control.
The second type of wood burning tip is the chisel tip. This type of tip is good for creating lines with more detail. The chisel tip produces a finer line than the roundtip and it can be used to create intricate designs.
The third type of wood burning tip is the calligraphy pen styletip. This type of tip creates thick, bold lines and it is ideal for writing or drawing letters. The calligraphy pen styletip is also great for filling in large areas quickly.
There are three main types of wood burning tips: the round tip, the flat tip, and the pointed tip. Each one has its own advantages and disadvantages, so it’s important to choose the right one for your project.
The round tip is the most versatile of the three and can be used for a variety of tasks.
It’s great for making curved lines and detailed shapes. However, it can be difficult to control and may produce smoke if not used properly.
The flat tip is best suited for straight lines and large areas.
It’s easy to control and doesn’t produce much smoke. However, it can’t create intricate designs like the round tip can.
The pointed tip is perfect for creating small details and fine lines.
It’s very precise and doesn’t produce much smoke.
Wood Burning Tip Guide
Wood burning is an excellent way to add a personal touch to your home décor. Whether you’re looking to add warmth to a room or simply want to create a unique piece of art, wood burning is a great option. However, it’s important to keep a few things in mind when you’re working with wood burning tools.
Here are some tips to help you get the best results:
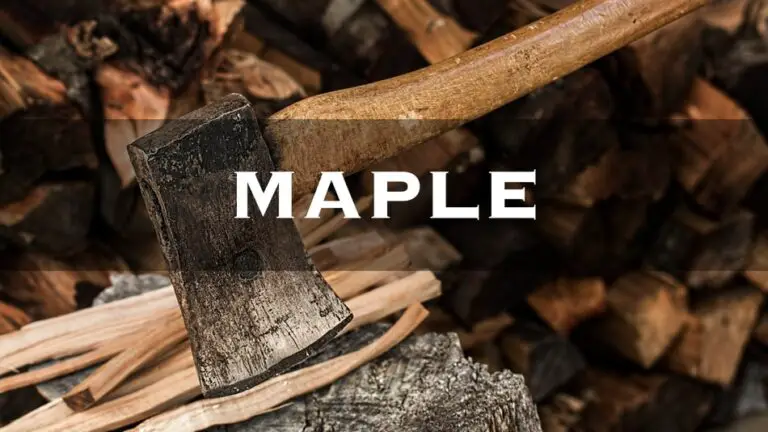
1. Choose the right wood. Hardwoods like maple and oak are ideal for wood burning because they have tight grain patterns that produce clean lines and detailed images.
Softwoods like pine and cedar can be more difficult to work with because their grain patterns are more open, which can cause your lines to be less defined.
2. Prep your wood before you start burning. Sanding your wood will help create a smooth surface for burns, while priming will help prevent the wood from scorching or discoloring during the burning process.
3. Use the right tools. A quality wood burner is essential for achieving great results. Look for one that has multiple temperature settings so you can adjust according to the type of wood you’re working with and the design you’re trying to create.
Additionally, different tips can produce different effects, so it’s helpful to have a variety on hand (e.g., fine-tipped pens for details versus broader chisels for larger areas).
4 . Practice on scrap pieces of wood before starting your project .
This will help you get a feel for how your tool works and how long it takes to achieve certain effects . Plus , it ’s always better t o make mistakes on practice pieces rather than on your final project !
Wood Burning Tip for Writing
There’s something special about writing with a wood burning pen. The scent of the wood, the feel of the heat on your paper, and the beautiful results you can achieve are just some of the reasons why this type of writing is so popular. If you’re new to wood burning, or simply want to improve your skills, here are a few tips to help you get started.
One of the most important things to remember when wood burning is to go slowly. It’s tempting to try and speed through your project, but this will only result in mistakes and uneven lines. Take your time and focus on each stroke – you’ll be glad you did when you see the final product!
Another tip is to practice on scrap pieces of wood before tackling your main project. This will help you get a feel for how much pressure to apply, how fast or slow to move your pen, and what sort of results you can expect. Once you’ve got the hang of it, you’ll be ready to tackle anything!
Finally, don’t be afraid to experiment. There are all sorts of different techniques that can be used when wood burning – from stippling to hatching – so explore different ways until you find ones that work best for you. And if something doesn’t turn out quite as planned?
Just consider it a learning experience and try again next time!
Are Wire Tips Better for Wood Burning
Are Wire Tips Better for Wood Burning?
If you’re looking for the best wood burning tips, you may be wondering if wire tips are better than other types. After all, wire tips offer many benefits over traditional wood burning tips.
Here’s a look at some of the advantages of using wire tips for your next wood burning project:
1. Wire tips offer more precision. When you’re working with delicate details, a wire tip can help you achieve the results you want.
With a traditional wood burning tip, it can be easy to accidently burn too deeply or create an uneven finish. But with a wire tip, you can get much more precise control over your burns. This is especially helpful when working on small projects or intricate designs.
2. Wire tips heat up faster. If you’re in a hurry to get started on your project, wire tips can help you save time. They heat up faster than traditional wood burning tips, so you won’t have to wait as long for them to be ready to use.
This is ideal when you’re working on a tight schedule or just don’t want to wait around for your tools to heat up.
3 . Wire tips last longer.
Not only do they heat up faster, but wire tips also last longer than traditional wood burning tips before they need to be replaced. This means that you’ll save money in the long run by using this type of tip instead of a standard one.
How to Make Your Own Wood Burning Tips
Wood burning tips are a great way to add a personal touch to your woodworking projects. With a few simple tools and some practice, you can easily create your own custom tips for wood burning. Here’s how:
First, gather the supplies you’ll need: a sharp knife, a piece of sandpaper, and some woodburning pen blanks. Pen blanks are available in various sizes at most craft stores.
Next, use the knife to carefully cut the tip of the pen blank at an angle.
The angle will determine the width of the line you’ll be able to burn into the wood. A 45-degree angle is a good place to start.
Once you’ve cut the tip of the pen blank, use sandpaper to smooth any rough edges.
This will help prevent splinters when you’re using the tip to burn into wood.
Now it’s time to start burning! Place the tip of the pen against the surface of your project and apply pressure as you move it along in a steady line.
As you become more comfortable with this technique, you can experiment with different widths and speeds for different effects. Just remember – practice makes perfect!
Wood Burning Tool Replacement Tips
If you’ve been using the same wood burning tool for a while, it might be time for an upgrade. Here are a few tips to help you choose the right replacement:
1. Consider the type of wood you’ll be working with.
Different woods require different types of tools, so make sure you get one that’s compatible with the material you’ll be using most often.
2.Think about the size and shape of the projects you typically work on. If you usually burn small details into your woodwork, you’ll need a smaller tip than someone who regularly burns large areas.
3. Pay attention to the power source. Some tools are powered by electricity, while others use batteries or even gas canisters. Choose the option that best suits your needs and preferences.
4. Don’t forget about accessories! Many wood burning kits come with a variety of tips and other accessories that can be very useful (and even necessary) for certain projects. Make sure to check what’s included before making your purchase.
5 . Compare prices and reviews before making your final decision – but don’t sacrifice quality for cost.

Credit: www.pinterest.com
What is the Best Tip to Use for Wood Burning Letters?
There are a few things to keep in mind when burning letters into wood. The first is to practice on scrap wood before attempting your project piece. This will help you get a feel for the tools and techniques involved.
When burning letters into wood, it’s important to use a sharp tool. A dull tool will make it more difficult to control the burn and may result in uneven or poor-looking letters. It’s also important to go slowly and carefully when burning letters.
Rushing the process can lead to mistakes.
One of the best tips for creating beautiful, even letters when burning them into wood is to use a stencil. Stencils help ensure that your letters are all the same size and shape.
They also make it easy to space out your letters evenly on the wood piece. Simply trace around the stencil with your burn tool, following the lines accurately.
Are Wood Burning Tips Universal?
No, wood burning tips are not universal. Each type of wood burns differently, so you need to choose the right tip for the job. For example, hardwoods like oak and maple require a different tip than softwoods like pine and cedar.
The size of the wood also matters – thicker pieces require a larger tip, while smaller pieces can be burned with a smaller tip.
Which Wood Burning Tip is Best for Shading?
Shading with a wood burning tip is a great way to add depth and dimension to your work. There are many different tips that can be used for shading, but the best one to use depends on the look you are going for.
If you want a softer look, then using a round or oval shaped tip is best.
This will give you more control over the shading and allow you to create subtle gradations. For a more bold look, using a chisel tip is ideal. This will create sharper lines and darker shadows.
Experiment with different tips until you find the one that gives you the results you want. And don’t be afraid to experiment with different techniques – there’s no right or wrong way to shade, so have fun and see what works best for you!
What is the Difference between Wood Burning And Pyrography?
Wood burning and pyrography are two terms that are often used interchangeably, but there is actually a difference between the two. Wood burning is the process of using a hot tool to burn designs into wood. Pyrography, on the other hand, is the art of using heat to create patterns and images on various materials like wood, leather, or paper.
So, what’s the difference between wood burning and pyrography? In short, it’s all about the intention. Wood burning is usually done for functional purposes like creating marks or branding onto lumber.
Pyrography, on the other hand, is done for purely artistic reasons.
Both wood burning and pyrography require the use of a heated tool like a pen or wand. The tip of this tool is then placed onto the surface that you want to work with.
As you apply pressure and heat, it will start to burn away at the material, leaving behind a dark mark.
The main difference lies in how these marks are made. With wood burning, you typically just make straight lines or basic shapes since you’re mostly working with functional objects like furniture pieces.
Pyrography gives you much more freedom to be creative since your only goal is to create an aesthetically pleasing design.
Of course, there are always exceptions to every rule! You can definitely get creative with wood burning and make more complex designs – it just takes practice (and maybe a little bit more patience).
Likewise, if you’re looking to brand something quickly and don’t have time for elaborate designs, then pyrography might not be ideal either.
At the end of the day, it really comes down to personal preference and what you hope to achieve with your project. So experiment with both methods until you find what works best for you!
5 BEST Wood Burning Tips – Which Tips to Use for Wood Burning
Conclusion
There are three main types of wood burning tips: round, flat, and knife. Each type has its own advantages and disadvantages that you should consider before purchasing a tip. Round tips are the most common type of tip and are good for general wood burning.
Flat tips are great for detailed work, but can be difficult to control. Knife tips are good for cutting and shaping wood, but can be dangerous if not used properly.