How to Paint Exterior Wood Trim
1. Start by sanding down the trim with medium-grit sandpaper to remove any flaking paint or wood debris.
2. Wipe down the trim with a damp cloth to remove any dust from sanding.
3. Apply a primer to the trim using a brush or roller, making sure to evenly cover all surfaces.
4. Once the primer is dry, paint the trim with your desired color using a brush or roller. multiple thin coats may be necessary for even coverage.
5. Allow the paint to fully dry before putting back in place or touching up with a second coat, if needed.
- Begin by sanding the trim with a medium-grit sandpaper to remove any existing paint or varnish
- If the trim is particularly dirty, you may need to use a degreaser to remove any built-up grime
- Once the trim is clean and smooth, apply a primer designed for exterior wood surfaces
- This will help the paint adhere better and provide a more uniform appearance
- When the primer is dry, select a paint color that coordinates well with the siding of your home
- Use a high-quality brush or roller to apply the paint in even strokes
- For areas that are difficult to reach, consider using a small paintbrush or foam roller
- These can help you avoid leaving behind streaks or brush marks
- Allow the first coat of paint to dry completely before applying a second coat, if necessary
- After the final coat is dry, you may want to add a clear topcoat for extra protection against weathering and wear and tear
How To Paint Exterior Wood Trim – Ace Hardware
What Kind of Paint Do You Use on Exterior Wood Trim?
When painting exterior wood trim, it is important to choose a paint that is durable and will stand up to the elements. A high-quality latex paint is a good option for most projects. However, if you are painting in a very hot or humid climate, an oil-based paint may be a better choice.
Be sure to select a paint that is specifically designed for use on exterior wood trim.
What is the Best Way to Paint Exterior Trim?
Picking the best way to paint your exterior trim can be tricky. Many factors come into play, such as the material of the trim, the climate you live in, and your personal preferences. But with a little research, you can find the perfect method for painting your home’s trim and making it look its best.
One of the most important considerations when painting exterior trim is the type of material the trim is made from. Wood is a popular choice for many homeowners, but it requires more upkeep than other materials like vinyl or aluminum. If you choose to paint wood trim, be sure to use a high-quality exterior primer and paint to protect it from weather damage.
You’ll also need to sand down any rough spots before painting and caulking any cracks or gaps to prevent moisture from getting in.
Vinyl and aluminum trims are low-maintenance options that are easy to clean and don’t require much prep work before painting. However, they don’t always hold up as well as wood in extreme climates.
If you live in an area with harsh winters or hot summers, consider using a different type of material for your exterior trim.
Once you’ve selected the right material for your climate and personal preferences, it’s time to choose a color scheme. If you want your trim to blend in with your siding, select a shade that’s similar but slightly lighter or darker than your siding color.
For a more dramatic look, go for contrasting colors that will really make your trim stand out against your siding. No matter what colors you choose, be sure to test them out on a small section of trim before committing to an entire project. This will help ensure that you love the final results.
How Do You Paint Exterior Wood Door Trim?
When painting exterior wood door trim, there are a few things to keep in mind. First, you’ll want to make sure that the surface is clean and free of any dirt or debris. Once the surface is clean, you’ll need to choose a primer that is specifically designed for use on wood.
After the primer has been applied, you can then choose your paint color. When choosing a paint color, it’s important to keep in mind the overall color scheme of your home’s exterior. Once you’ve chosen a paint color, apply two coats of paint to the door trim, allowing each coat to dry completely before applying the next.
Do I Need to Prime Exterior Wood before Painting?
No, you don’t need to prime exterior wood before painting. However, if the wood is bare and has never been painted before, you’ll want to use a primer to help the paint adhere better and improve the overall appearance of your paint job.

Credit: www.homepainterstoronto.com
Fastest Way to Paint Exterior Trim
If you’re looking for the fastest way to paint exterior trim, there are a few things you can do to speed up the process. First, if possible, remove any loose or flaking paint from the surface before painting. This will make the surface easier to work with and will help ensure a smooth finish.
Second, use a high-quality primer designed for exterior use. This will help the paint adhere better to the surface and will also provide a barrier against weather damage. Finally, use a paintbrush or roller specifically designed for exterior use.
These tools are designed to withstand harsh conditions and will help you achieve a professional-looking finish.
Painting Exterior Trim That is Peeling
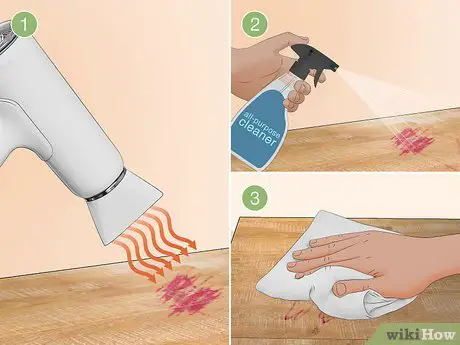
If your home’s exterior trim is peeling, it’s important to take care of the problem as soon as possible. Peeling paint can be caused by a number of factors, including weather damage, poor quality paint, or improper painting techniques. Whatever the cause, once the paint starts peeling, it will only get worse if left untreated.
To repair peeling paint on exterior trim, start by scraping away any loose paint with a putty knife. If the area is large or the paint is particularly stubborn, you may need to use a power washer to remove all of the loose paint. Once the area is clean and dry, apply a high-quality primer designed for use on exterior surfaces.
When choosing a new paint color, keep in mind that darker colors will absorb more heat from the sun and are more likely to fade over time.
Once the primer is dry, apply two coats of fresh paint to the trimmed area using a brush or roller specifically designed for use on exteriors. Be sure to follow all directions on the cans of both primer and paint for best results.
With proper preparation and care, your freshly painted trim should last for years to come!
Best Paint for Exterior Wood Trim
When it comes to choosing the best paint for exterior wood trim, there are a few things to keep in mind. The first is the type of wood you’re working with. If you have softwood like cedar or redwood, you’ll want to use a primer before painting to help the paint adhere better and prevent peeling.
For hardwoods like oak or maple, sanding before painting is key to getting a smooth finish.
Another important consideration is whether your trim is exposed to direct sunlight or not. If it is, choose a paint that has good UV protection to prevent fading.
And finally, make sure you select a color that compliments your home’s siding and trim.
Conclusion
Painting exterior wood trim can be a daunting task, but with the right preparation and tools, it can be easily accomplished. First, remove any old paint or debris from the surface of the trim using a putty knife or other sharp object. Next, sand down the trim to create a smooth surface for the new paint to adhere to.
Once the trim is sanded, apply a primer coat and allow it to dry completely. Finally, paint the trim using a brush or roller designed for use on exterior surfaces.