How to Make Wood Frame for Mirror
To make a wood frame for a mirror, you will need:
-A mirror
-Wooden boards (enough to go around the entire perimeter of the mirror)
-Nails or screws
-Hammer or screwdriver
-Paint or stain (optional)
1. Start by measuring the length and width of your mirror. Cut the wooden boards to size so that they will fit snugly around the perimeter of the mirror. If you are using paint or stain, now is the time to apply it to the boards.
Allow them to dry completely before proceeding.
2. Place the wooden boards around the edge of the mirror, making sure that they are flush with each other and creating a tight seal. Nail or screw them into place.
Be sure that no sharp edges are protruding from any of the boards, as this could create a hazard.
3. Hang your new wood framed mirror on a wall and enjoy!
- Decide on the size and shape of your mirror
- Cut the wood to size using a saw
- Assemble the frame by nailing or screwing the pieces of wood together
- Add any details or decorations to the frame that you desire
- Place the mirror inside the frame and secure it in place with glue or screws
How to Build a Mirror Frame
What Kind of Wood is Used for Mirror Frames?
One common type of wood used for mirror frames is pine. Pine is a softwood that is easy to work with and takes paint or stain well. It is also relatively inexpensive.
Other types of wood that can be used for mirror frames include maple, oak, cherry, and walnut. These hardwoods are more expensive than pine, but they will last longer and can be sanded and refinished if necessary.
How to Make a Wood Frame for Bathroom Mirror?
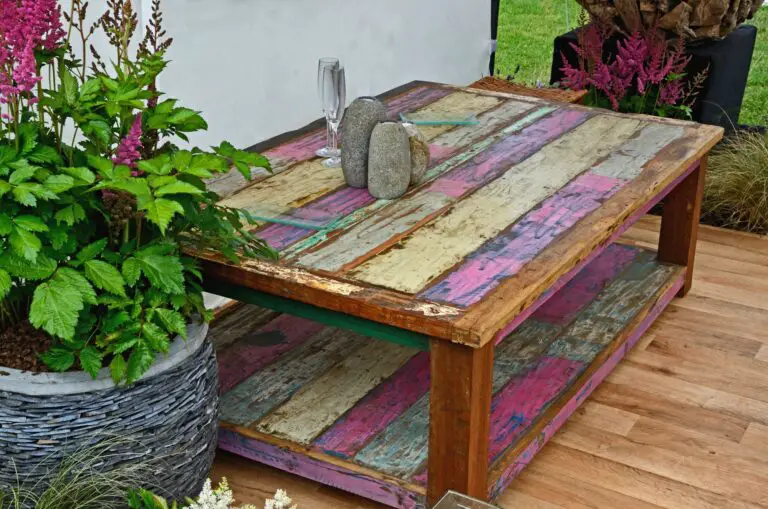
If you’re looking for a rustic look in your bathroom, consider framing your mirror with reclaimed wood. You can find old barn wood or fence boards at many salvage yards or home improvement stores. Once you have your materials, follow these steps to build your frame:
1. Cut the boards to size using a saw. Make sure they’re all the same length.
2. Lay the boards out on a flat surface and arrange them in the order you want them to appear on the mirror.
Use clamps to hold them together while you work.
3. Drill pilot holes through the boards and screw them together using long screws (at least 2″). Be careful not to over-tighten the screws, which could cause the wood to split.
4. Sand down any rough edges and finish the frame with a sealant of your choice (polyurethane, beeswax, etc.).
How Do You Make a Simple Mirror Frame?
If you’re looking for a simple mirror frame to make, here’s a quick and easy tutorial. You’ll need:
-A piece of wood cut to size (You can have this cut at a hardware store if you don’t have access to a saw)
-Sandpaper
-Paint or Stain (optional)
-Nails or screws
-Hooks (optional)
1. Start by sanding down your piece of wood. This will help create a smooth surface for painting or staining later on.
If you’re not planning on painting or staining, you can skip this step.
2. Next, decide whether you want to paint or stain your frame. If you’re opting for paint, choose the color(s) you want and apply one or two coats evenly over the entire frame.
If you’re going with stain, select the shade you like best and apply it according to the instructions on the can. Again, if you don’t plan on painting or staining simply move on to the next step. Note: If your mirror is very large, consider adding an extra support in the center of the frame by attaching another piece of wood horizontally across the back using nails or screws before proceeding to step 3.3 Now it’s time to attach your mirror to the frame using hooks (if your mirror doesn’t already have these).
How Do You Make a Homemade Wood Frame?
Assuming you would like a step by step guide on how to make a wood frame:
1. Gather your supplies. You will need wood boards (the dimensions will depend on the size of the frame you want to make), a saw, clamps, sandpaper, wood glue, and nails or screws.
2. Cut your boards to size. Use a saw to cut the boards to the desired length and width for your frame. If you want clean cuts, use a miter saw or jigsaw.
3. Join the corners together with clamps and wood glue. Apply glue to the ends of two boards and clamp them together at a 90 degree angle using corner clamps (or regular clamps if you don’t have any). Let the glue dry for at least an hour before proceeding to the next step.
4. Nail or screw the corners together for extra stability (optional). Once the glue has dried, you can add nails or screws through the outside of each corner joint for extra stability. This is optional, but recommended if your frame will be subject to a lot of wear and tear.
5a) For an unfinished look: Sand all of the edges of your frame until they are smooth, then wipe away any dust with a damp cloth. Your frame is now complete!
5b) For a finished look: In addition to sanding all of the edges smooth, you will also need to stain or paint your frame before sealing it with polyurethane varnish .
To do this, first choose your desired finish color (stain or paint), then apply it evenly across all surfaces of your frame using brushstrokes in one direction only . After letting it dry completely , apply 1-2 coats of clear polyurethane varnish in long even strokes , making sure not to miss any spots . Allow ample drying time between coats according to manufacturer’s instructions , then enjoy your beautiful new wood frame !

Credit: theholtzhouse.com
How to Frame a Mirror With Molding
If you have a plain, boring mirror that you’d like to dress up a bit, one easy way to do it is to frame it with molding. It’s a relatively simple project that can be completed in an afternoon, and it can make a big difference in the look of your room. Here’s how to do it:
1. Start by measuring your mirror and cutting the molding to size. You’ll need four pieces of molding, cut at 45-degree angles, to fit around the perimeter of the mirror.
2. Next, attach the molding to the mirror using glue or small nails.
Be sure to use painters’ tape along the edges of the mirror so you don’t damage it while working.
3. Once all four pieces of molding are attached, paint or stain them to match your decor. Then Hang your newly framed mirror on the wall and enjoy!
How to Make a Large Mirror Frame
Making a large mirror frame is a great way to add style and character to any room. Here are some tips on how to make a large mirror frame that will look great in your home.
1. First, measure the size of the mirror and then add 2-3 inches to each side for the frame.
Cut four pieces of wood that are equal in size to the dimensions of the frame. You can use a miter saw or hand saw to cut the wood.
2. Next, sand down the edges of the wood so they are smooth.
Then, stain or paint the wood according to your preference. If you want an aged look, you can distress the wood with sandpaper after it has been stained or painted.
3. Once the wood is dry, assemble the frame by attaching two pieces together with screws or nails at each corner.
Repeat this step until all four pieces of wood are attached together to form a rectangle. Make sure that all corners are flush before moving on.
4 .
To finish off the frame, add trim around all four sides using smaller pieces of wood or molding .
Stick on Mirror Frame
If you’re looking for an easy and affordable way to upgrade your mirror, then stick on mirror frames are a great option! These adhesive frames can be found in a variety of styles and colors to match any decor, and they’re simple to apply. Just clean the surface of your mirror, remove the backing from the frame, and press it into place.
Voila! You’ve instantly transformed your plain old mirror into a work of art.
Stick on mirror frames are a great way to add personality to any room, whether you use them in the bathroom as part of your morning routine or in the entryway as a welcoming touch for guests.
And because they come in such a wide range of styles, there’s sure to be one that’s perfect for you. So why not give stick on mirror frames a try? You might just be surprised at how much you love them!
Conclusion
Making a wood frame for your mirror is a simple process that anyone can do with a few tools and some basic knowledge of carpentry. The first step is to measure the mirror and then cut the lumber to size. Next, you will need to assemble the frame using either screws or nails and then finish it off by attaching the Mirror clips.