How to Install Wood Siding around Windows
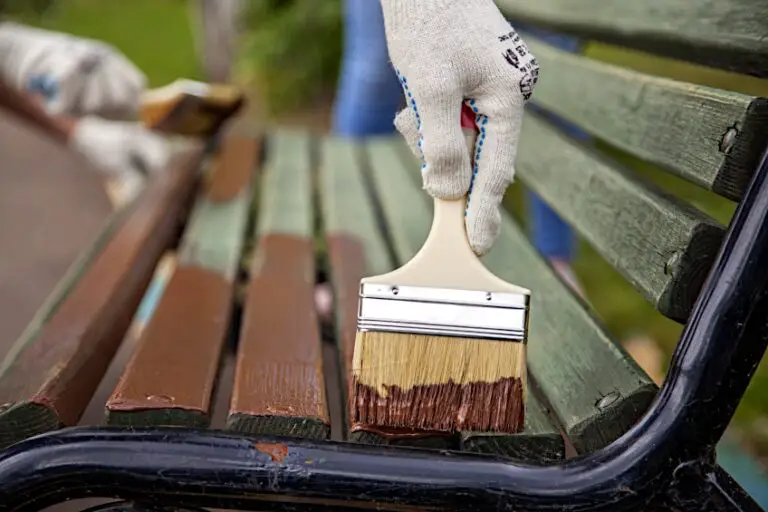
1. Cut the wood siding to size using a power saw.
2. Apply construction adhesive to the back of each piece of wood siding, then press it into place around the window.
3. Nail the wood siding to the studs with 8d nails, spacing them about 6 inches apart.
4. Use a caulk gun to apply silicone caulk around the perimeter of the window, both between the wood siding and the window frame and between each piece of wood siding.
- Measure the area around the window where you want to install the wood siding
- Cut the siding to size using a power saw or hand saw
- Apply construction adhesive to the back of each piece of siding, then press it into place on the wall around the window
- Nail each piece of siding in place with finishing nails and a hammer or nail gun
- Fill any gaps between pieces of siding with caulk, then paint or stain the wood siding as desired
How-to install exterior Wood Window Trim and Horizontal Wood Siding
How Do You Install Siding around Windows?
Installing siding around windows is a fairly straightforward process. First, measure the area around the window to be sure you have enough siding to cover it. Next, cut the siding to fit the space and nail it into place.
Be sure to caulk any gaps between the siding and the window frame to create a tight seal.
How Do You Install Wood Trim around Windows?
Wood trim around windows is a popular way to add character and style to a home. There are several ways to install wood trim around windows, but the most common method is by using finishing nails.
To start, measure the width of the window opening and cut the wood trim to size.
Next, apply a bead of caulk around the perimeter of the window opening. This will help create a seal between the window and trim.
Now it’s time to attach the wood trim to the window.
Begin by nailing through the center of each side piece into the window frame. Then continue by attaching each end piece in the same manner. Once all four pieces are secured, go back and fill in any gaps with additional finish nails as needed.
Finally, touch up any nail holes with putty or caulk and paint or stain as desired. That’s it! You’ve successfully installed wood trim around your windows like a pro!
Do You Trim the Windows before Or After Siding?
If you’re installing new siding on your home, you’ll want to make sure the windows are properly trimmed before proceeding. This ensures a clean, finished look and makes it easier to install the siding around the windows. You’ll also want to caulk and seal any gaps between the window trim and siding to create a weather-tight seal.
How Do You Install Wood Siding by Yourself?
Installing wood siding by yourself is not as difficult as it may seem. In fact, with a little bit of planning and the right tools, you can have your new wood siding installed in no time! Here are the basics of how to install wood siding by yourself:
1. Start by measuring the area where you will be installing the wood siding. This will help you determine how much material you will need to purchase.
2. Next, cut the lumber to size using a saw.
If you are working with pre-cut lumber, this step may not be necessary.
3. Once the lumber is cut to size, it’s time to begin nailing it into place. Start at one end of the area and work your way down, nailing each piece of lumber into place as you go.
Be sure to use nails that are long enough to penetrate through the thickness of the lumber and into the sheathing beneath it.
4. Continue nailing all of the pieces of lumber into place until the entire area is covered.
Credit: thespacebetweenblog.net
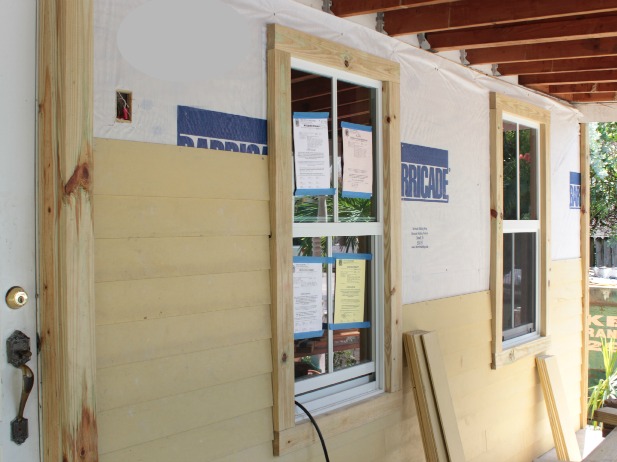
Installing Exterior Window Trim Over Siding
If your home has siding, you can still add exterior window trim for a polished look. Here’s how to do it:
1. Measure the width of the window opening and add 1/2 inch for clearance.
Cut two pieces of trim to this length.
2. Cut a third piece of trim that is 1-1/2 inches longer than the other two pieces. This will be the top piece of trim.
3. Center the top piece of trim over the window opening and nail it in place with 4d finish nails.
4. Place one of the side pieces of trim against the house, flush with the top piece of trim. Nail it in place with 4d finish nails spaced every 8 inches or so.
Repeat with the other side piece of trim. Use a level to make sure all three pieces are even before nailing them in place permanently. If necessary, shim underneath the side pieces until they are level with each other and with the top piece .
of triathlon 5 Once everything is level , predrill pilot holes through th e sidepieces into t he studs behind the sheathing .
Window Trim before Or After Siding
There’s no right or wrong answer when it comes to installing window trim before or after putting up siding. It really depends on your preference and what will work best for your home. Here are a few things to consider when making your decision:
If you install the trim first, you’ll need to be careful not to damage it when putting up the siding. This can be more difficult if you’re working with thinner, delicate trim.
Trim can also provide a visual guide for nailing in the siding, which can be helpful if you’re not used to working with this material.
If you install the siding first, you won’t have to worry about damaging the trim. However, it can be more difficult to get a clean look where the two materials meet.
How to Install Exterior Trim Boards
One of the final steps in finishing the exterior of your home is installing trim boards. These provide a decorative touch as well as protect your home from the elements. Here’s how to install them:
1. Measure and cut your trim boards to size. You’ll need a saw for this – either a hand saw or power saw will work. Be sure to measure twice and cut once!
2. Nail the trim boards into place using galvanized nails or screws. Start at the bottom and work your way up, overlapping each board slightly as you go. If you’re using screws, predrill pilot holes first to avoid splitting the wood.
3. Caulk any gaps between the trim boards and your house siding with latex caulk. This will help seal out moisture and pests. Use a putty knife or caulking gun to apply it evenly, then smooth it with your finger for a professional finish.
4 . Paint or stain the trim boards as desired to match or complement your home’s exterior color scheme . Allow plenty of time for drying between coats if you’re painting .
With these steps , you can easily install exterior trim boards yourself – no contractor needed !
Conclusion
Wood siding is a classic choice for many homes. If you are considering installing wood siding, there are a few things to keep in mind. First, you will need to make sure that the area around your windows is properly prepared.
This means removing any existing siding and trim, as well as any nails or screws that may be in the way. Next, you will need to measure the area around your window and cut the pieces of wood siding to fit. Be sure to allow for overlap so that the wood siding fits snugly against the window.
Once all of the pieces are cut, you can begin nailing them into place. Start at the bottom and work your way up, making sure that each nail is driven into a stud for maximum support. Finish by adding any trim or moulding that you desire.
With some time and effort, you can install wood siding around your windows yourself – giving your home an instant upgrade!