How to Install Real Wood Beams on Ceiling
1. Decide where you want the beams to go and mark the ceiling.
2. Cut the beams to size, using a power saw.
3. Place the beams on the ceiling, using large washers and screws to secure them in place.
4. Use wood filler to fill any gaps between the beams and the ceiling.
5. Paint or stain the beams as desired.
- Decide where you want your beams to go
- Measure and mark the location of each beam on the ceiling
- Cut the beams to size
- If you’re using real wood beams, you’ll need to have them cut to size by a professional
- Install any necessary supports for the beams
- This may include installing joists or other support structures in order to provide a solid foundation for the beams
- Affix the beams to the ceiling
- This can be done with nails, screws, or brackets, depending on the weight and material of the beams
- Be sure to secure them firmly in place so they don’t fall down!
DIY Box Beams | Easy Faux Beams
How Do You Attach Wood Beams to a Ceiling?
There are a few different ways to attach wood beams to a ceiling. The most common is by using hangers or brackets. Hangers are metal straps that are nailed or screwed into the beam and then attached to the ceiling joists.
Brackets are similar to hangers, but they have a plate that sits on top of the beam and attaches to the ceiling joists with screws or nails.
Another way to attach beams is by using timber connectors. Timber connectors are metal plates that connect two pieces of lumber together.
They come in various sizes and styles depending on the application. The most common type used for attaching beams is the truss connector plate. This type of connector has four holes that align with the four corners of the beam.
Nails or bolts are then used to secure the beam in place.
The final method for attaching beams is through mortise and tenon joints. A mortise is a hole cut into one piece of lumber, while a tenon is a tongue of wood that fits into the mortise like a puzzle piece.
To create this joint, first, cut a groove along each edge of the beam where it will meet up with another piece of lumber (this could be another beam or a support post). Next, cut notches (the tenons) into each end of these grooves so they fit snugly around the other piece of lumber when inserted.
How Do You Secure a Wooden Beam?
If you’re looking to secure a wooden beam, there are a few things you’ll need to do. First, you’ll need to make sure the beam is properly supported. This means ensuring that it is sitting on a level surface and that there is nothing blocking it from being able to sit flush against the support.
Once the beam is in place, you can begin securing it by nailing or screwing it into the support. It’s important to make sure that the nails or screws are driven in at an angle so that they grip the beam securely. You can also use brackets or straps to further secure the beam if needed.
How Much Does It Cost to Install Wood Beams on a Ceiling?
Wood beams are a great way to add character and charm to any room in your home. Whether you’re looking to add some rustic flair or simply want to make a statement, wood beams are an excellent choice. But before you start planning your project, it’s important to know how much it will cost to install wood beams on your ceiling.
The cost of installing wood beams varies depending on a number of factors, including the type of wood, the size of the beam, and the complexity of the installation. However, you can expect to spend anywhere from $500 to $1,500 on materials and labor for a typical installation.
If you’re looking for a more budget-friendly option, consider using faux wood beams instead of real wood.
Faux wood beams are made from polyurethane or other synthetic materials and can provide the same look as real wood at a fraction of the cost.
How Do You Attach Wood Beams to Drywall?
Assuming you would like tips on how to attach wood beams to drywall, here are a few ideas:
-If the wood beam is small enough, you may be able to simply screw it into the drywall. Larger beams will require more support.
-You can create a wooden frame on the back of the drywall and then attach the beam to that. This will provide more stability and support for larger beams.
-Another option is to use L brackets or other metal brackets to secure the beam to the wall.
This is a good option if you want an invisible attachment method.
-You could also use dowels or other types of fasteners that go through both the wood beam and drywall in order to secure it in place.
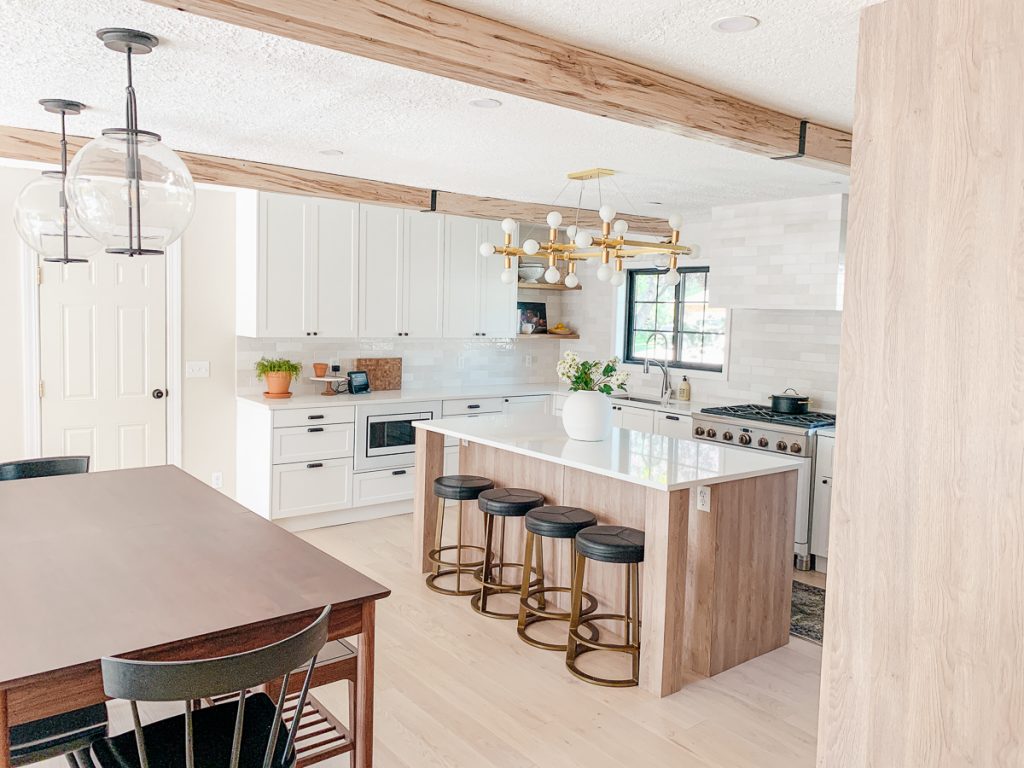
Credit: www.chrislovesjulia.com
How to Install Heavy Beams
Installing heavy beams can be a challenging task, but there are some tips that can make the process a little easier. First, it is important to have the right tools for the job. A crane or forklift can be helpful in lifting and positioning the beams.
Additionally, you will need some strong chains or straps to secure the beams in place.
Once you have all of your supplies gathered, you can begin installing the beams. Start by attaching the chains or straps to one end of the beam, and then use the crane or forklift to slowly lift it into place.
It is important to take your time with this step and be careful not to damage any surrounding structures. Once the beam is in place, you can secure it with bolts or other fasteners. Repeat this process for each of the beams you are installing.
With some patience and careful planning, installing heavy beams can be a relatively easy task. Just be sure to take your time and follow these tips for a successful installation.
Cost to Install Wood Beams on Ceiling
If you’re looking to add some character to your home, wood beams are a great way to do it. But before you start sawing away, there are a few things you need to know about the cost of installing wood beams on your ceiling.
The first thing you need to consider is the type of wood beams you want to use.
There are many different types of wood beams available, and each has its own price tag. For instance, pine beams are very affordable, while oak beams can be quite expensive. The type of beam you choose will ultimately come down to personal preference and budget.
Once you’ve selected the type of beam you want, the next step is deciding how many beamswant installed. This will obviously impact the cost, as more beams means a higher price tag. However, it’s important to factor in the size of your room when making this decision – too many beams can make a space feel cramped and cluttered.
Work with a professional to determine how many beams will strike the perfect balance between aesthetics and function.
Finally, installation costs need to be considered. If you’re handy with tools and confident in your abilities, DIYing the project could save you some money.
However, unless you’re experienced in working with wood and construction, we recommend leaving this one to the professionals. Installation costs will vary depending on the complexity of your project but generally range from $500-$1000+.
All told, adding wood beams to your ceiling is a great way to add both style and value to your home – just be sure to factor in all associated costs before getting started!
How to Install Beams on Vaulted Ceiling
If you’re looking to add beams to a vaulted ceiling, there are a few things you need to keep in mind. First, you’ll need to find the highest point of the ceiling and mark it. This will be where your beam will sit.
Next, you’ll need to determine how long your beam will be. Keep in mind that the longer the beam, the heavier it will be, so make sure you have adequate support before proceeding. Once you have your measurements, cut your beam accordingly and attach it to the ceiling using screws or nails.
Make sure everything is level before proceeding with installation. Finally, add any decorative touches you desire and enjoy your new vaulted ceiling!
Conclusion
Adding wood beams to your ceiling can give your home an instant upgrade. Real wood beams are a beautiful addition to any room and can be installed relatively easily. Here is a step-by-step guide on how to install real wood beams on your ceiling:
1. Choose the right location for your beams. You will want to consider things like support and weight distribution when selecting a spot for your beams.
2. Cut the beams to size.
This step is critical in ensuring that your beams fit correctly and look seamless once installed.
3. Install metal hangers onto the beam using screws or nails. The hangers will help support the weight of the beam and ensure that it stays in place during installation.
4. Suspend the beam from the ceiling using ropes or chains attached to the hangers. This step may require a helper, as suspending a heavy beam can be difficult to do alone.