How to Fix Light Spots in Stain
If you have light spots in your stain, don’t worry! There are a few easy ways to fix them. First, try rubbing the spot with a damp cloth.
If that doesn’t work, you can try using a little bit of sandpaper. If neither of those methods work, you can always repaint the area.
- Isolate the area with light spots and sand it lightly with fine-grit sandpaper
- Wipe away any dust with a tack cloth
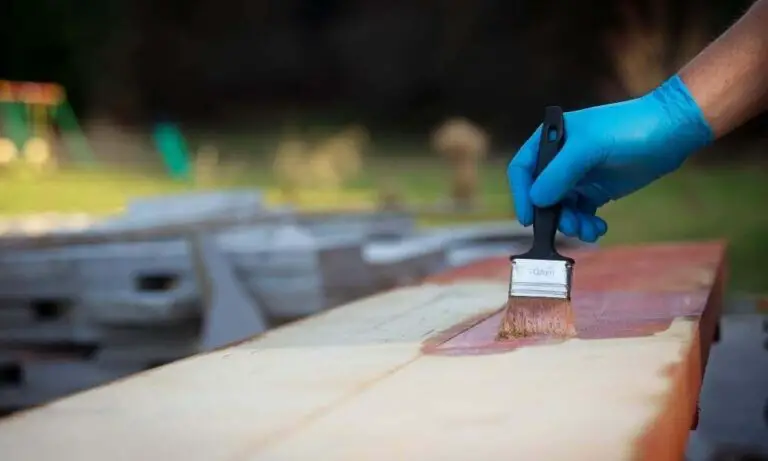
- Apply a thin layer of stain with a rag, working in the direction of the grain
- Wipe away any excess stain with a clean rag
- Allow the stain to dry completely before applying a topcoat of varnish or polyurethane
Wood Won’T Take Stain in Spots
If you’re staining a piece of wood and you notice that the stain isn’t taking in some spots, there are a few things you can do. First, make sure that you sanded the wood evenly before applying the stain. If the wood is unevenly sanded, the stain will have a harder time penetrating into the wood.
Second, try using a different type of stain. Some stains are more difficult to work with than others and might not penetrate as well into the wood. Third, if all else fails, you can always paint over those areas that won’t take stain.
Light Spots on Wood After Staining
If you notice light spots on your wood after staining, don’t panic! There are a few possible reasons why this could happen, and fortunately, there are also a few easy solutions.
One reason for light spots on wood after staining is that the wood was not properly prepared before staining.
In order to get an even stain, it’s important to sand the wood evenly and remove any dirt or debris. If you skip this step, the stain will not adhere evenly and you’ll end up with light spots.
Another possibility is that you used too much pressure when applying the stain.
If you press too hard, the stain will soak into the wood unevenly and create light spots. The solution here is to be gentle when applying the stain and use even strokes.
Finally, it’s also possible that your chosen stain is simply too light for the wood.
If this is the case, you can try a different type of stain or go over the light areas with a darker color of paint. With a little trial and error, you should be able to find a perfect match!
How to Fix Blotchy Stain on Pine Wood
Are you the proud owner of a piece of pine furniture? If so, you’re probably familiar with the problem of blotchy stains. Luckily, there’s an easy fix!
First, identify the direction of the grain. Then, using a fine-grit sandpaper, sand in the opposite direction of the grain. Be sure to go slowly and evenly to avoid creating gouges in the wood.
Once you’ve sanded away the blotchy stain, apply a new finish using a brush or rag. For best results, use a product that’s specifically designed for use on pine wood. Allow the finish to dry completely before using your furniture again.
How to Remove Excess Stain That Has Dried
If you have excess stain that has dried on your wood surface, there are a few ways to remove it. You can try sanding the area with fine-grit sandpaper, using a chemical stripper or heat gun, or by gently rubbing the area with mineral spirits or denatured alcohol.
Sanding is usually the best way to remove excess stain, but if the stain is particularly stubborn, you may need to resort to one of the other methods.
Chemical strippers and heat guns can be effective, but they can also damage the wood if not used correctly. If you decide to use one of these methods, be sure to test it in an inconspicuous spot first to make sure it won’t damage the finish of your piece.
Mineral spirits and denatured alcohol will dissolve most types of stains, so they’re worth trying if other methods haven’t worked.
Be sure to use a soft cloth when rubbing these liquids into the wood so you don’t scratch the surface.
With a little patience and elbow grease, you should be able to remove that excess stain and restore your wood surface to its original beauty!
How to Fix a Bad Floor Stain Job
Whether you’re a novice or a seasoned do-it-yourselfer, there’s always the potential for making mistakes when stainiing your floors. If you find yourself with a bad floor stain job, all is not lost. With a little elbow grease and some patience, you can fix the problem and have beautiful stained floors.
Here’s what you’ll need to do to fix a bad floor stain job:
1. Start by sanding down the area that contains the bad stain job. This will help to rough up the surface so that the new stain will adhere better.
Be sure to use coarse sandpaper for this step.
2. Once you’ve sanded down the area, vacuum up any dust that has been created. Then, wipe down the area with a damp cloth to remove any remaining dust particles.
3 . Now it’s time to apply your new stain. Be sure to follow the directions on the can carefully in order to avoid making any more mistakes!
4 . After applying your new stain, allow it to dry completely before walking on it or placing any furniture back in the room .
Credit: www.reddit.com
How Do You Fix Patchy Wood Stain?
If you have ever applied a wood stain and ended up with an uneven, patchy finish, you are not alone. This is a common problem that can be caused by several different factors. Fortunately, it is usually fairly easy to fix.
In this blog post, we will discuss some of the most common causes of patchy wood stain and how to fix them.
One common cause of patchy wood stain is applying the stain too thickly. When wood stain is applied too thickly, it can dry unevenly and leave behind a streaked or blotchy finish.
To avoid this problem, always apply wood stain evenly and in thin coats. Allowing each coat to dry completely before applying the next one will also help ensure an even finish.
Another common cause of patchy wood stain is failing to properly prepare the surface before staining.
If the wood surface is not clean or smooth, the stain will not adhere evenly and can result in an uneven finish. Be sure to sand the surface thoroughly before staining and remove all dust with a damp cloth before beginning.
Finally, using a poor quality wood Stain can also cause problems with an uneven finish.
Always use high-quality stains that are designed for exterior use on outdoor projects like decks or fences. These stains will provide better coverage and protection against weathering than lower quality products.
What Causes White Spots When Staining Wood?
When it comes to staining wood, one of the most common questions is: why do white spots appear and how can I avoid them?
The answer lies in the nature of wood itself. Wood is made up of countless tiny cells that are filled with water.
When you apply a stain, the liquid seeps into these cells and changes their color.
However, not all of the cells will take in an equal amount of stain. Some will absorb more while others less, which leads to an uneven appearance.
In addition, the different types of wood have varying degrees of density, meaning that they will also absorb stains differently. Softer woods tend to be more porous and will absorb stains more readily than harder woods.
There are a few things you can do to avoid or minimize white spots when staining wood:
– Make sure the wood is clean and free of any dirt or debris before beginning.
– Use a pre-stain conditioner on particularly soft or porous woods. This helps to even out absorption and prevent blotching.
– Apply the stain evenly with a brush, working in small sections at a time. Avoid going over any areas multiple times as this can cause unevenness.
Why Does My Stain Look Spotty?
There are a few reasons your stain might look spotty. One reason is that the wood wasn’t properly sanded before staining. If the wood is too rough, the stain will have a difficult time sticking to it and will appear patchy.
Another reason could be that you’re using an oil-based stain and the surface isn’t entirely dry. Oil and water don’t mix, so if there’s any moisture on the surface, the oil in the stain will repel it and cause spotting.
Finally, it’s also possible that you simply didn’t apply enough stain to evenly cover the entire piece of wood.
Be sure to use even strokes and don’t skimp on the product to avoid this problem.
How Do You Get Light Stains Out of Wood?
Light stains on wood can be removed by gently rubbing the affected area with a soft, dry cloth. If the stain persists, you can try using a mild soap and water solution, applied with a soft cloth. Be sure to test the soap on an inconspicuous area of the wood first to ensure it does not damage or discolor the finish.
FIX Tacky Stain – Applied Too Much – Waited Too Long – Stain Too Light – Common Beginner Problems
Conclusion
We’ve all been there. You’re in the middle of staining your deck or your fence and you notice light spots where the stain is supposed to be darker. Or maybe you’re looking at an old piece of furniture that’s been stained and it looks like someone forgot to put stain in some areas.
Either way, light spots in stain can be fixed relatively easily.
The first thing you need to do is identify what type of wood you’re working with. If it’s softwood, like pine, fir or cedar, then you can probably just sand away the light spots and re-stain the area.
If it’s hardwood, like oak or maple, then you’ll need to use a wood filler to fill in the light spots before re-staining.
Once you know what type of wood you’re dealing with, sand away any loose fibers and debris from the light spots. If it’s softwood, you can probably just use a hand sander or even sandpaper wrapped around a block of wood.
For hardwood, though, you’ll want to use a power sander so you don’t damage the surrounding finish.
After sanding, apply your chosen wood filler to the light spots and let it dry according to the manufacturer’s instructions. Once it’s dry, sand it down until it’s flush with the rest of the surface and then re-stain the entire piece using a brush or rag for even coverage.