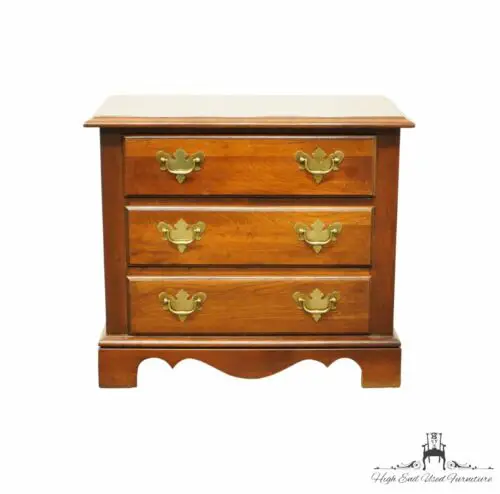
Can You Stain Wood Filler
Yes, you can stain wood filler. The best way to do it is to use a gel stain or a liquid stain. You can also use a spray-on stain, but it’s harder to control the color.
- Sand the wood filler with a fine-grit sandpaper to smooth the surface
- Wipe away any dust with a damp cloth
- Apply a thin layer of stain to the wood filler with a brush or rag, working in the direction of the grain
- Allow the stain to dry completely before applying a topcoat or sealer, if desired
How to Hide Wood Filler After Staining
Wood filler is a great way to repair small holes and cracks in wood surfaces. However, when it comes time to stain the wood, the filler can be a challenge to conceal. There are a few different ways that you can go about hiding wood filler after staining, depending on the type of surface you’re working with.
If you’re staining a smooth surface like a table top or countertop, one option is to use a gel stain. Gel stains are thicker than traditional liquid stains, so they can help to cover up any imperfections in the wood filler. Simply apply the gel stain over the entire surface using a clean cloth, then wipe away any excess with another cloth.
The key is to work in small sections so that the gel doesn’t have time to dry before you wiping it away.
Another option for concealing wood filler on smooth surfaces is to use a matching paint pen or marker. This method works best if the wood filler is already close in color to the surrounding wood.
Simply fill in any gaps or holes with the pen or marker, then allow it to dry completely before proceeding with your stain job.
If you’re working with a textured surface like rough-sawn lumber or reclaimed barnwood, staining over wood filler can be a bit trickier. In these cases, it’s often best to first seal the wood filler with shellac or clear epoxy resin.
Once the sealer has dried, you can proceed with your chosen method of staining (liquid, gel, etc.). The sealer will help prevent the stain from being absorbed unevenly into the wood filler, giving you a more consistent finish overall.
How to Make Wood Filler Look Like Wood
When it comes to wood filler, there are a lot of different ways that you can make it look like wood. You can use a variety of techniques and materials to get the desired look, but the most important thing is to be patient and take your time. Here are some tips on how to make wood filler look like wood:
1. Choose the right type of wood filler. There are many different types of wood fillers available on the market, so it’s important to choose one that will best suit the project you’re working on. If you’re not sure which type of filler to use, ask for advice from a professional at your local hardware store.
2. Apply the filler evenly. Once you’ve chosen the right type of filler, it’s important to apply it evenly across the surface you’re working on. This will help ensure a consistent finish and prevent any unwanted lumps or bumps from forming.
3. Use a putty knife to smooth out the surface. After you’ve applied the filler, use a putty knife or other similar tool to smooth out the surface until it’s completely even. This step is crucial in order to achieve a professional-looking finish.
4 . Allow the filler to dry completely before sanding or painting . It’s important to let the filler dry completely before moving onto the next step in your project .
Depending on the type of filler you used , this could take anywhere from several hours to overnight .
5 Sand lightly once dry In order To create an ultra – smooth texture , sand lightly over entire area with high – grit sandpaper until completely smooth . Wipe away any dust with a damp cloth before proceeding .
These simple tips should help you achieve great results when using wood filler in your next project!
What Do You Do When Wood Filler Won T Stain
One of the most frustrating things that can happen when trying to finish a woodworking project is finding that the wood filler won’t stain. This can be especially true if you’re trying to match the stain color to an existing piece of furniture or trim. There are a few things you can do to try and get the wood filler to accept the stain, but it’s important to understand that in some cases it may not be possible to get an exact match.
If you’re using water-based stains, one method is to apply a pre-stain conditioner before applying the stain. This will help open up the pores of the wood so that the stain can penetrate more evenly. You can also try thinning down the stain with water before applying it, which will also help it penetrate better.
Be sure to test this on a scrap piece of wood first so that you don’t ruin your project!
If you’re using oil-based stains, you can try heating up the stain before applying it. This will help it penetrate better into the wood filler.
You can also try adding a bit of mineral spirits or paint thinner to the stain to help it spread more easily. As always, be sure to test this on a scrap piece first!
Another method that sometimes works is staining with a gel stain instead of a traditional liquid Stain.
Gel stains are thicker and usually have pigment already mixed in, so they tend to adhere better to surfaces like wood filler. They can be tricky to work with, so be sure to read all of the instructions carefully before starting your project!
Wood Filler before Or After Staining
One of the most common questions we get here at Minwax is whether wood filler should be used before or after staining. The answer may surprise you – it depends! Here’s a quick rundown of when to use wood filler and when to skip it:
If you’re working with bare wood, always apply wood filler before stain. This will help create an even surface for staining and prevent any blotches or inconsistencies in the finish.
If you’re dealing with minor scratches or dents, you can usually fill them in after staining.
Just make sure to match the color of your filler to the stain so it blends in seamlessly.
And that’s really all there is to it! Now get out there and start filling (or not filling) those cracks and crevices as needed.

Credit: www.zar.com
Can You Stain Over Filler?
If you’re looking to add a new stain color to your woodwork, you may be wondering if you can simply apply the new stain over top of the old filler. The answer is yes, in most cases you can stain over filler. However, there are a few things to keep in mind before starting this project.
First, check the label on your filler to make sure it is compatible with staining. Some fillers are not meant to be stained and may react negatively to the stain chemicals. If your filler is not compatible with staining, you’ll need to remove it completely before proceeding.
Once you’ve confirmed that your filler is compatible with staining, sand it down until it is smooth. Any roughness in the surface will show through once the stain is applied. If necessary, apply a second layer of filler and sand again until smooth.
Now you’re ready to apply the new stain color! Be sure to follow all instructions on the label for best results. In general, it’s best to work in small sections and wipe away any excess stain immediately so as not to cause runs or streaks in the finish.
Allow the newly stained area to dry thoroughly before adding any additional coats or finishes.
Does Stain Penetrate Wood Filler?
If you are looking to touch up some woodwork around your home, you may be wondering if stain will penetrate wood filler. The answer is yes, but there are a few things to keep in mind.
First, it is important to choose the right type of wood filler.
There are two main types of wood filler: oil-based and water-based. Oil-based fillers are more durable and will stand up to stains better than water-based fillers. However, they can be more difficult to work with and cleanup.
Water-based fillers are easier to use and cleanup, but they may not be as durable as oil-based fillers.
Once you have chosen the right type of wood filler, it is important to prepare the surface before staining. Make sure the surface is clean and free of any dirt or debris.
If there are any cracks or holes in the surface, make sure to fill them in with wood filler before staining. This will help ensure even coverage and prevent the stain from seeping into these areas.
Once the surface is prepared, apply a thin layer of stain evenly over the area you wish to touch up.
Let the stain dry completely before applying a second coat, if necessary. You may also want to seal the area with a clear sealer after staining to help protect it from future wear and tear.
How Do You Stain Wood Filler Darker?
There are a few ways that you can stain wood filler darker, but it really depends on what type of wood filler you are using. If you are using a water-based wood filler, then you can simply add some water-based stain to the filler before you apply it to the wood. If you are using an oil-based wood filler, then you will need to use an oil-based stain.
You can also add pigment to either type of filler in order to darken it.
Can You Dye Wood Filler?
Yes, you can dye wood filler. Wood filler is a type of putty that is used to fill in holes and cracks in wood surfaces. It is available in different colors, but it can also be dyed to match the color of the surrounding wood.
To dye wood filler, mix a small amount of the filler with an equal amount of water-based latex paint. Stir until the paint is completely mixed in and then apply it to the hole or crack that you want to fill. Allow it to dry completely before sanding it smooth.
Conclusion
Whether you’re repairing a piece of furniture or building something new, wood filler is a handy material to have on hand. But can you stain wood filler? The answer is yes!
Wood filler is made from wood pulp and other materials, so it takes stain just like regular wood.
To stain wood filler, start by stirring the filler to make sure it’s smooth. Then, apply a generous amount of stain to the filler with a brush or rag.
Let the stain sit for a few minutes before wiping away any excess. Once the stain has dried, your wood filler will be stained and ready to use!