Can Wood Putty Be Stained
Wood putty is a type of filler used to repair small holes, dents, and scratches in wood surfaces. While it can be stained to match the color of the surrounding wood, it is not necessary to do so. The putty will typically dry to a light brown or tan color that can be sanded smooth once it has cured.
Most wood putty is designed to be stained, so that it will match the surrounding wood. The best way to test whether your wood putty can be stained is to do a patch test in an inconspicuous area. If the putty takes on the stain evenly, then you’re good to go!
Keep in mind that it may take several coats of stain to get an even color.
Is Wood Filler Actually Stainable? An Experiment
How to Hide Wood Filler After Staining
If you’re staining your woodworking project and don’t want the wood filler to show, there are a few things you can do. One is to choose a stain that’s similar in color to the wood filler. Another is to apply a sealer before staining.
And finally, you can use a glaze or topcoat after staining to help blend the wood filler in with the rest of the piece.
Wood filler comes in handy for filling holes and cracks in wood, but it can be tricky to get it to match the stain color of your project. If you’re using a light-colored stain, try a dark-colored wood filler; if you’re using a dark-colored stain, go for a lighter-colored wood filler.
You can also experiment with different colors of stains until you find one that gives you the desired effect.
Once you’ve chosen your stain color, it’s time to apply a sealer. This will help prevent the wood filler from soaking up too much stain and becoming blotchy or uneven.
Apply a thin layer of sealer over the entire surface of your project, including any areas where you’ll be using wood filler. Let the sealer dry completely before moving on to staining.
To help blend the wood filler into the rest of your piece, use a glaze or topcoat after applying stain.
These products come in various colors, so choose one that will complement your project’s overall look.
How to Make Wood Filler Look Like Wood
Wood filler is a great way to repair small cracks and holes in wood surfaces. When applied correctly, wood filler can be virtually invisible. However, if not done right, wood filler can stand out like a sore thumb.
Here are some tips on how to make wood filler look like wood:
-Choose a color that closely matches the surrounding wood. Wood filler comes in a variety of colors, so take your time to select the right one.
-Prepare the surface before applying the wood filler. Wipe away any dirt or debris from the area around the crack or hole. This will help the wood filler adhere better and create a smoother finish.
-Apply the wood filler with a putty knife or other similar tool. Gently smooth it into the crack or hole, taking care not to overfill.
-Allow the wood filler to dry completely before sanding it down flush with the surrounding surface.
Use fine-grit sandpaper for best results.
Can You Stain Over Plastic Wood Filler
If you’re looking to add a bit of stain to your woodworking project, you may be wondering if you can use plastic wood filler. The short answer is yes, you can! However, there are a few things to keep in mind when doing so.
First, make sure that the plastic wood filler is fully dry before attempting to stain it. If it’s even slightly damp, the stain may not take evenly. Second, always test the stain on a small inconspicuous area of the filler before committing to the whole piece.
This will help you gauge how well the stain will adhere and what color it will turn out.
And finally, once you’ve stained the plastic wood filler, be sure to seal it with a clear topcoat. This will protect the color from fading and wear and tear.
With these simple tips in mind, staining your plastic wood filler should be a breeze!
Staining Wood Filler Problems
Staining wood filler can be a bit of a tricky process. If not done correctly, it can result in some unsightly results. Here are a few tips to help you avoid any staining problems when using wood filler:
– Make sure the surface you’re working on is clean and free of debris before beginning. Any dirt or dust will just end up getting trapped under the filler and will be very difficult to remove once it’s dry.
– Apply the filler evenly across the surface, using just enough to fill in any cracks or holes.
If you use too much, it will be difficult to get an even stain later on.
– Once the filler is dry, sand it down until it’s flush with the surrounding wood. This will help ensure an even finish when staining.
– When applying stain to the filler, use a brush or rag instead of pouring it directly from the can. This will help prevent any runs or drips that could ruin your work.
– Work slowly and carefully, making sure to evenly cover all areas of the filler with stain.
Again, any missed spots will be very noticeable once everything is dry.
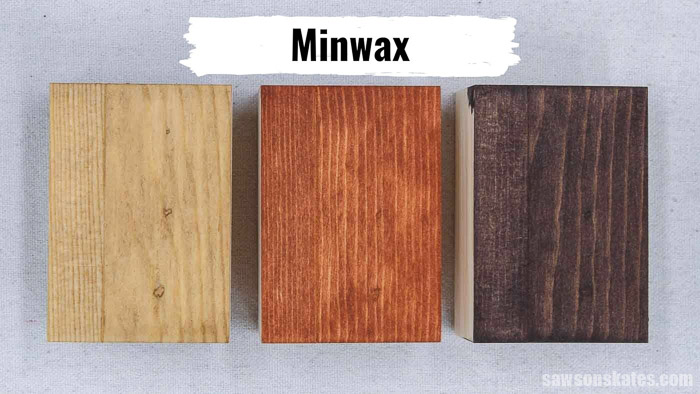
Credit: sawsonskates.com
How Do You Get Stain to Stick to Wood Putty?
Stain is more likely to adhere to wood putty if the putty is sanded first. Once the putty is smooth, apply a thin layer of stain with a cloth or brush, working in the direction of the grain. Allow the stain to dry completely before adding another layer or topcoating with varnish or paint.
How Do You Color Wood Putty?
Wood putty is a type of filler used to repair holes, dents, and scratches in wood surfaces. It is available in a variety of colors, but most commonly comes in white, black, or brown. To color wood putty, you will need:
-A container of wood putty that is big enough to hold the amount of putty you want to color
-One or more coloring agents (paint, pigment powder, etc.)
-Stirring sticks
The first step is to stir the wood putty thoroughly so that it is an even consistency. Next, add your coloring agent(s) to the putty and mix together until the desired color is achieved. Once you are happy with the color, apply the putty to the surface as needed and allow it to dry completely before sanding smooth.
How Do You Stain Putty?
Staining putty is a process that can be used to change the color of your putty or to create a unique, mottled effect. The first step is to choose the right type of stain for your project. There are two basic types of stains: oil-based and water-based.
Oil-based stains will penetrate deeper into the putty, creating a richer, more durable color. Water-based stains are easier to work with and clean up, but they may not provide as deep or long-lasting of a color.
Once you’ve selected your stain, it’s time to get started.
Begin by applying a liberal amount of stain to your putty using a brush or rag. Work the stain into the putty until it’s evenly distributed. If you’re going for an even color, you can stop here.
If you want a mottled effect, however, continue on to the next step.
Once you’ve applied the stain evenly, take a clean rag and lightly dab at areas where you want the color to be lighter or darker. This will create an uneven, mottled look that can add character and interest to your project.
Allow the stained putty to dry completely before proceeding with your project; this could take several hours or even overnight depending on conditions like temperature and humidity.
Can You Sand And Stain Wood Putty?
Wood putty is a type of filler used to repair small nicks, dents, and scratches in wood surfaces. While it is possible to sand and stain wood putty, it is not always necessary or recommended.
If the wood putty is still wet, you may be able to simply wipe away the excess with a damp cloth and allow it to dry.
Once dry, sanding may be necessary to create a smooth surface before staining.
If the wood putty has already dried and/or hardened, sanding will be required to remove any roughness on the surface. Once sanded, you can then proceed with staining the wood putty as desired.
Keep in mind that since wood putty is typically a different color than the surrounding wood, it may be necessary to use a darker stain or paint color to help blend everything together.
Conclusion
Wood putty is a type of filler used to fill in holes or cracks in wood. It is made from a variety of materials, but most commonly contains wood flour, linseed oil, and latex. Putty can be purchased ready-made or mixed at home.
Most wood putties are designed to be stained to match the surrounding wood. However, there are a few things to keep in mind when staining putty. First, it is important to apply stain before the putty has fully dried.
Otherwise, the stain will not take evenly and may create an undesirable finish. Second, it is best to use a water-based stain for ease of cleanup and minimal risk of damage to the surrounding wood.